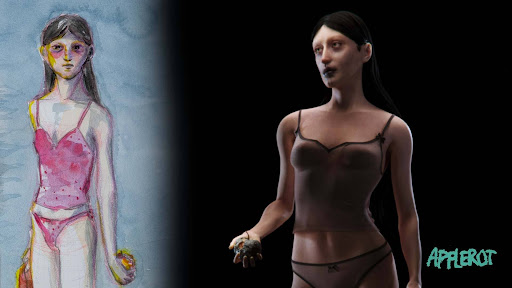
Creating the FNPF Soldier from Operation: Deli Platter
From character design to desk mats with iD Gaming
Operation: Deli Platter


Bringing to life the Operation: Deli Platter FNPF Soldier - Sgt. Lloyd Griffiths was something we’ve been dreaming of doing for a long time! And thanks to our collaboration with eSports brand iD Gaming it became a priority.
To be featured on precision grade desk-mats for eSports, we had to create a high fidelity hero render of Lloyd Griffiths.
In this blog I’m not going to be covering the character asset creation of Lloyd Griffiths as we will be dedicating a separate blog to that in the future.
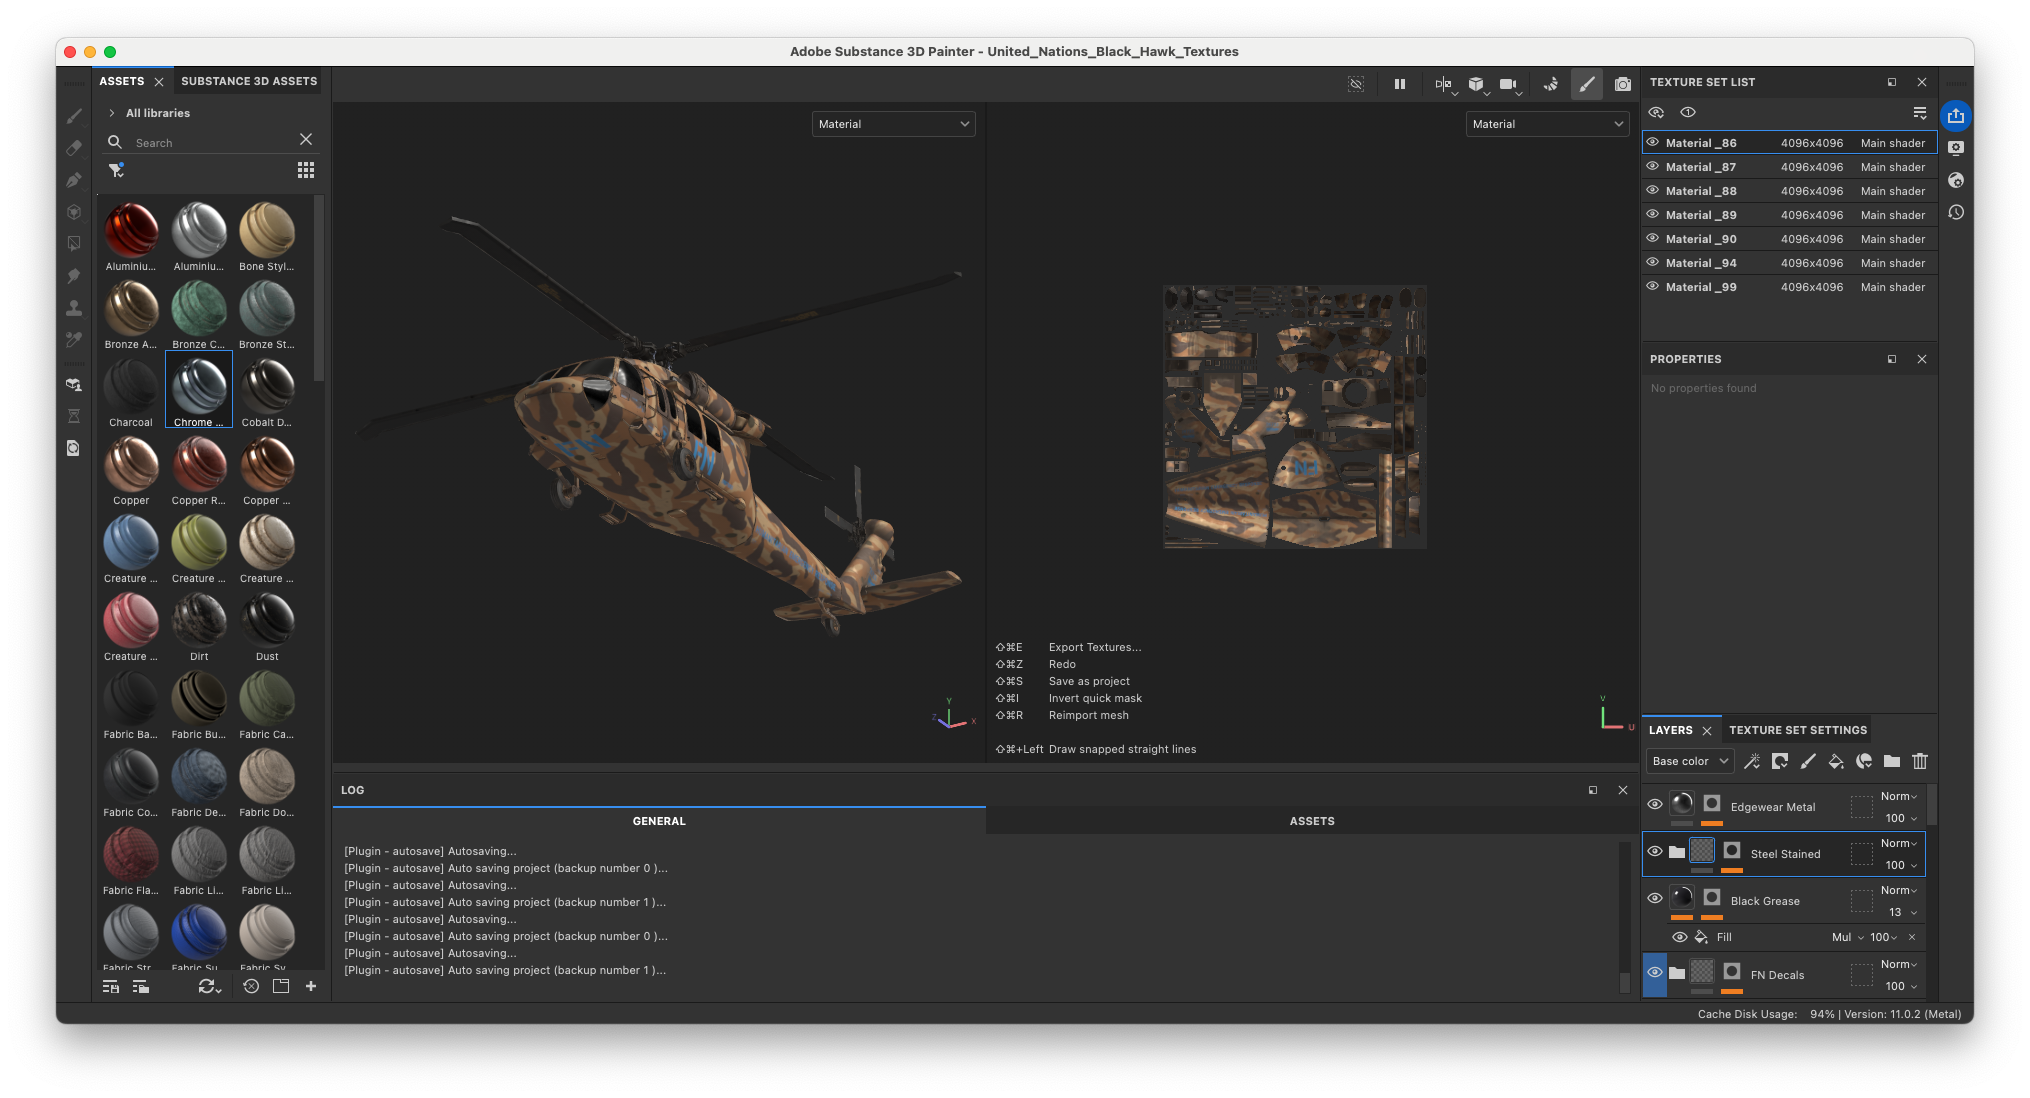
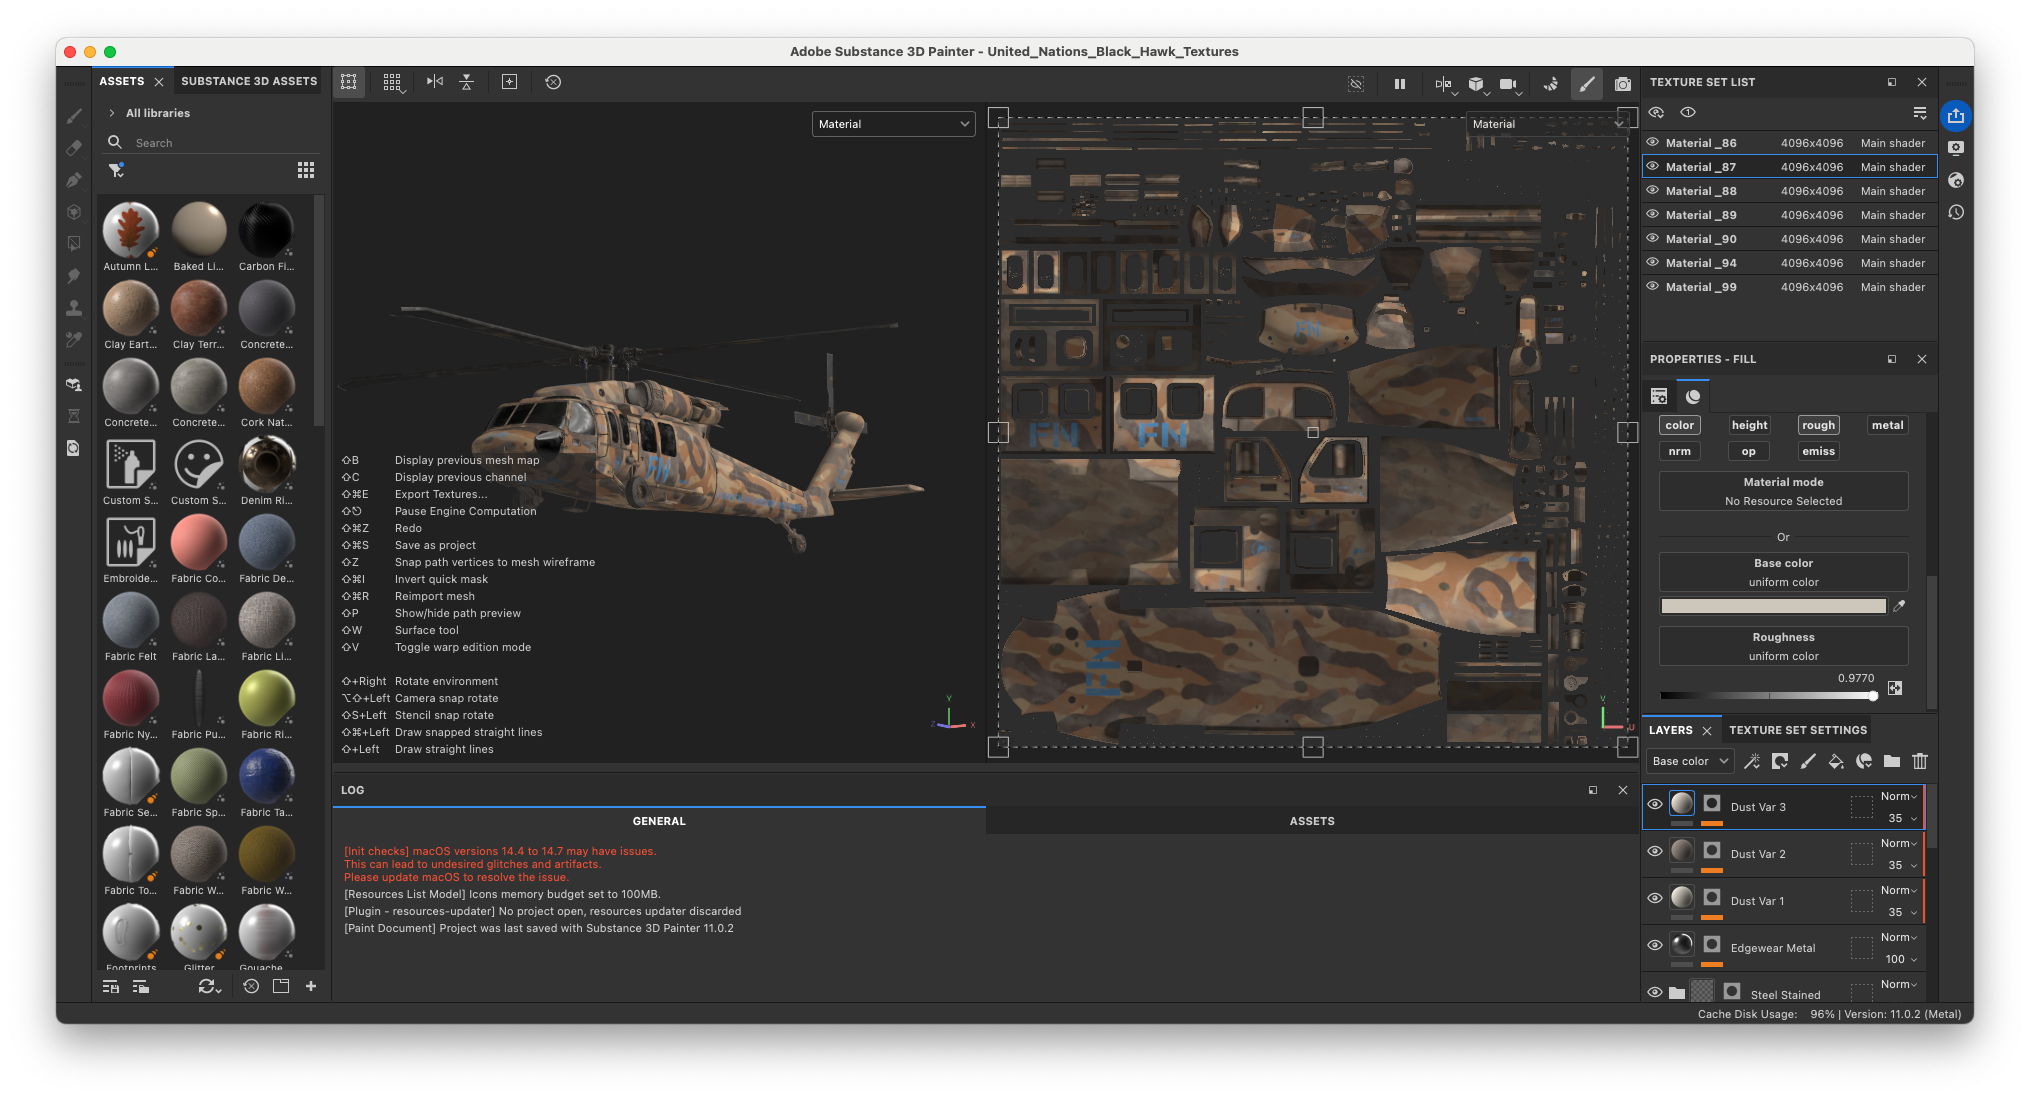
We’re starting off with texturing the different assets required for the scene, starting with the UH-40 Sikorsky Blackhawk.
The World of Operation: Deli Platter
In the world of Operation: Deli Platter the Free Nations have deployed several FNPF soldiers in Afri Proxica. The continent of Africa has been split up by the Free Nations and the One State during the Scramble for Afri Proxica (1972).
Today, Sgt. Lloyd Griffiths has been squad leader of the FNPF C8, gradually introducing peace in the zones of conflict between Sudan and Chad.
You can read this ongoing story on our Stories page. It’s called Republica’s Desert.
Texturing and Look Dev of the Blackhawk
The FNPF soldiers based in the deserts of Afri Proxica are often seen wearing the Sand Root camouflage pattern. So it was important to texture the Blackhawk helicopter in the same camo.
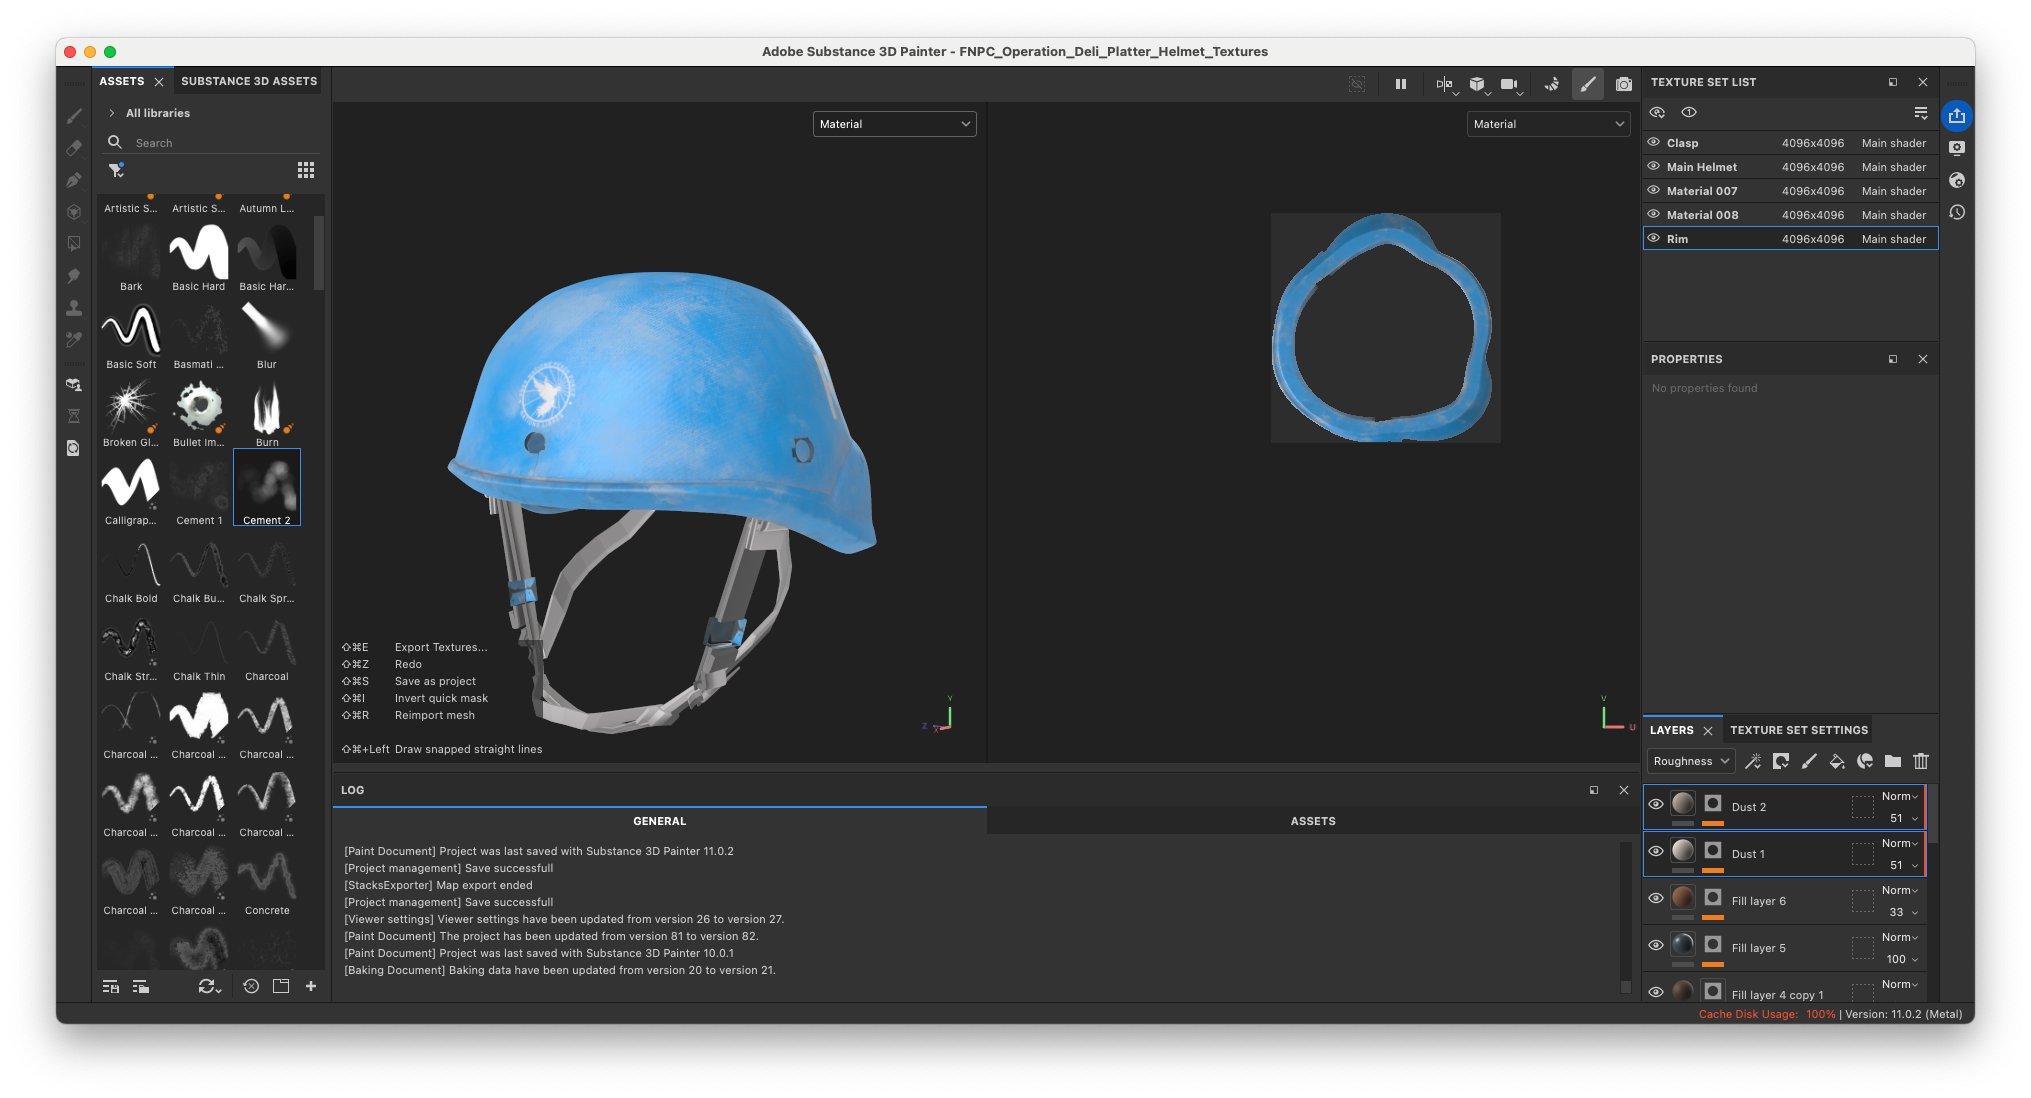
The most important technique that I continuously used was combining the Mask Builder with Micro Normals details.
On a layer with all the Normal Map information of Blackhawk, that I made sure was at the bottom of the hierarchy, I created an Anchor Point.
This is a reference that allows Substance 3D Painter to take information from one layer and apply it to another one.
Simply said, I can reference the Anchor Point’s Normal Map channel inside of a Mask Builder on another layer to create subtle details such as edge imperfections.
On every layer, from the base metal to the paint layer, surface imperfections and dust, I used the Mask Builder to get as much detail as possible.


A tip I can give to anyone texturing a realistic object is to research the manufacturing process of every step you’re texturing.
This made me for example find out how the camouflage paint is applied to the helicopter. And through layered Filters I managed to create a similar look to the real life references.

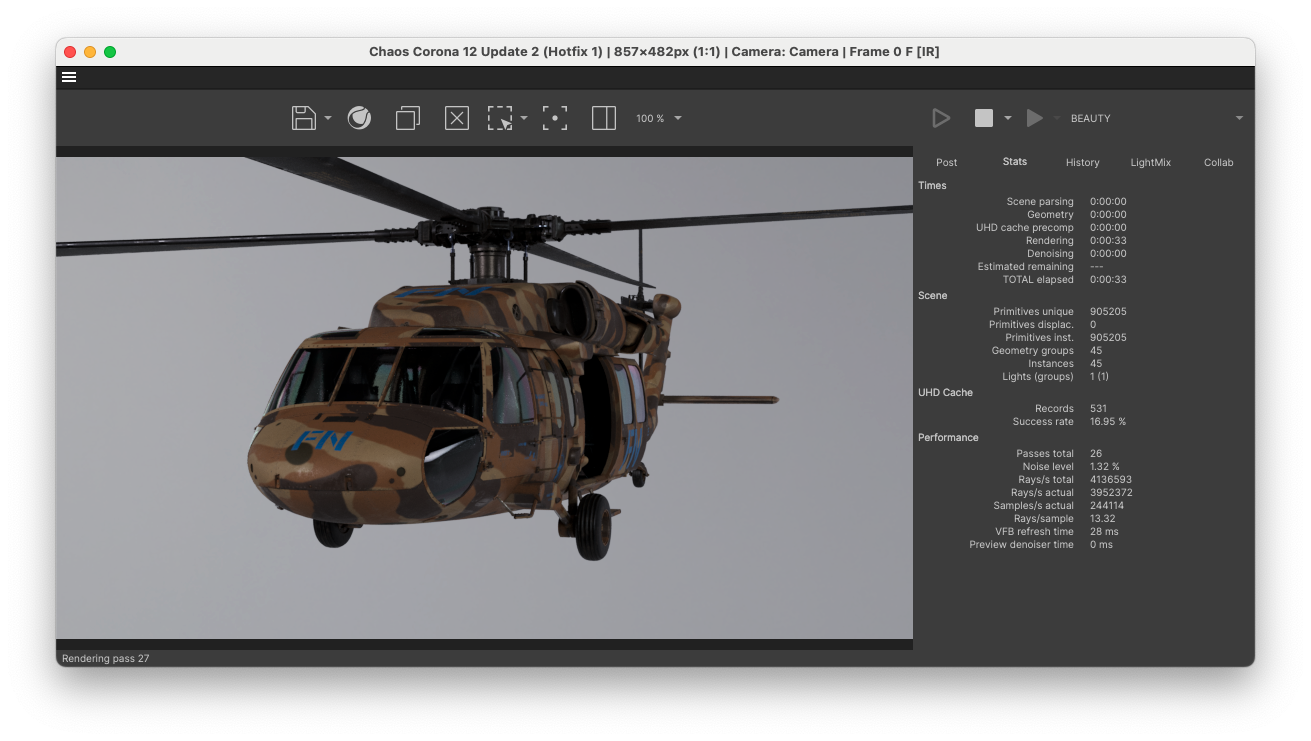
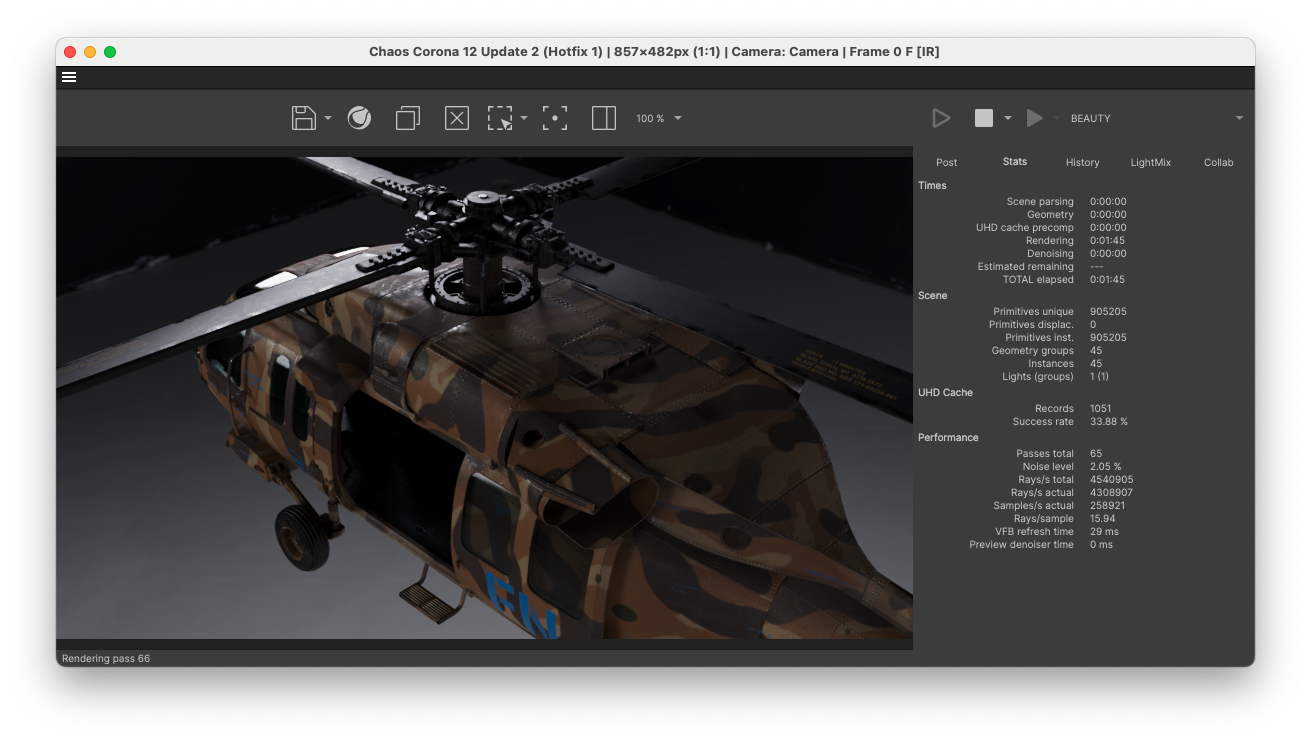
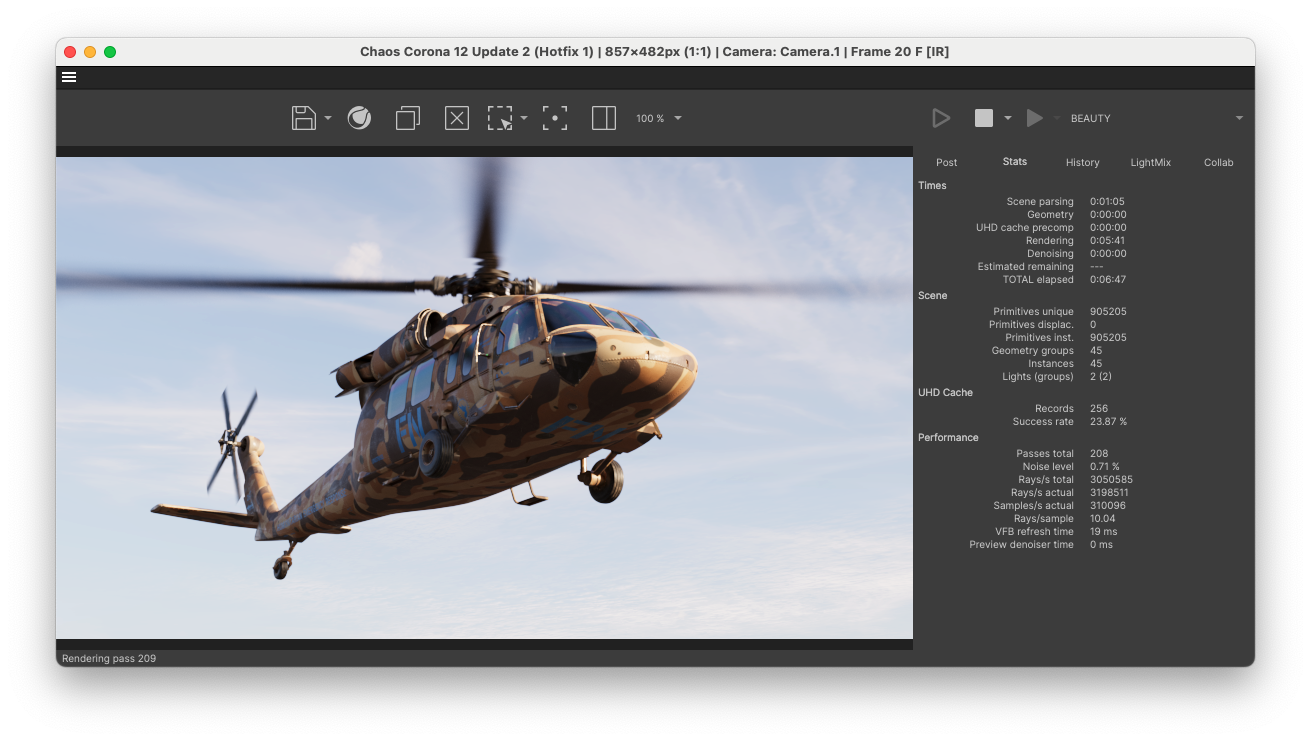
After you’re “done” texturing it’s important to take the asset into Look Development.
This is where you’ll be able to stress test the asset under a variety of lighting conditions. And usually this is where you’ll see how much more texturing will be necessary.
After placing the asset inside of a studio setup I’ve also placed it into a Sky. It’s important to also Look Dev your asset in a similar environment to where you will be using it in the final version.
Finally, it’s important to think about the narrative of the scene. This Sikorsky UH-40 Blackhawk has been with the FNPF C8 for several missions. Catching dust, exhaust grime and other imperfections over time. It was pretty clear that the asset needed many more aggressive layers of dust and imperfections to start blending in realistically to the scene.
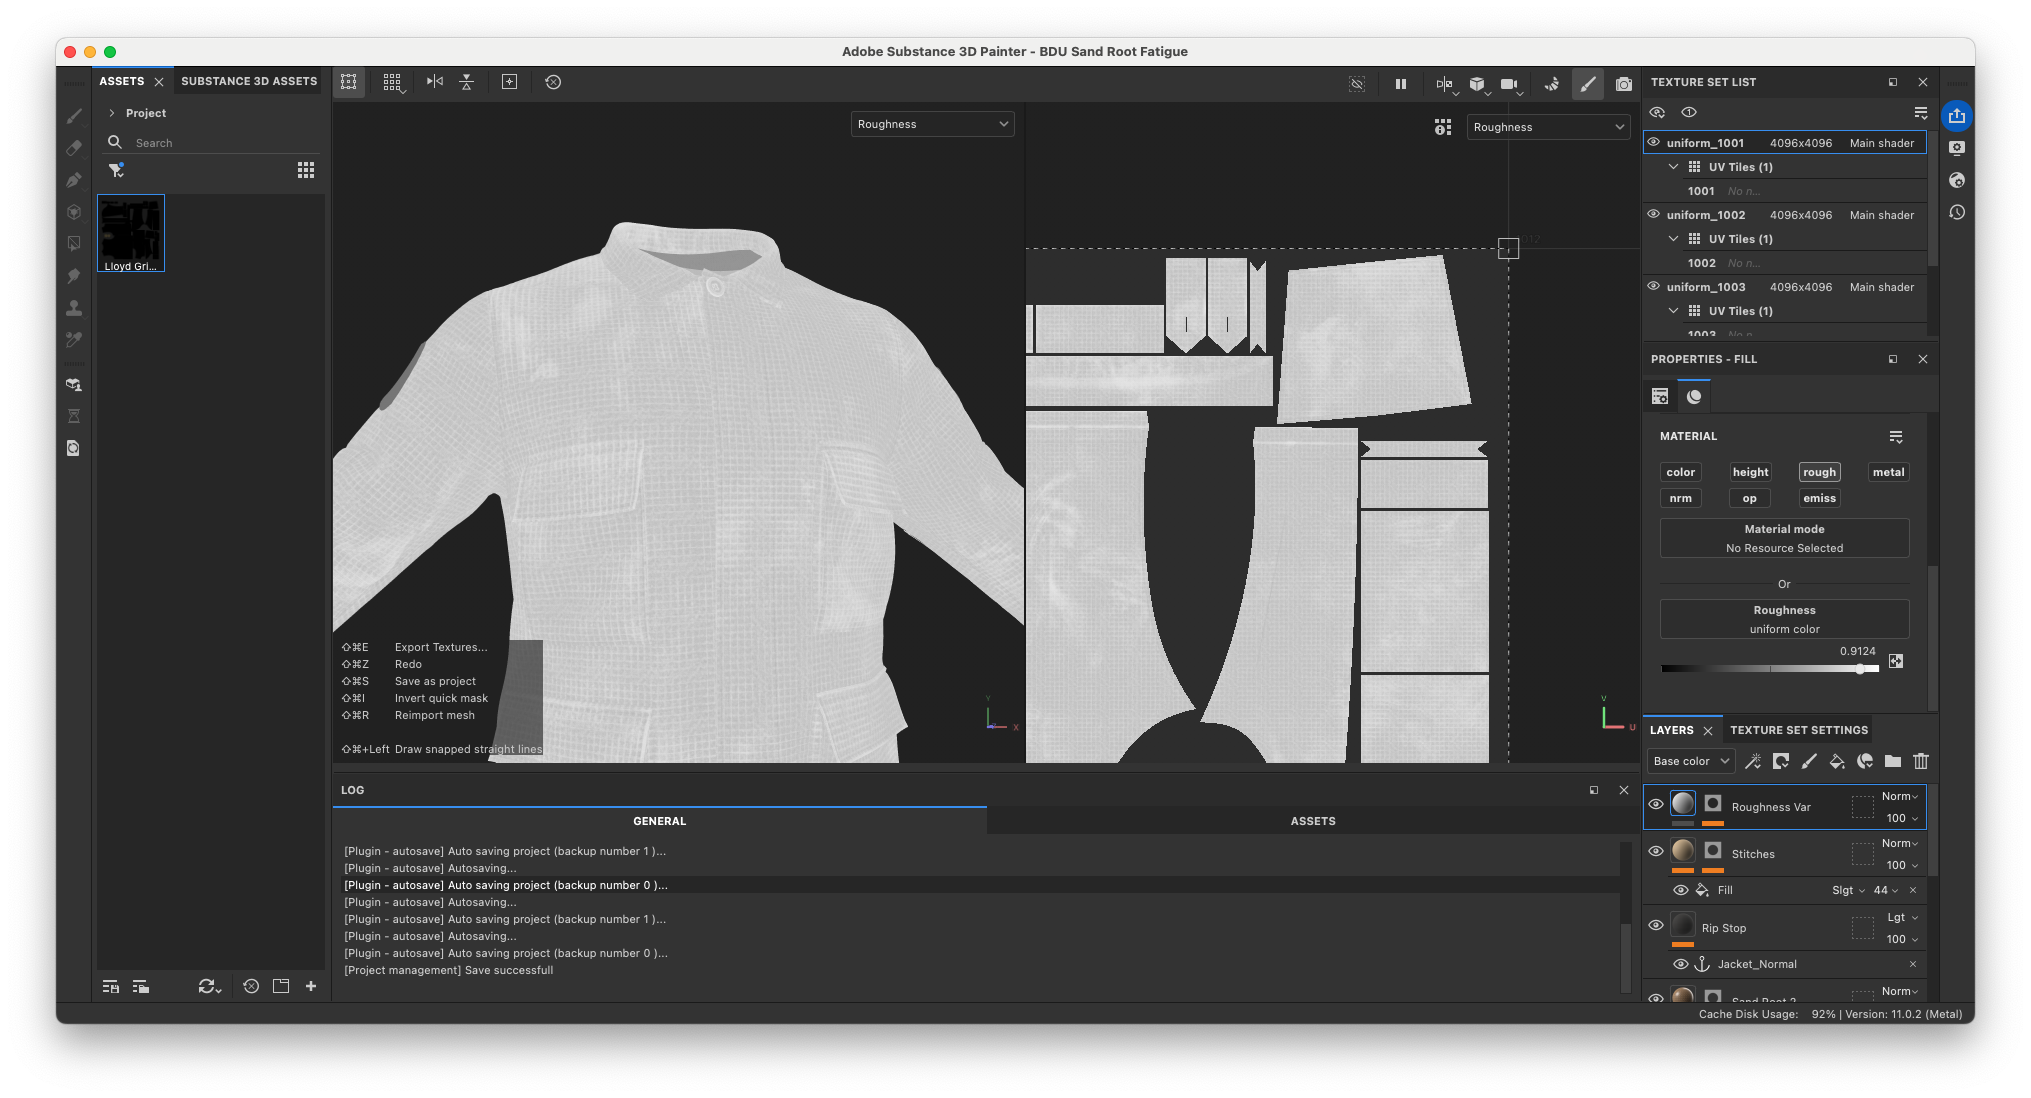
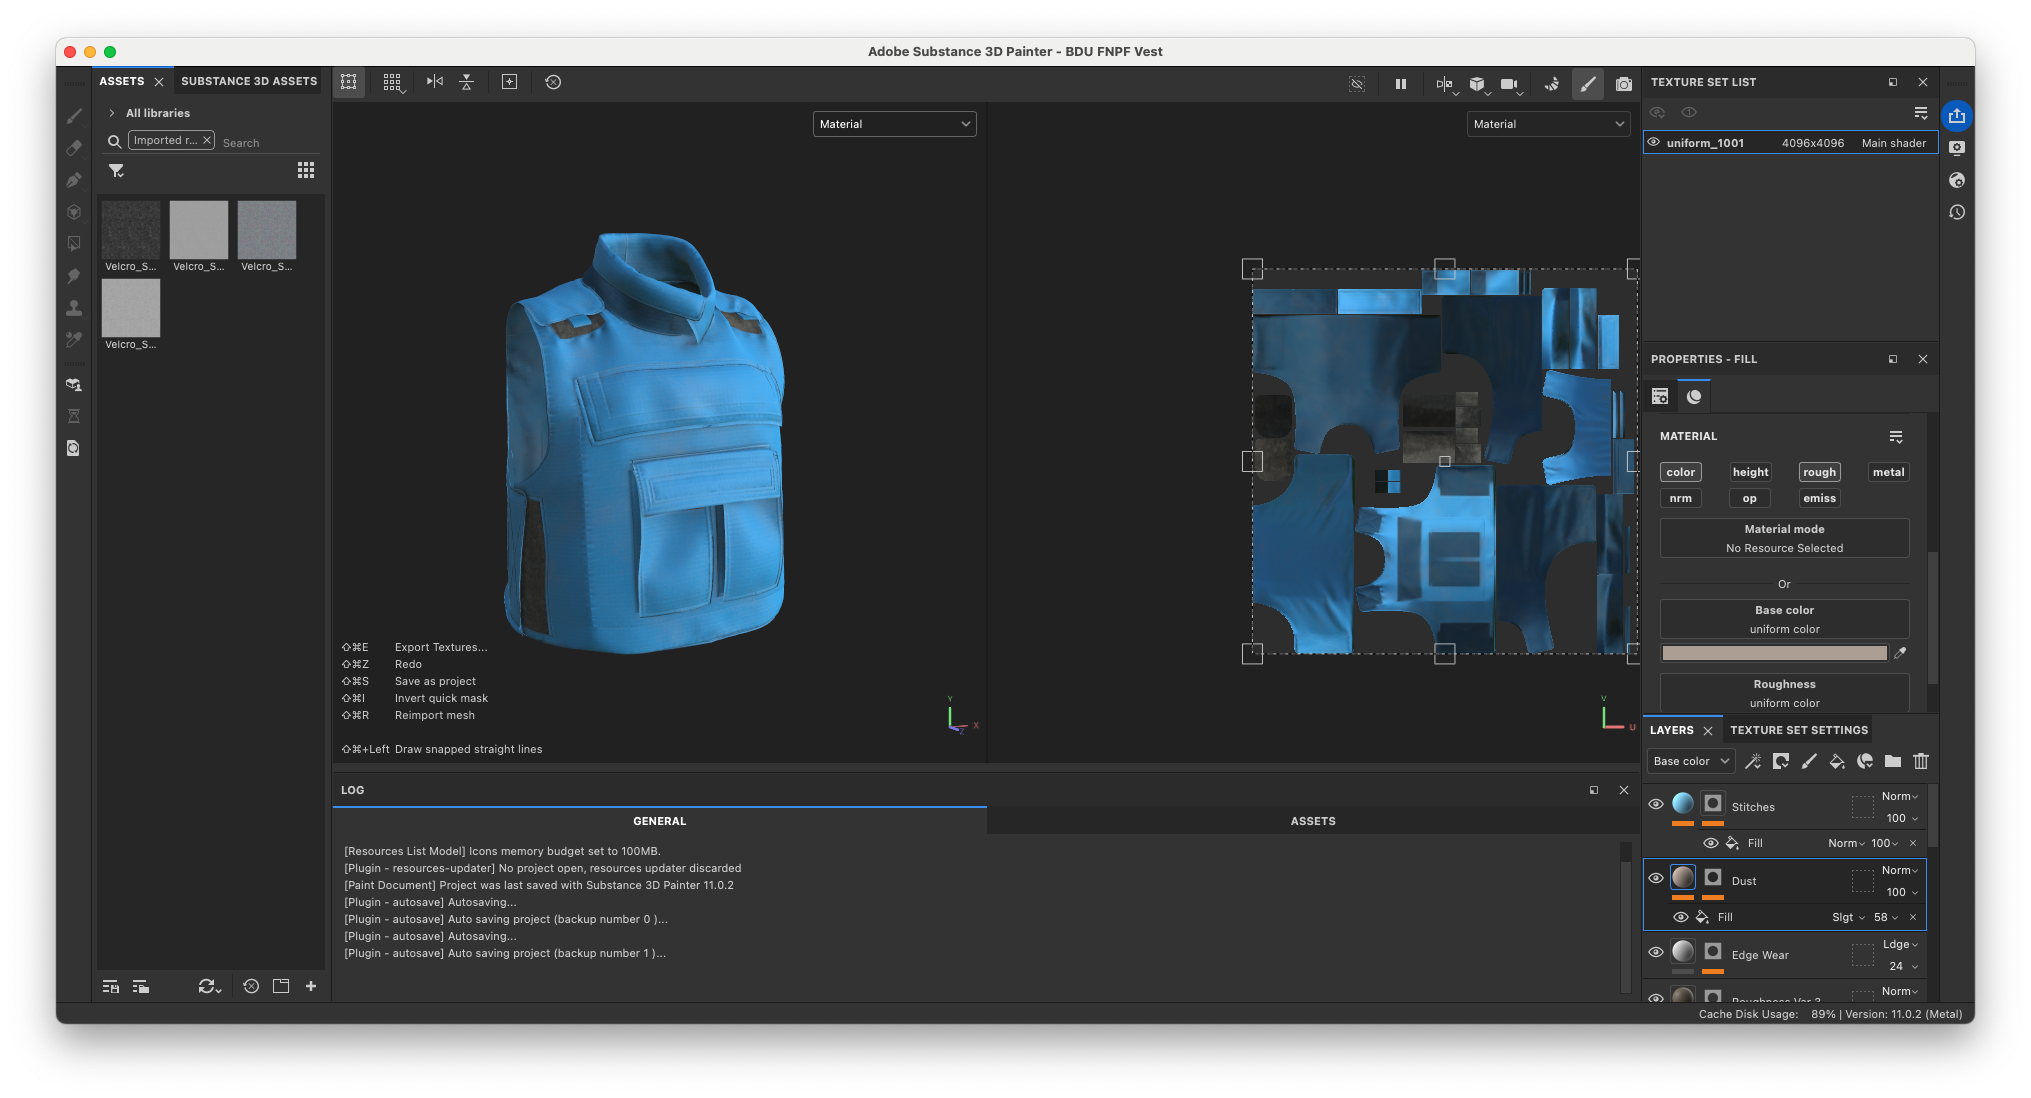
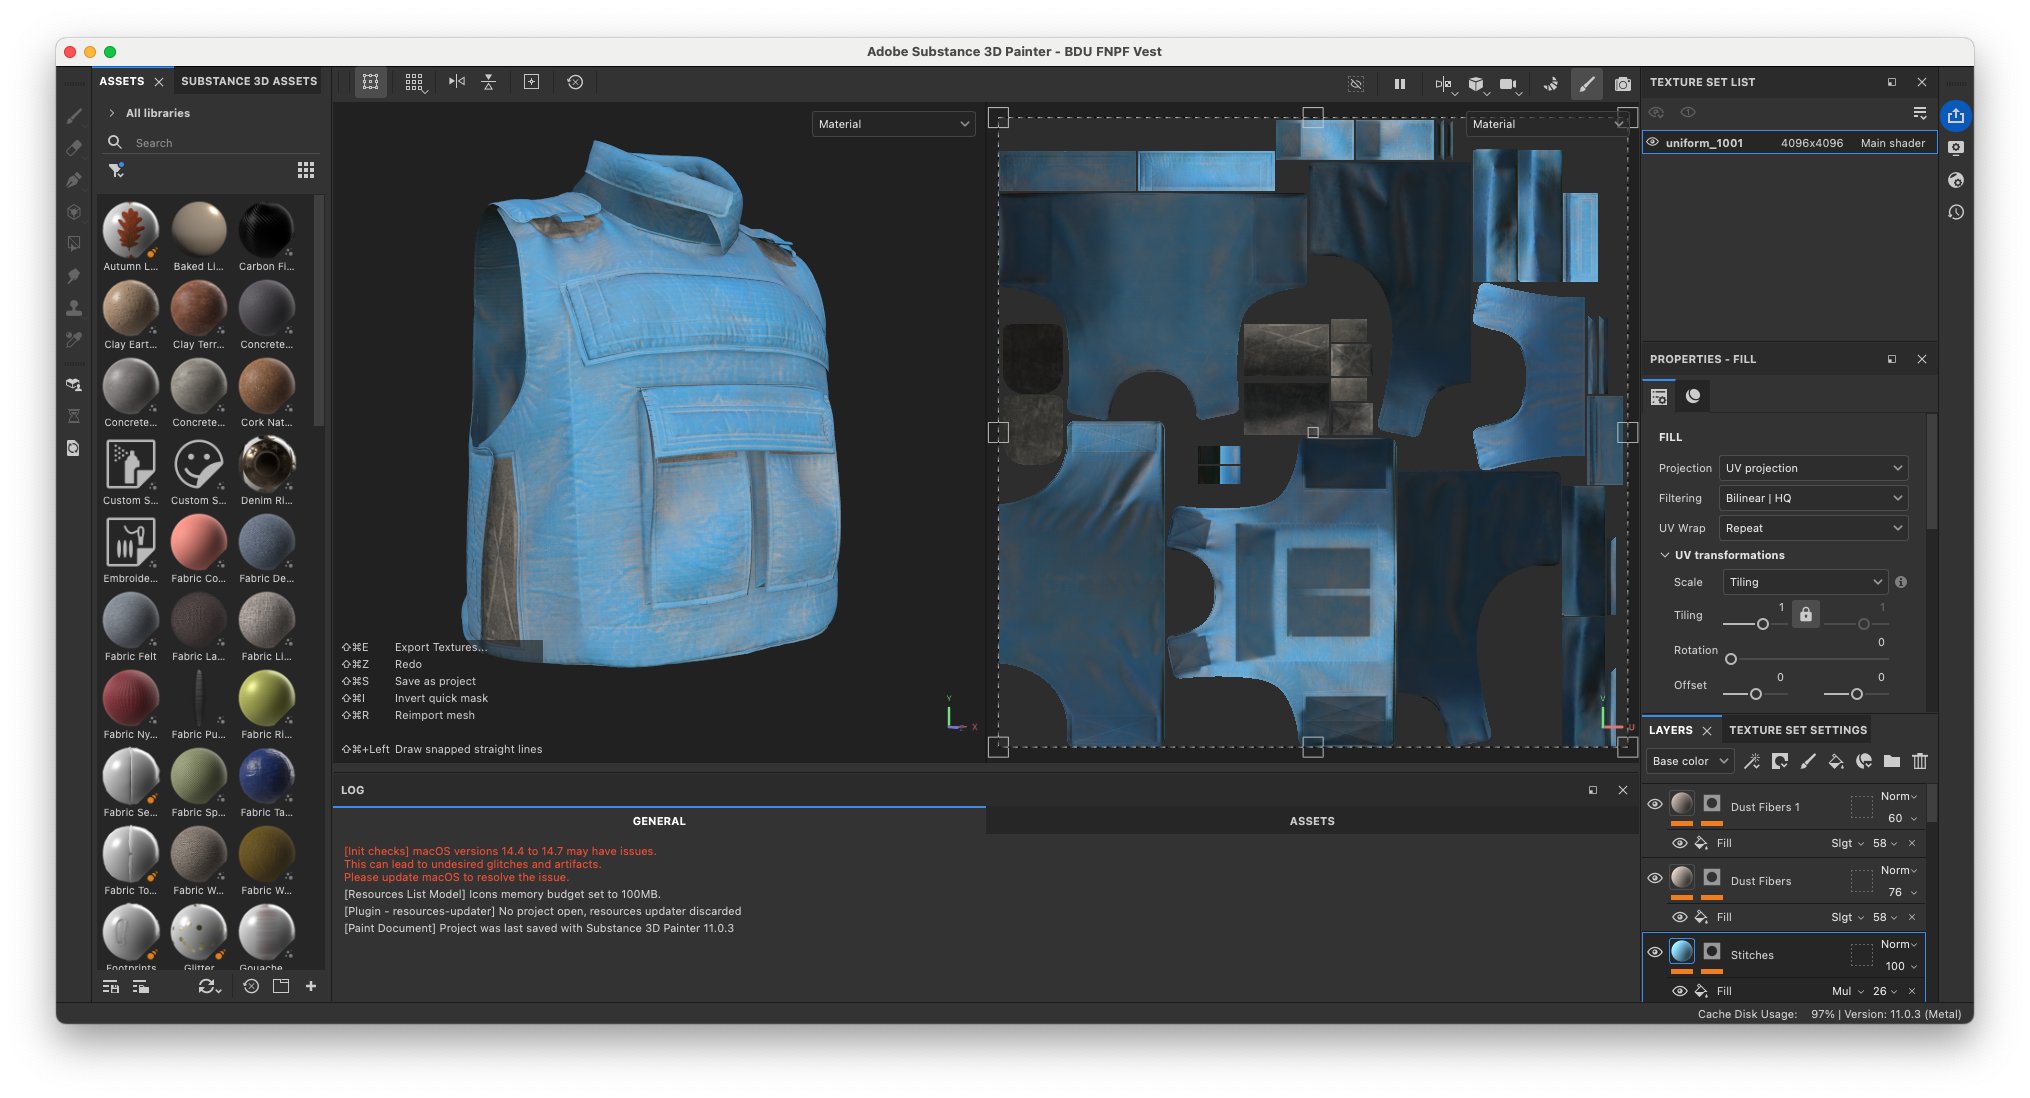
Texturing and Look Dev of the FNPF Outfit
Thanks to the wonderful folks at Bakermat Antwerp for supporting the production of Operation: Deli Platter we’ve been able to get our hands on incredibly detailed Ripstop fabric.
Their Virtual Library of high-resolution PBR fabrics is a life-saver for anyone working on realistic character renders.
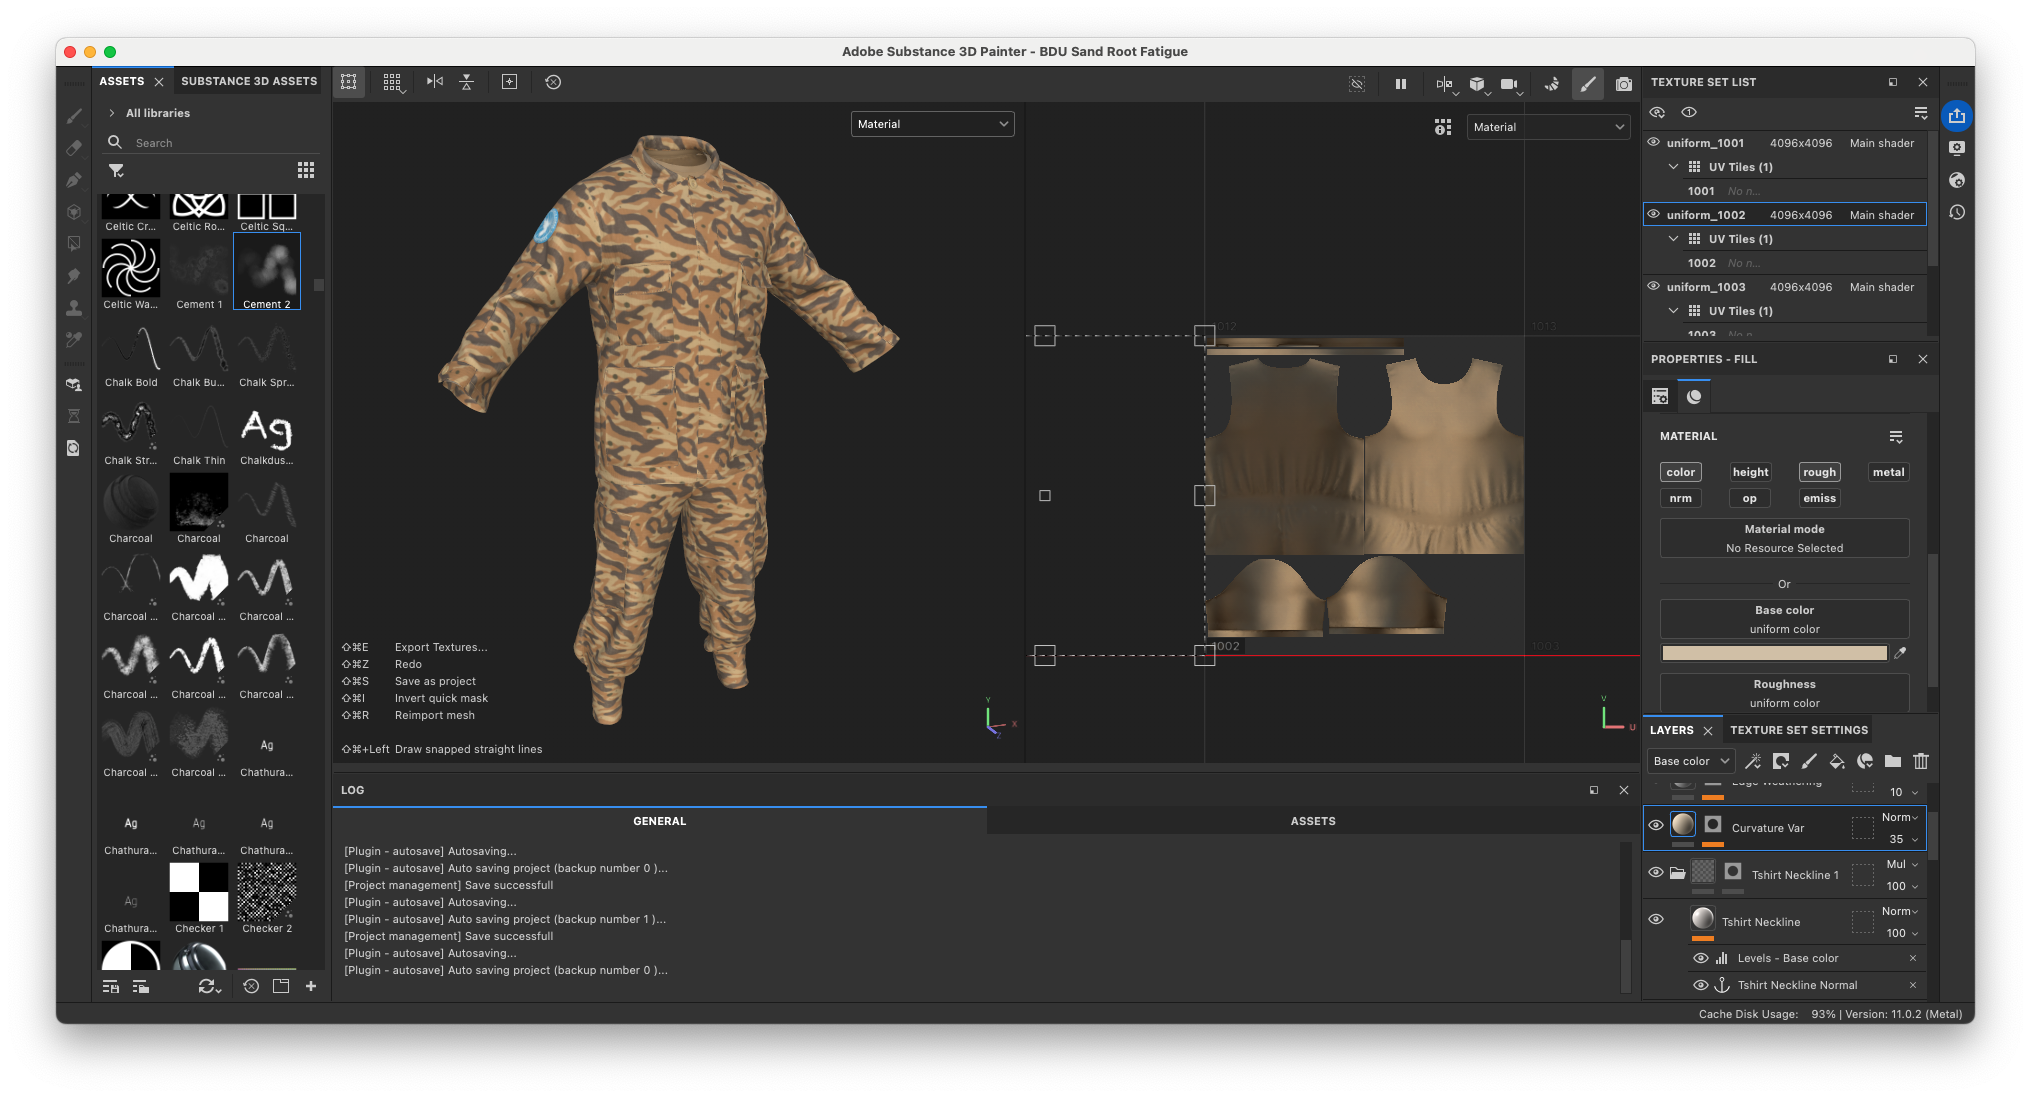
After creating the complete outfit in Style3D it was time to texture it in a similar way to texturing the Blackhawk.
Starting by creating an Anchor Point from the Normal Map of the fabric, as this will allow for adding all the necessary details on top of the Sand Root camouflage. By blending a variety of surface imperfection maps with the Ripstop fabric and the Sand Root camo, we can create a wide variety of Roughness and Color values.


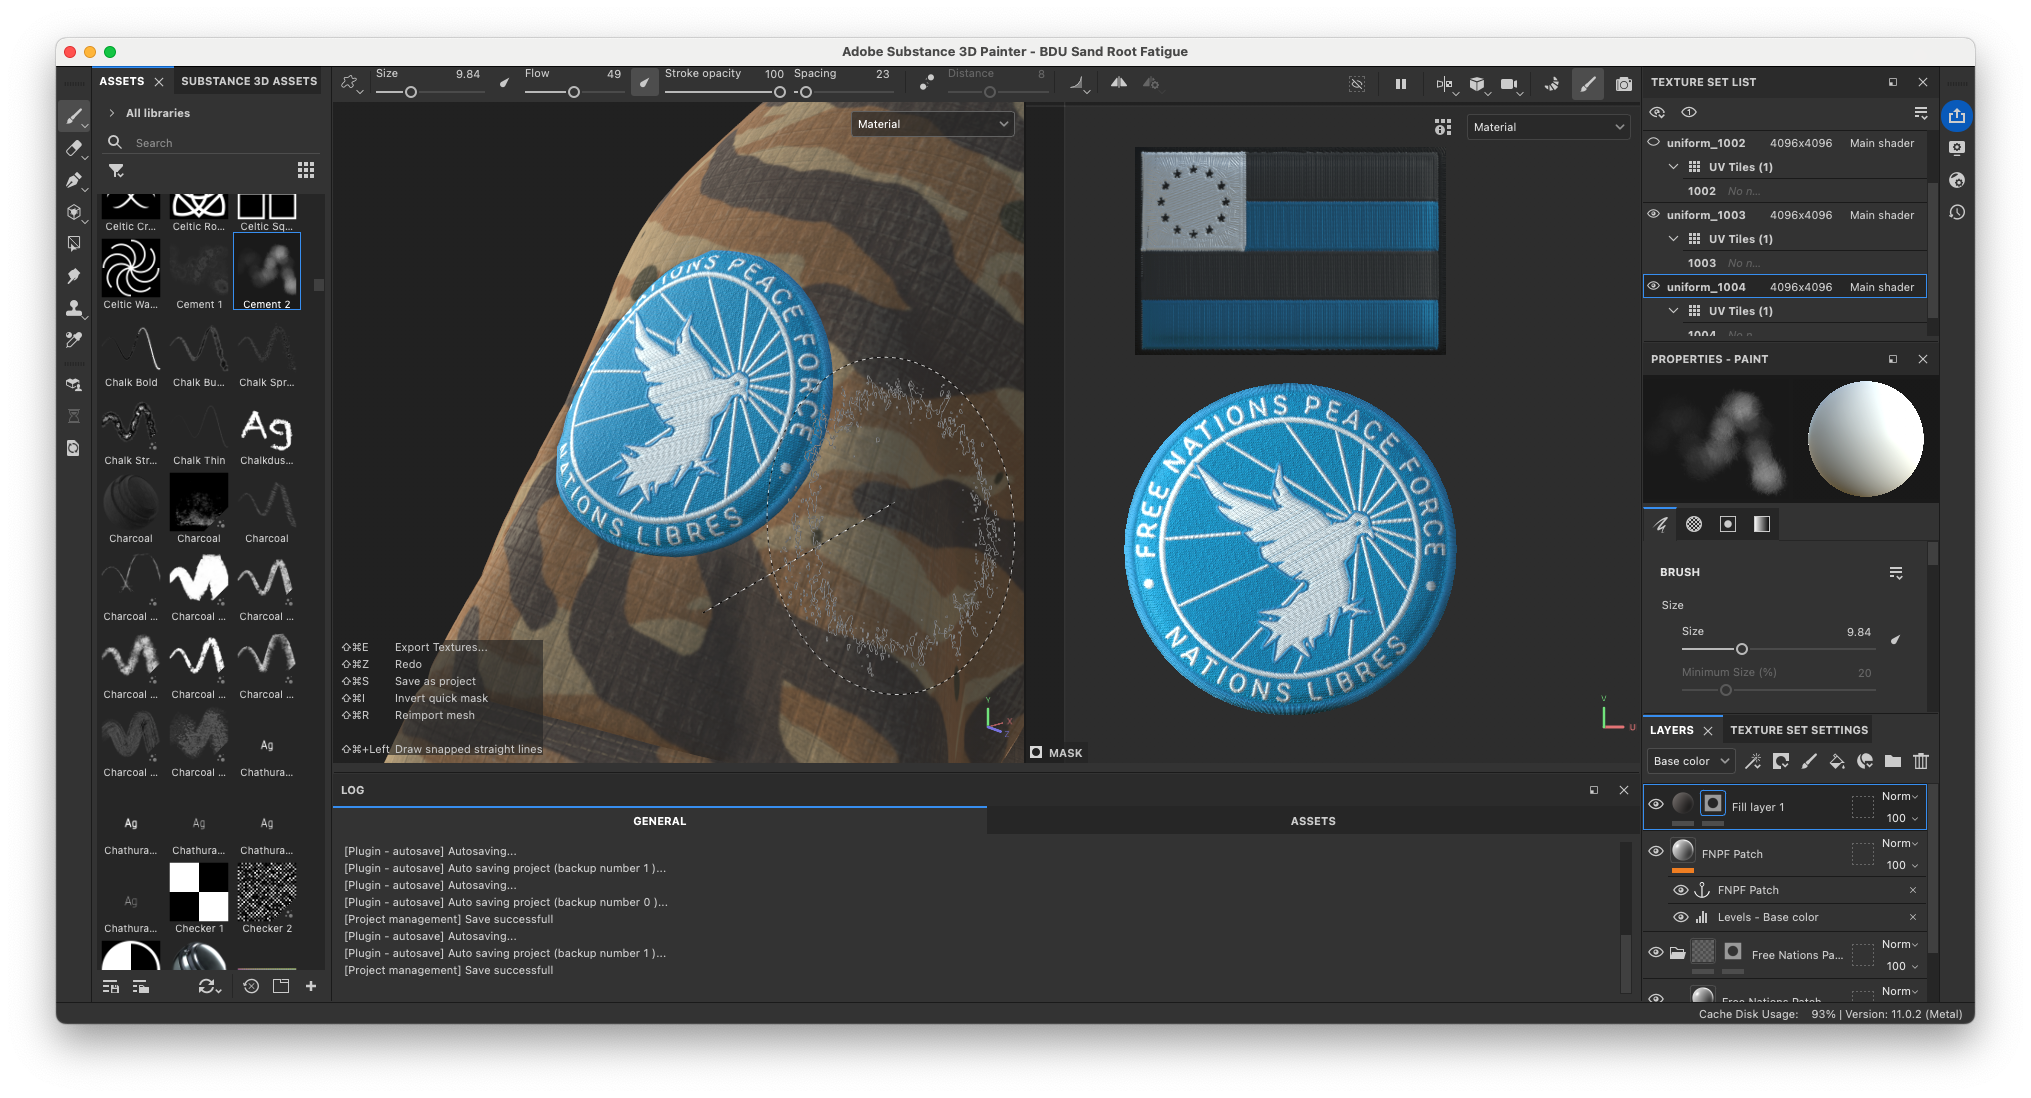
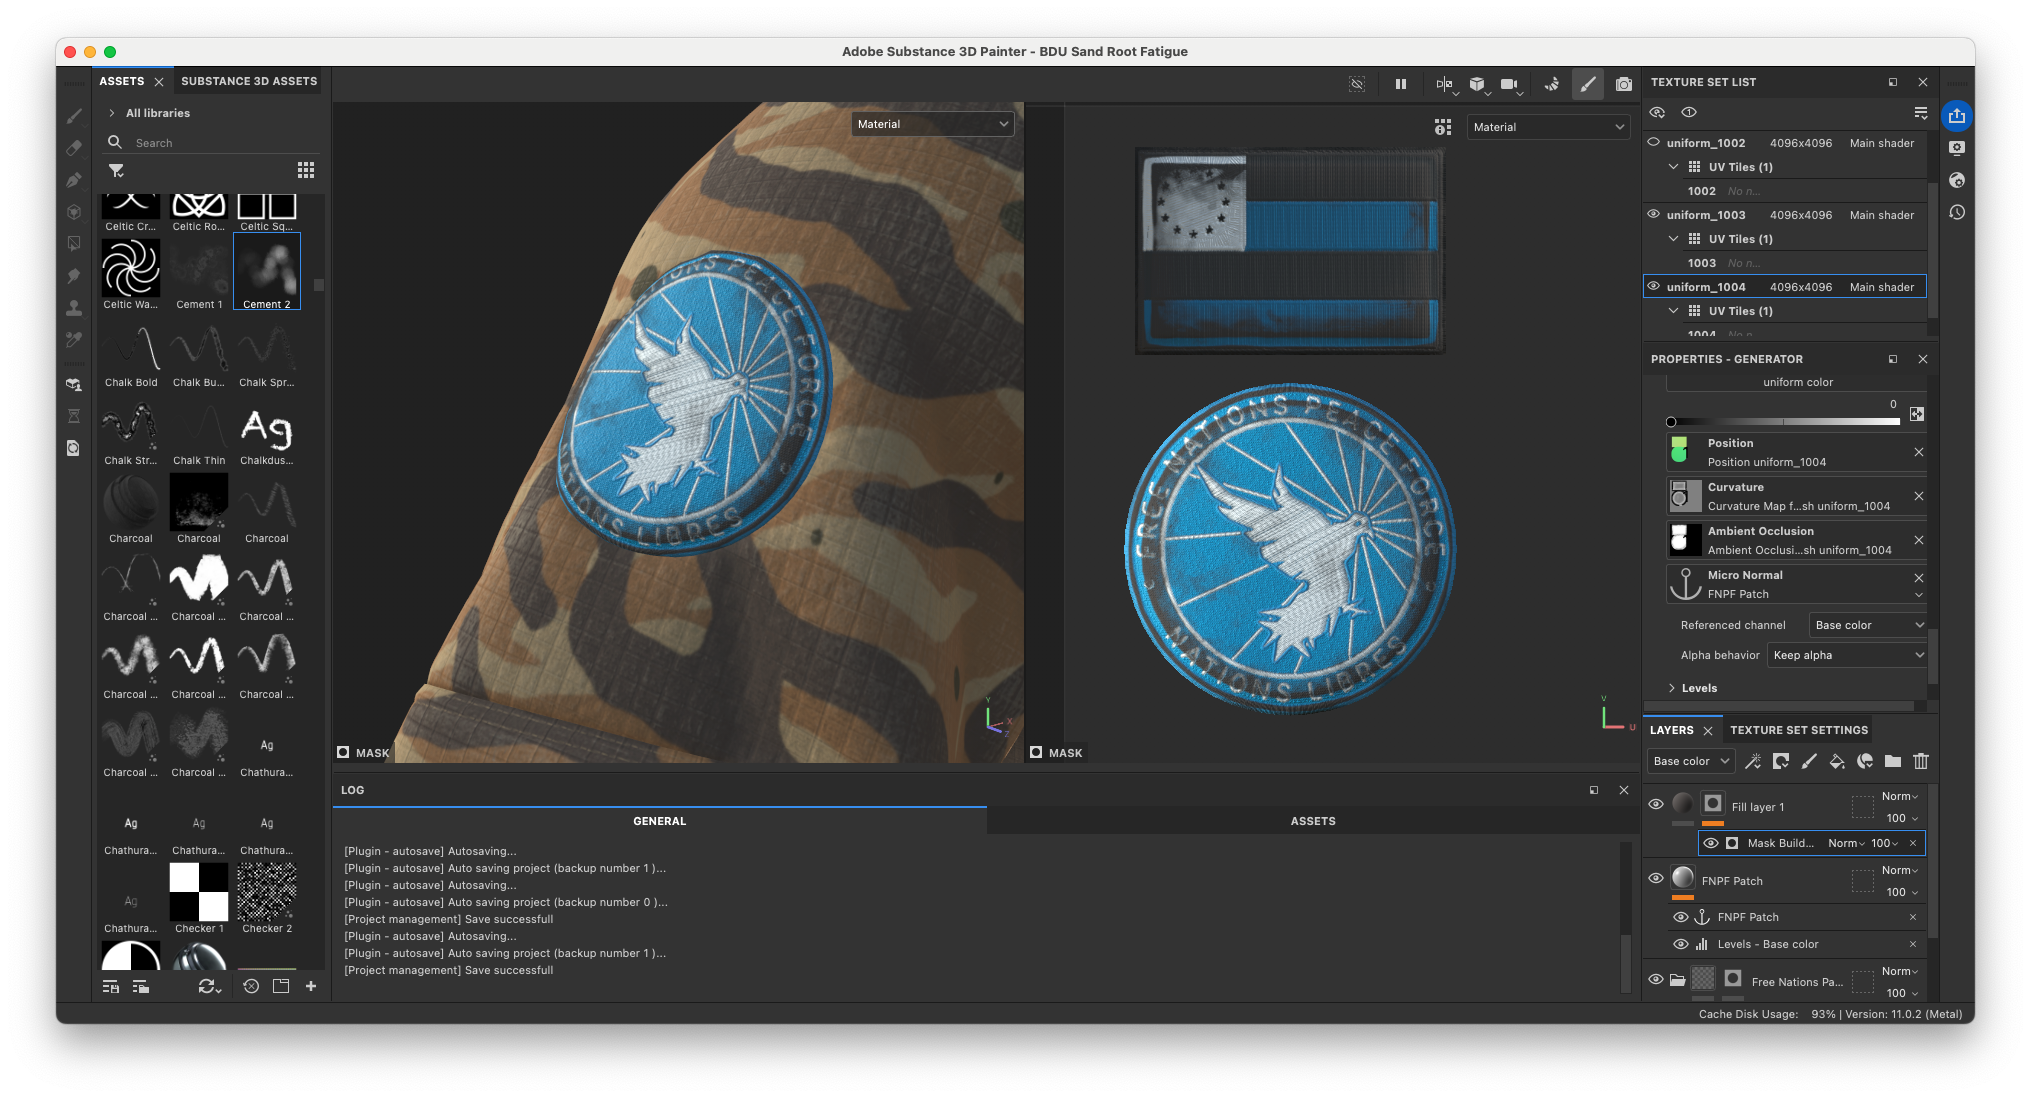
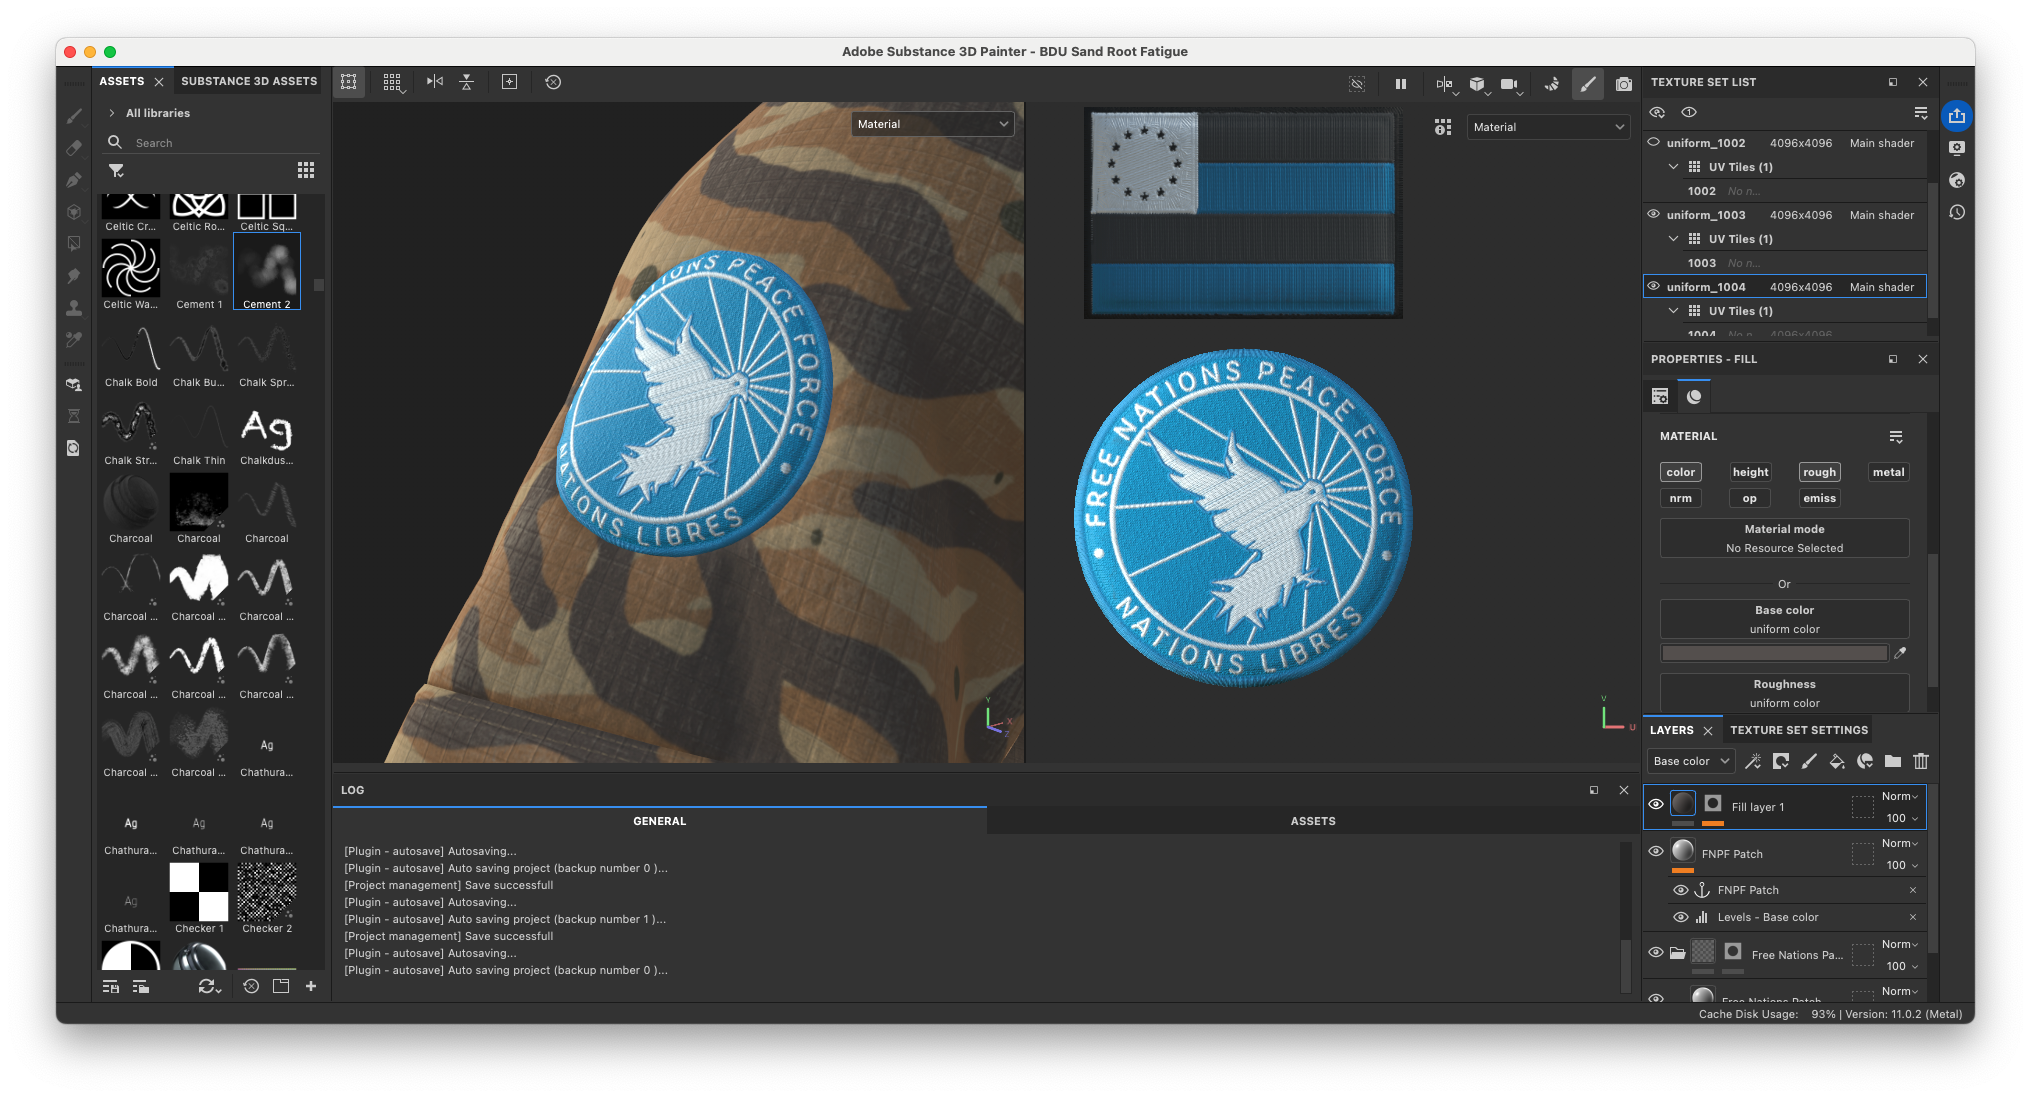
Sgt. Lloyd Griffiths has a Free Nations Peace Force (FNPF) patch on his arm. I’ve created the embroidered details in Substance 3D Sampler. Then exported the Normal, Height and Diffuse maps for use inside of Substance 3D Painter.
The beauty of the Anchor Point workflow is that I can now simply create one for the patch and mask out all the dirt in between the threads.

Would you like to own a piece of Operation: Deli Platter yourself?
You can get a FNPF military patch yourself from our Store.
To finish off the patches, I followed the same texturing process for the Free Nations flag.

As you can see, the complete fatigue is slowly coming together. However, it’ll be important to give it a final pass with additional dust, edge-wear and a wrinkle Normal map created in Zbrush.
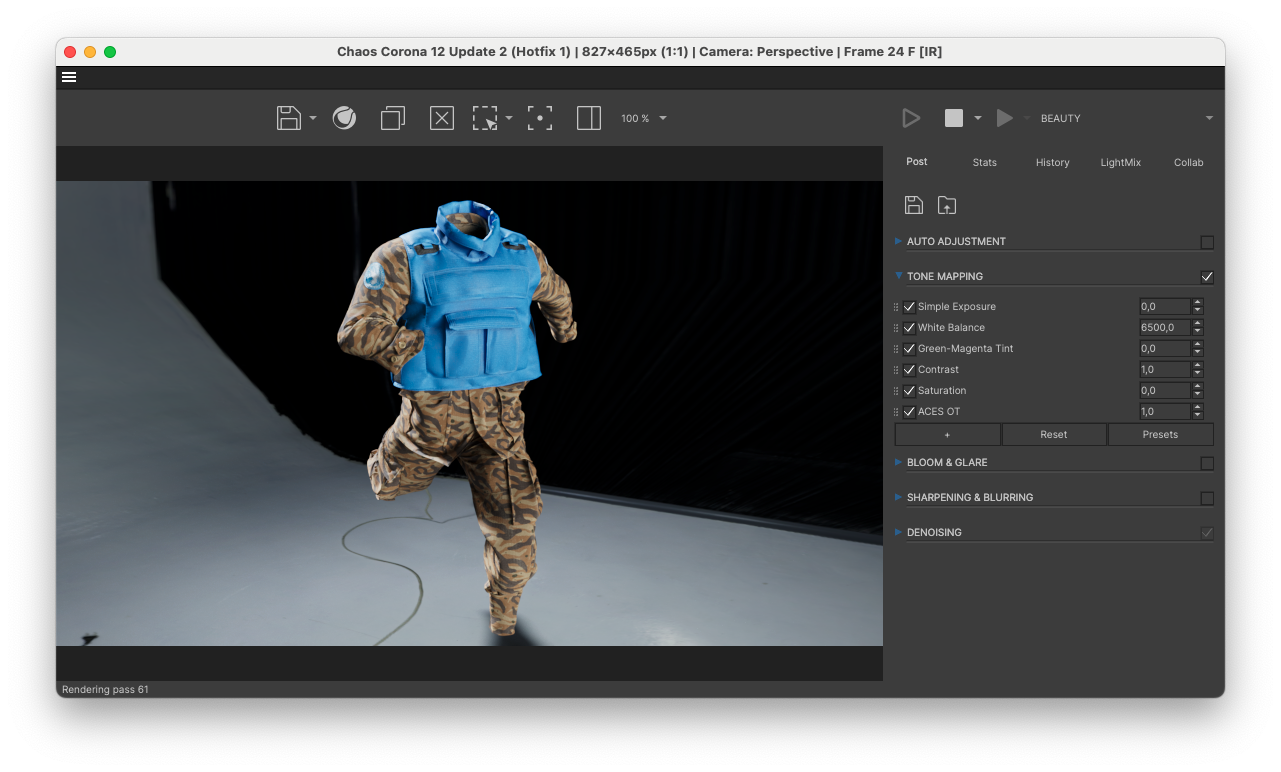
But first, let’s have a look at the FNPF blue tactical vest. This was quite a different challenge as the material is synthetic. And on top of that it’s made of an unnatural blue color. It can quickly look completely unrealistic, unless you really break up the colors through imperfections.
Like, really a lot. Don’t be afraid. Your texture map will thank you later.
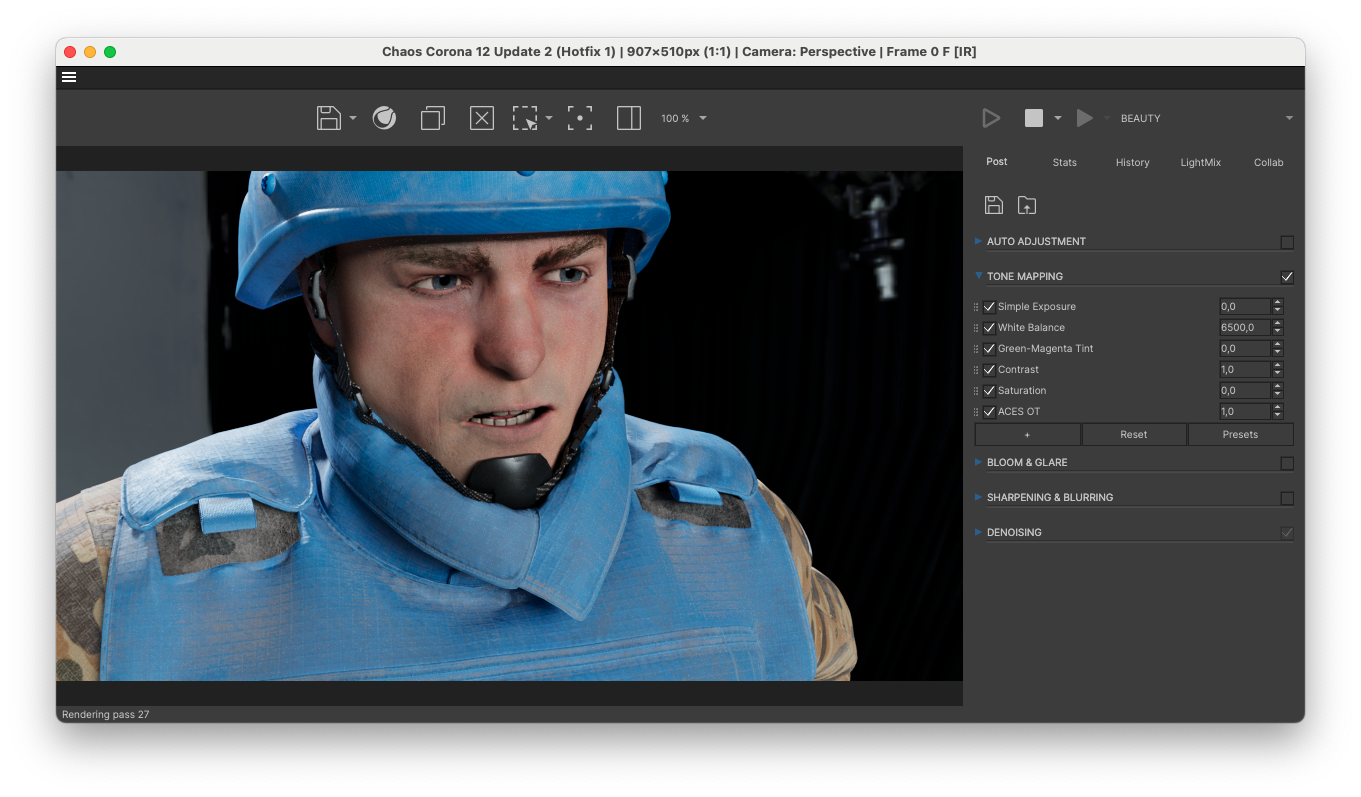
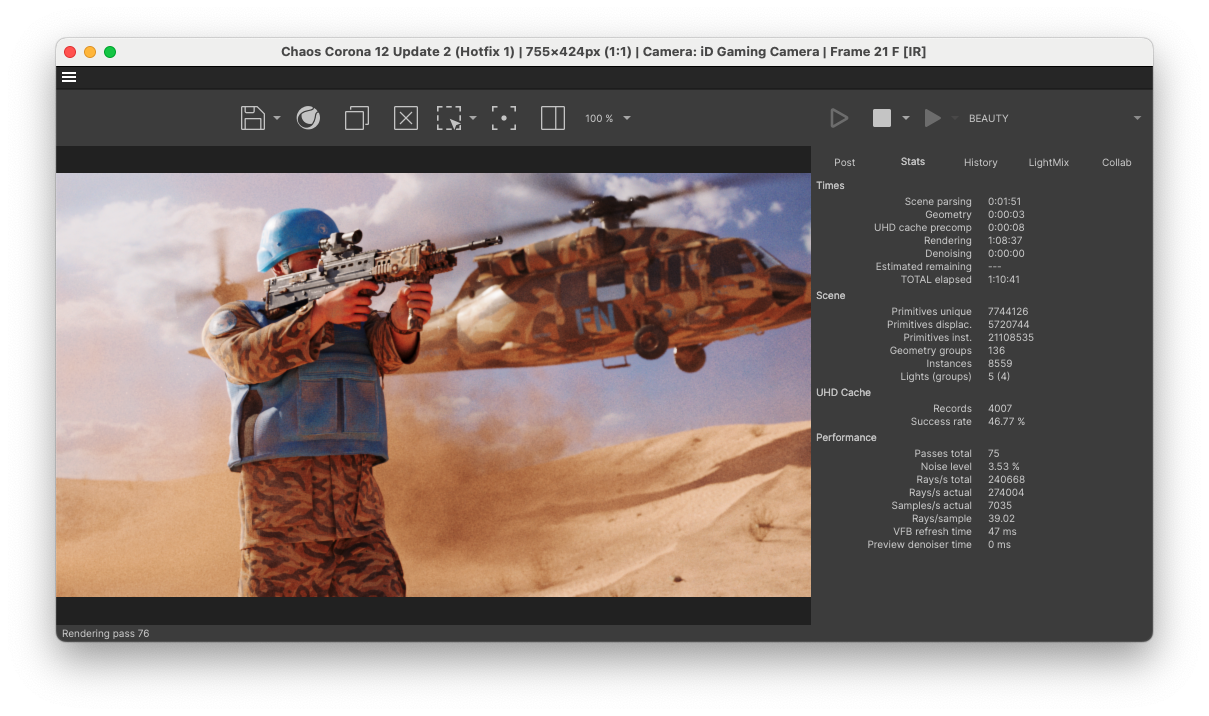
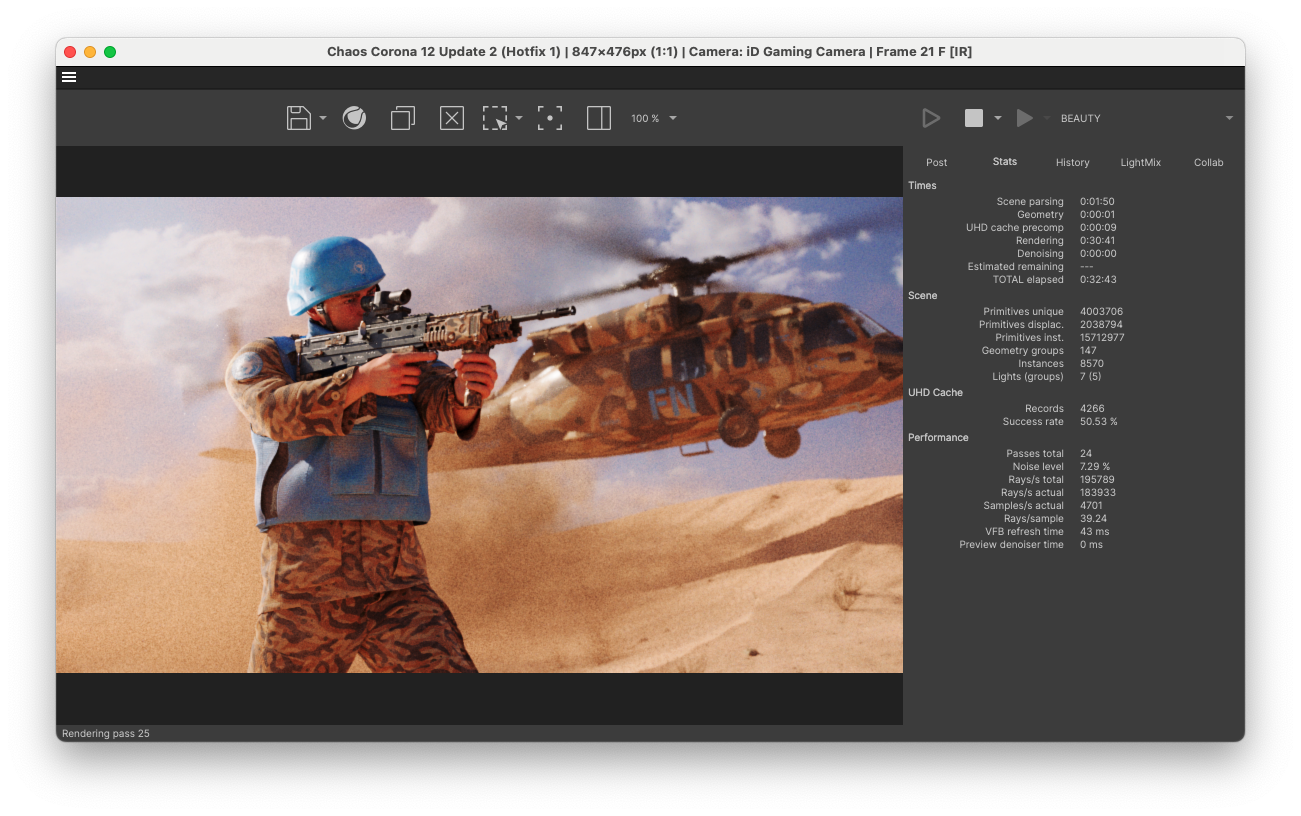
Alright, it’s time for Look Dev. I’m using Cinema 4D and Chaos Corona. For the Look Dev setup I’ve created a Corona Sky set to Dome projection. Then I applied a “Studio HDRI” from Polyhaven. Finally, I created a floor plane with a Shadow Catcher material applied to it. As long as you set the Corona Sky as the Environment inside your Shadow Catcher, it will be invisible.
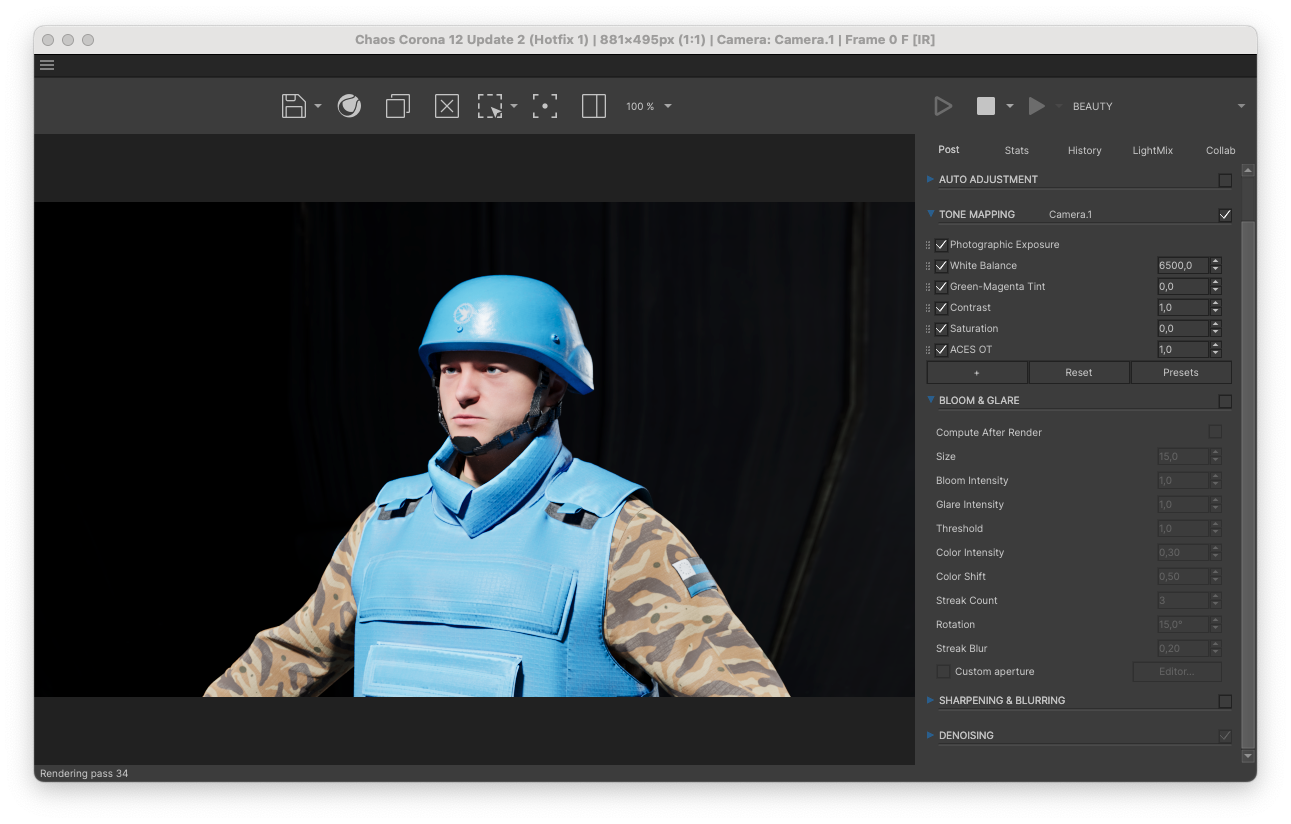
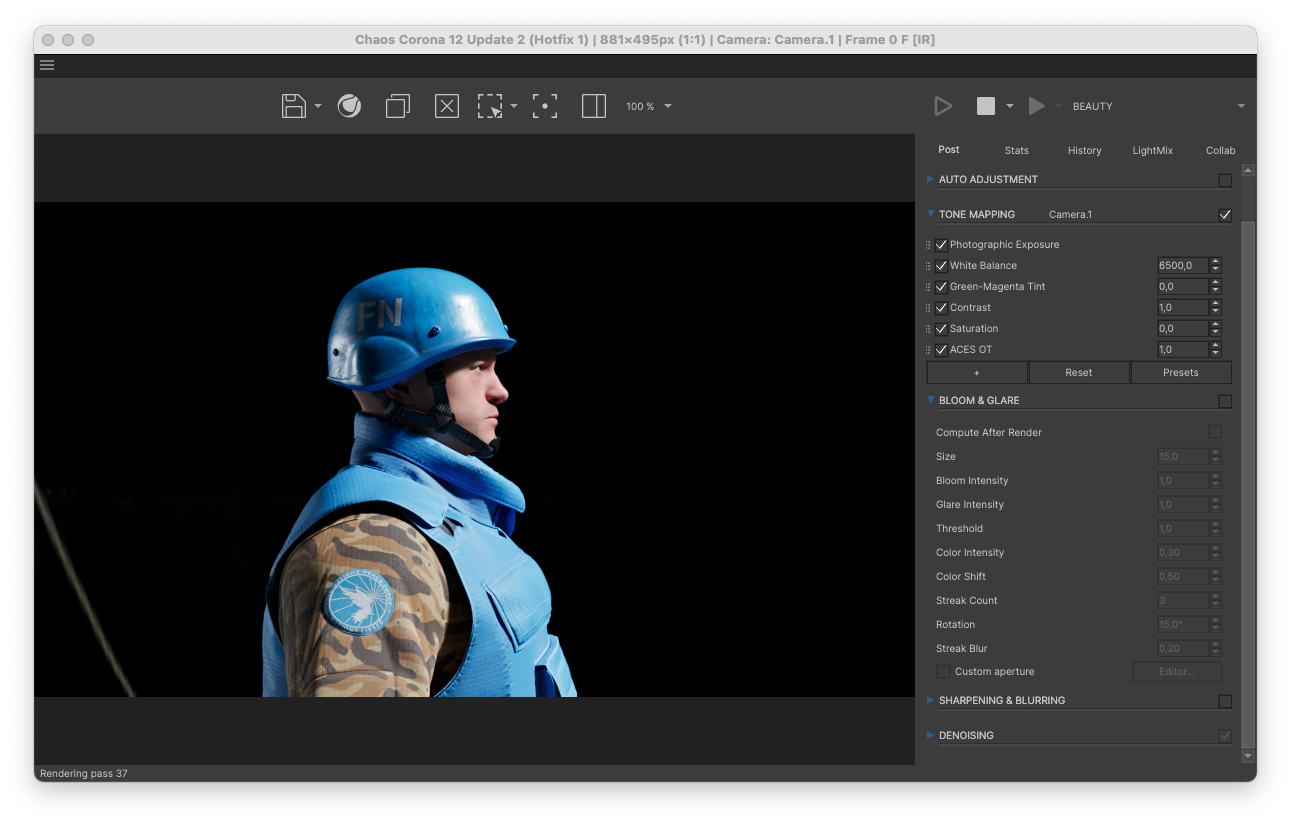
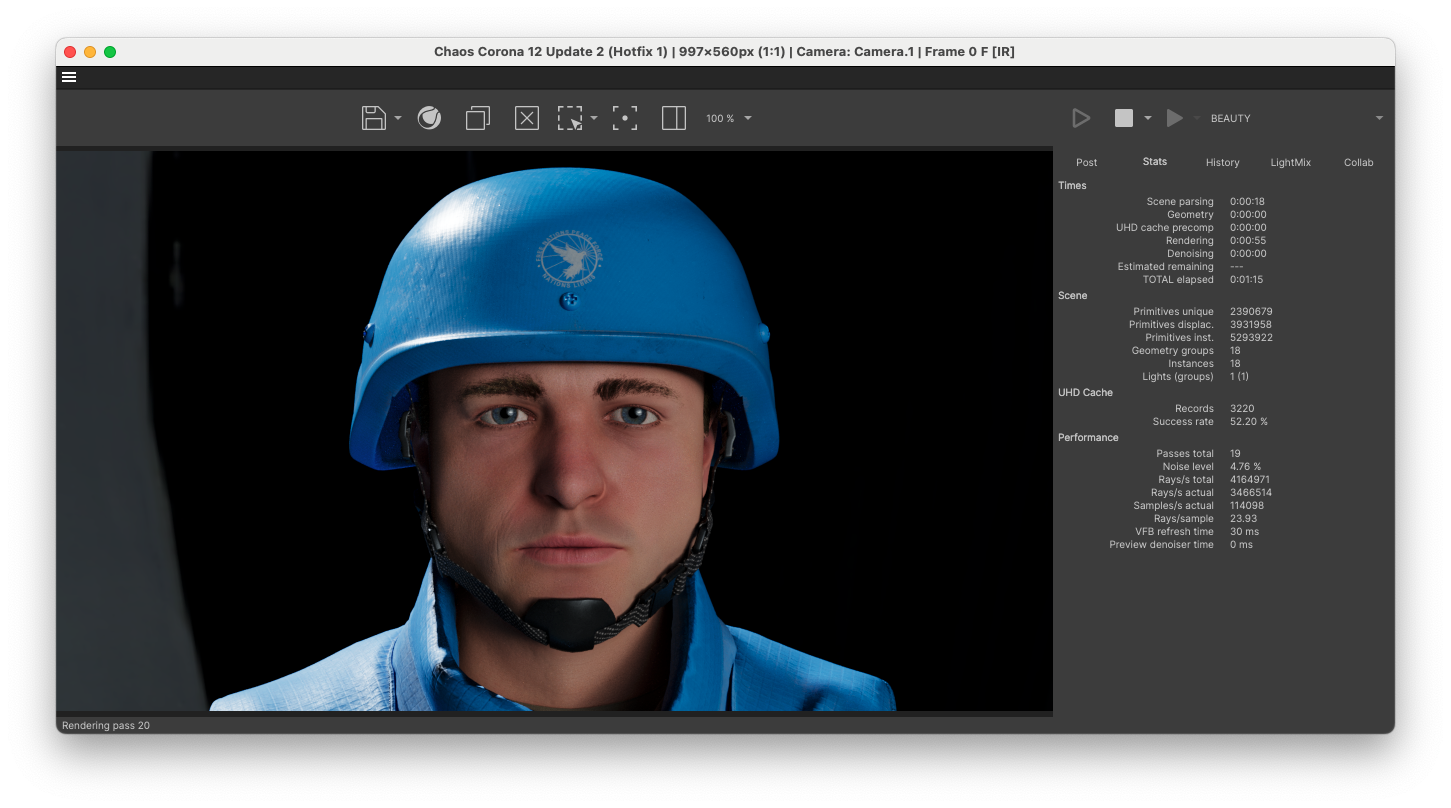
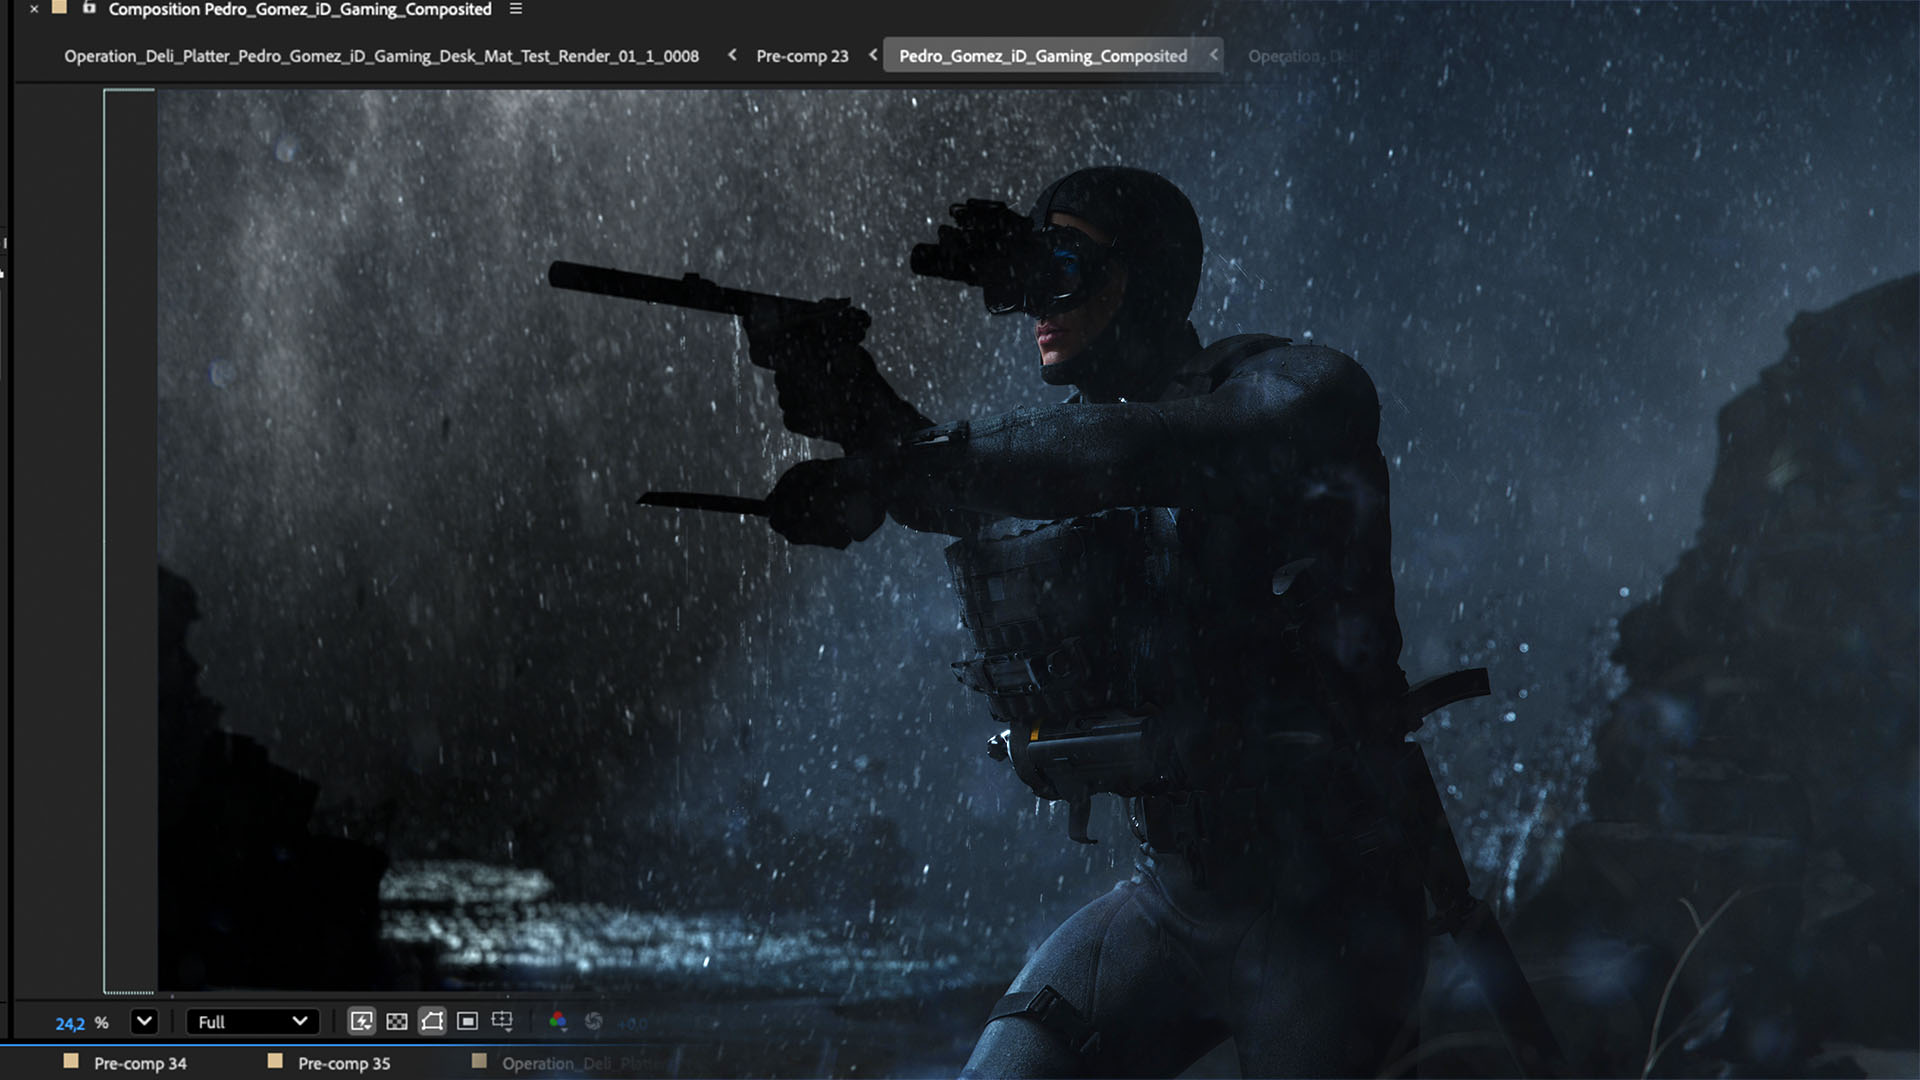
Here you will see the drastic difference between the screenshots of the objects without additional dust and with. I’ve also added an additional dust pass to the helmet and to the Lloyd Griffiths asset himself.
Building a Realistic Desert Scene
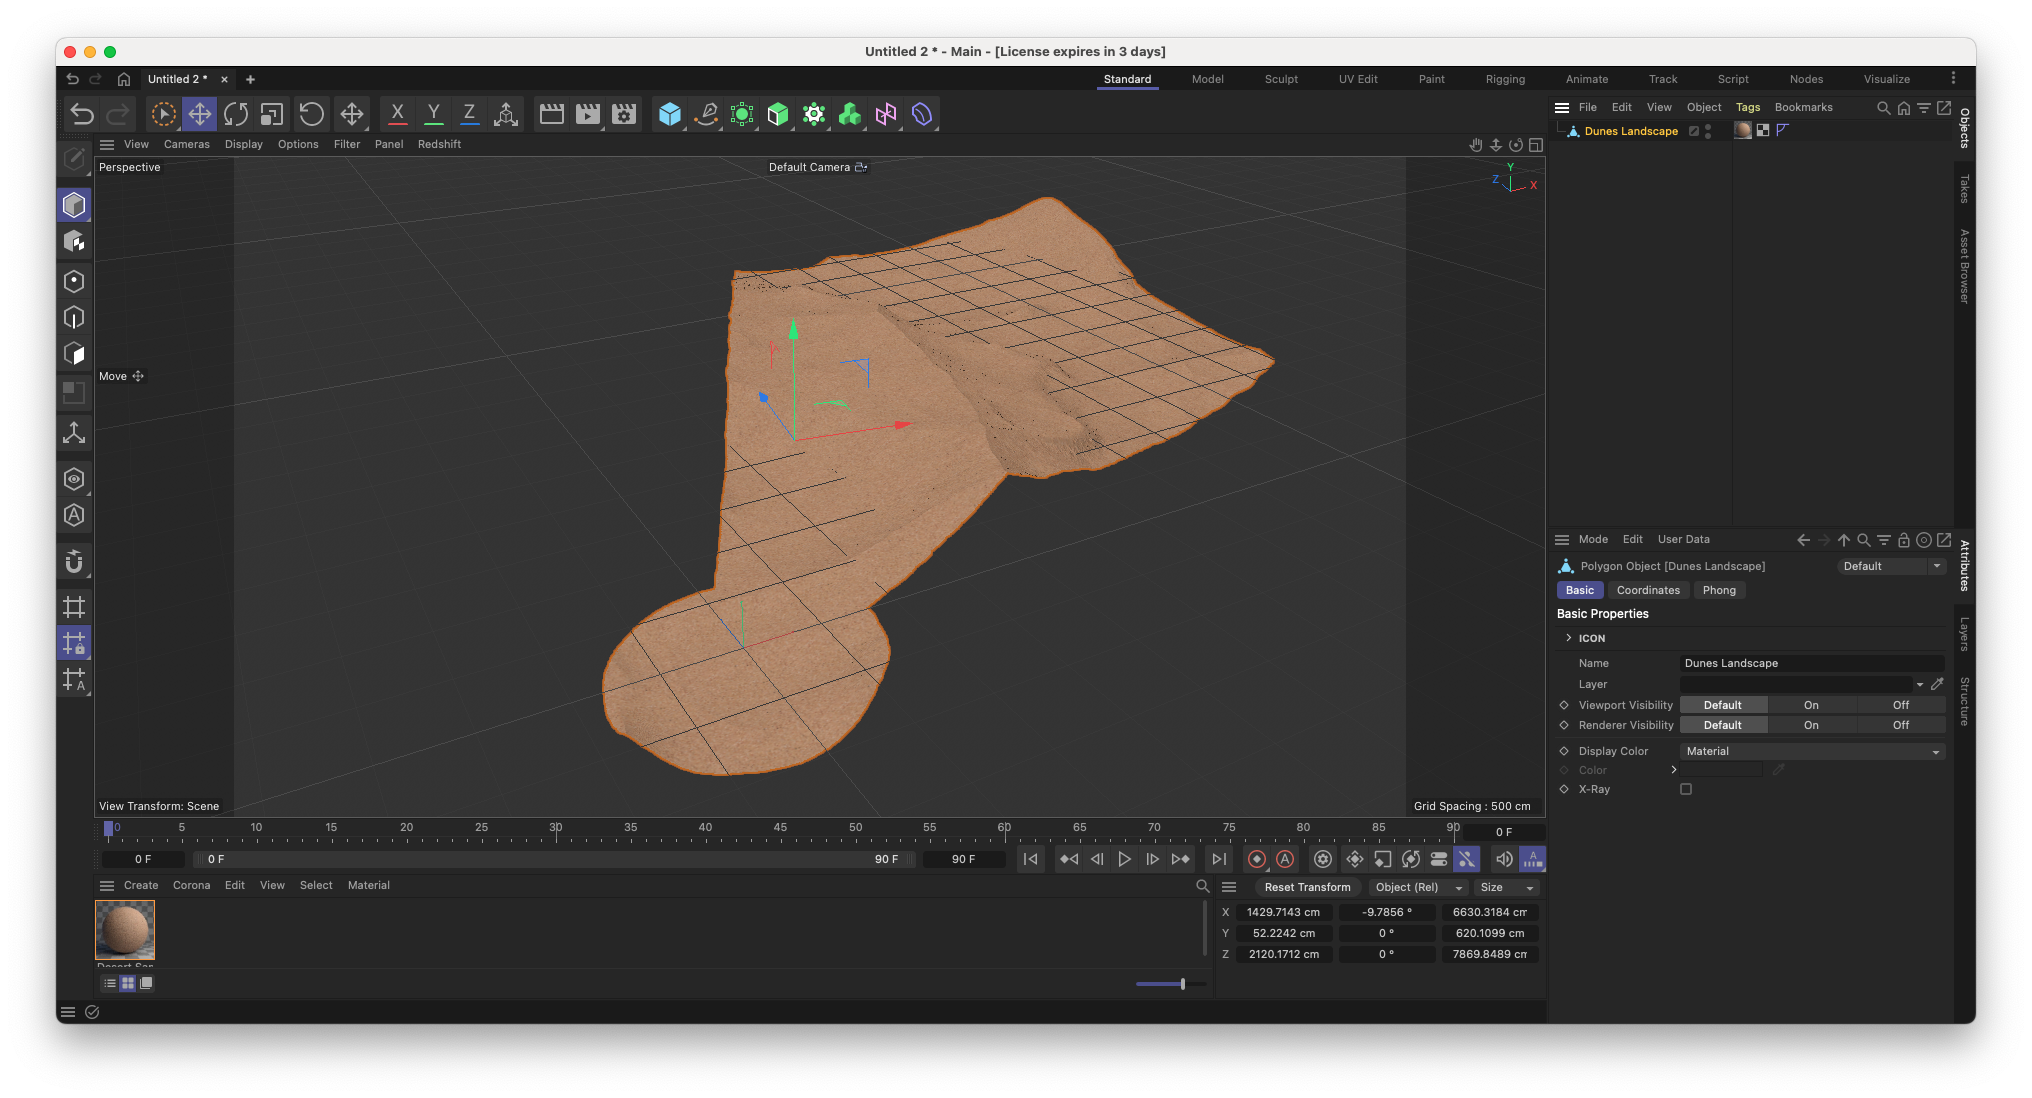
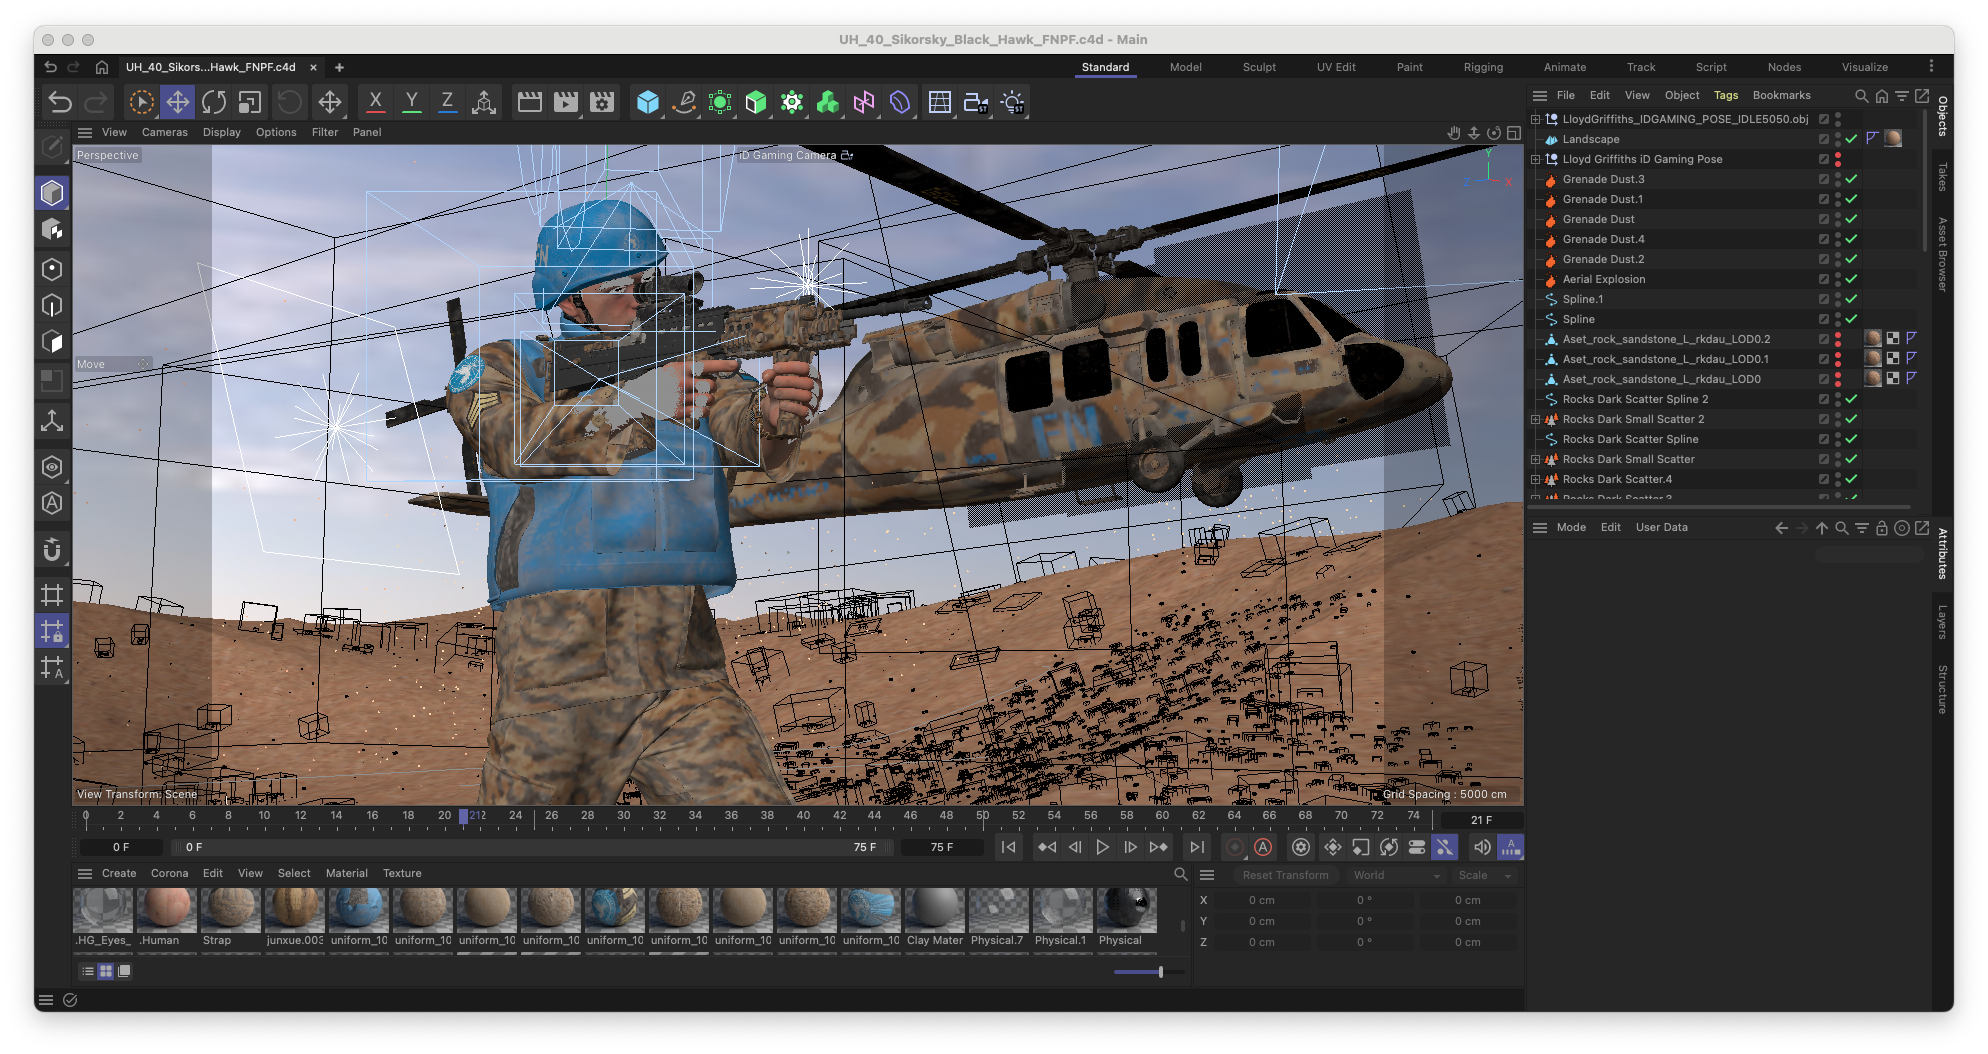
First things first, a desert dune. I got a high-resolution desert dune model from Waleed Nabil created in World Creator. To preserve memory I cut out the desert landscape to be limited to only what’s visible inside the camera view.
After placing a Corona Sky and a Corona Sun it was time to Merge the Sgt. Lloyd Griffiths into the scene. I took a bit of time placing the camera in the scene and trying to feel if the assets are of a high enough quality for the results we’re after.

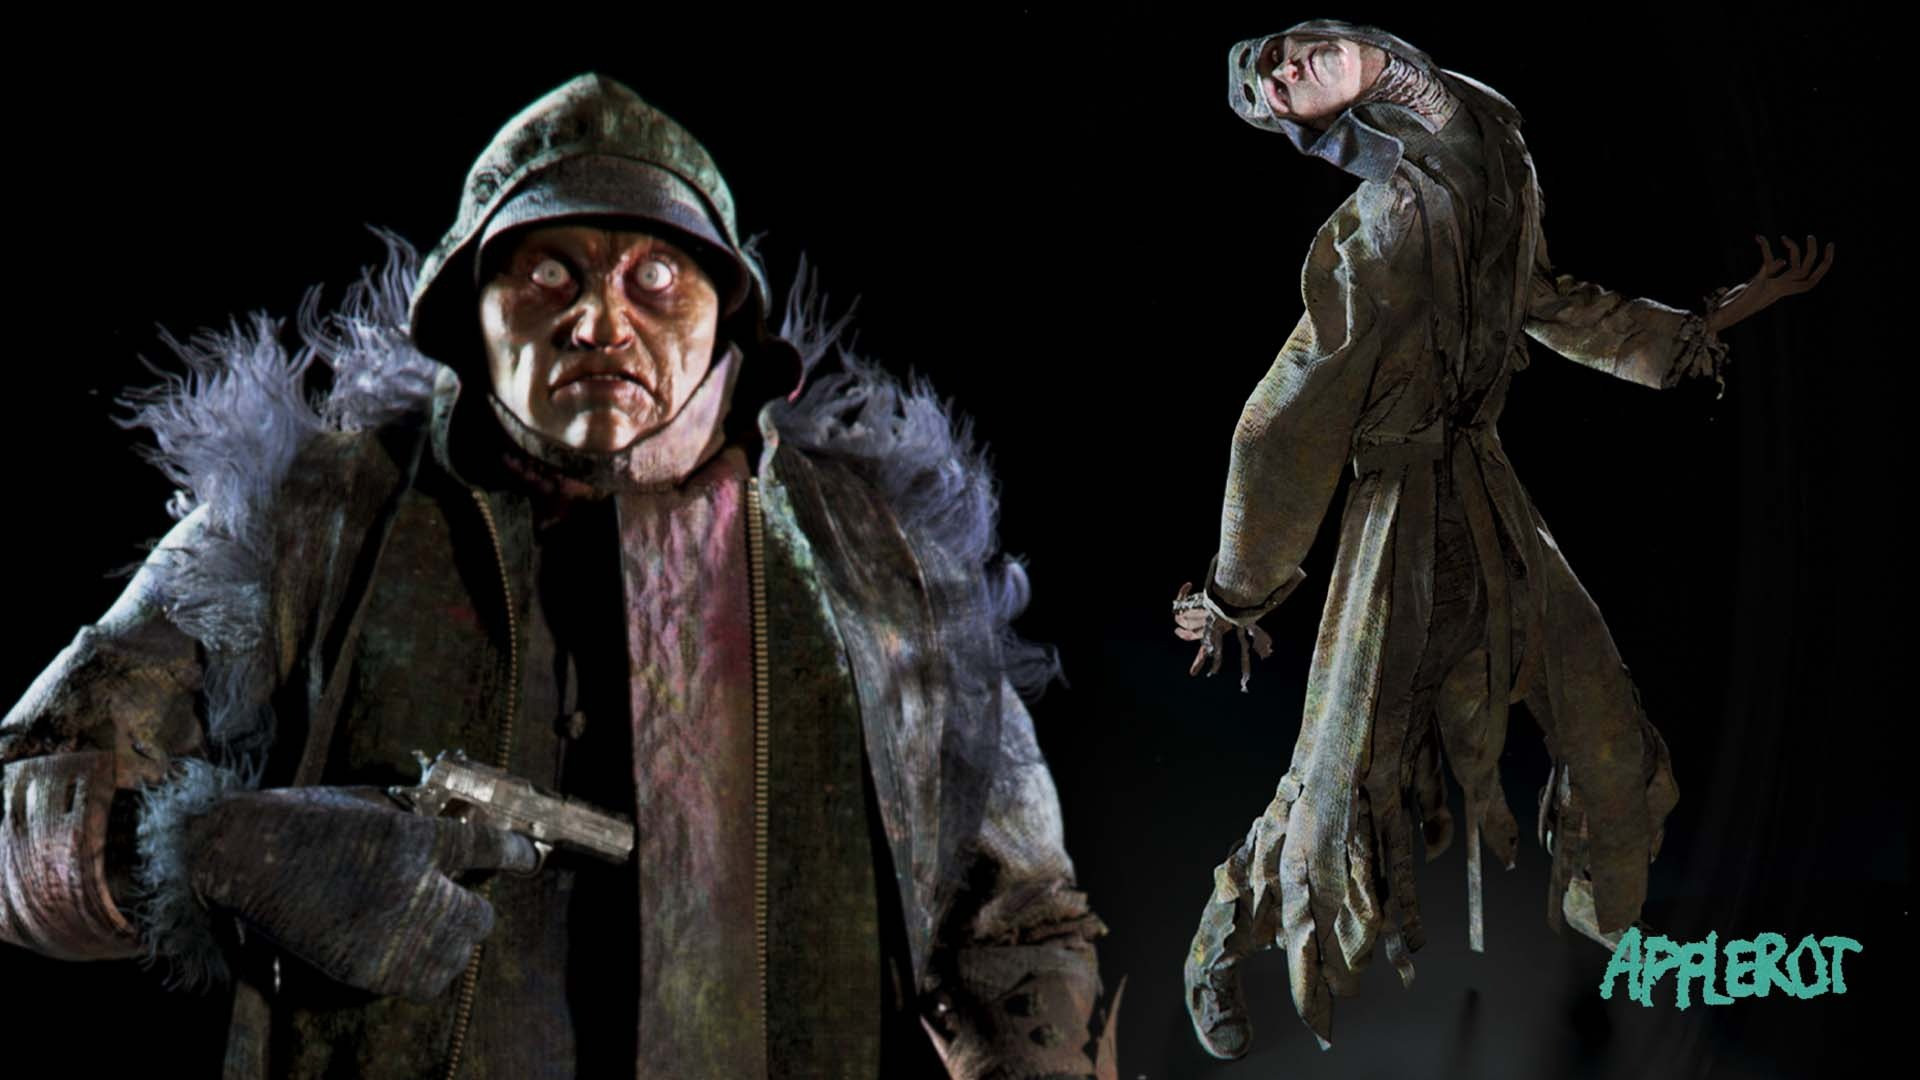
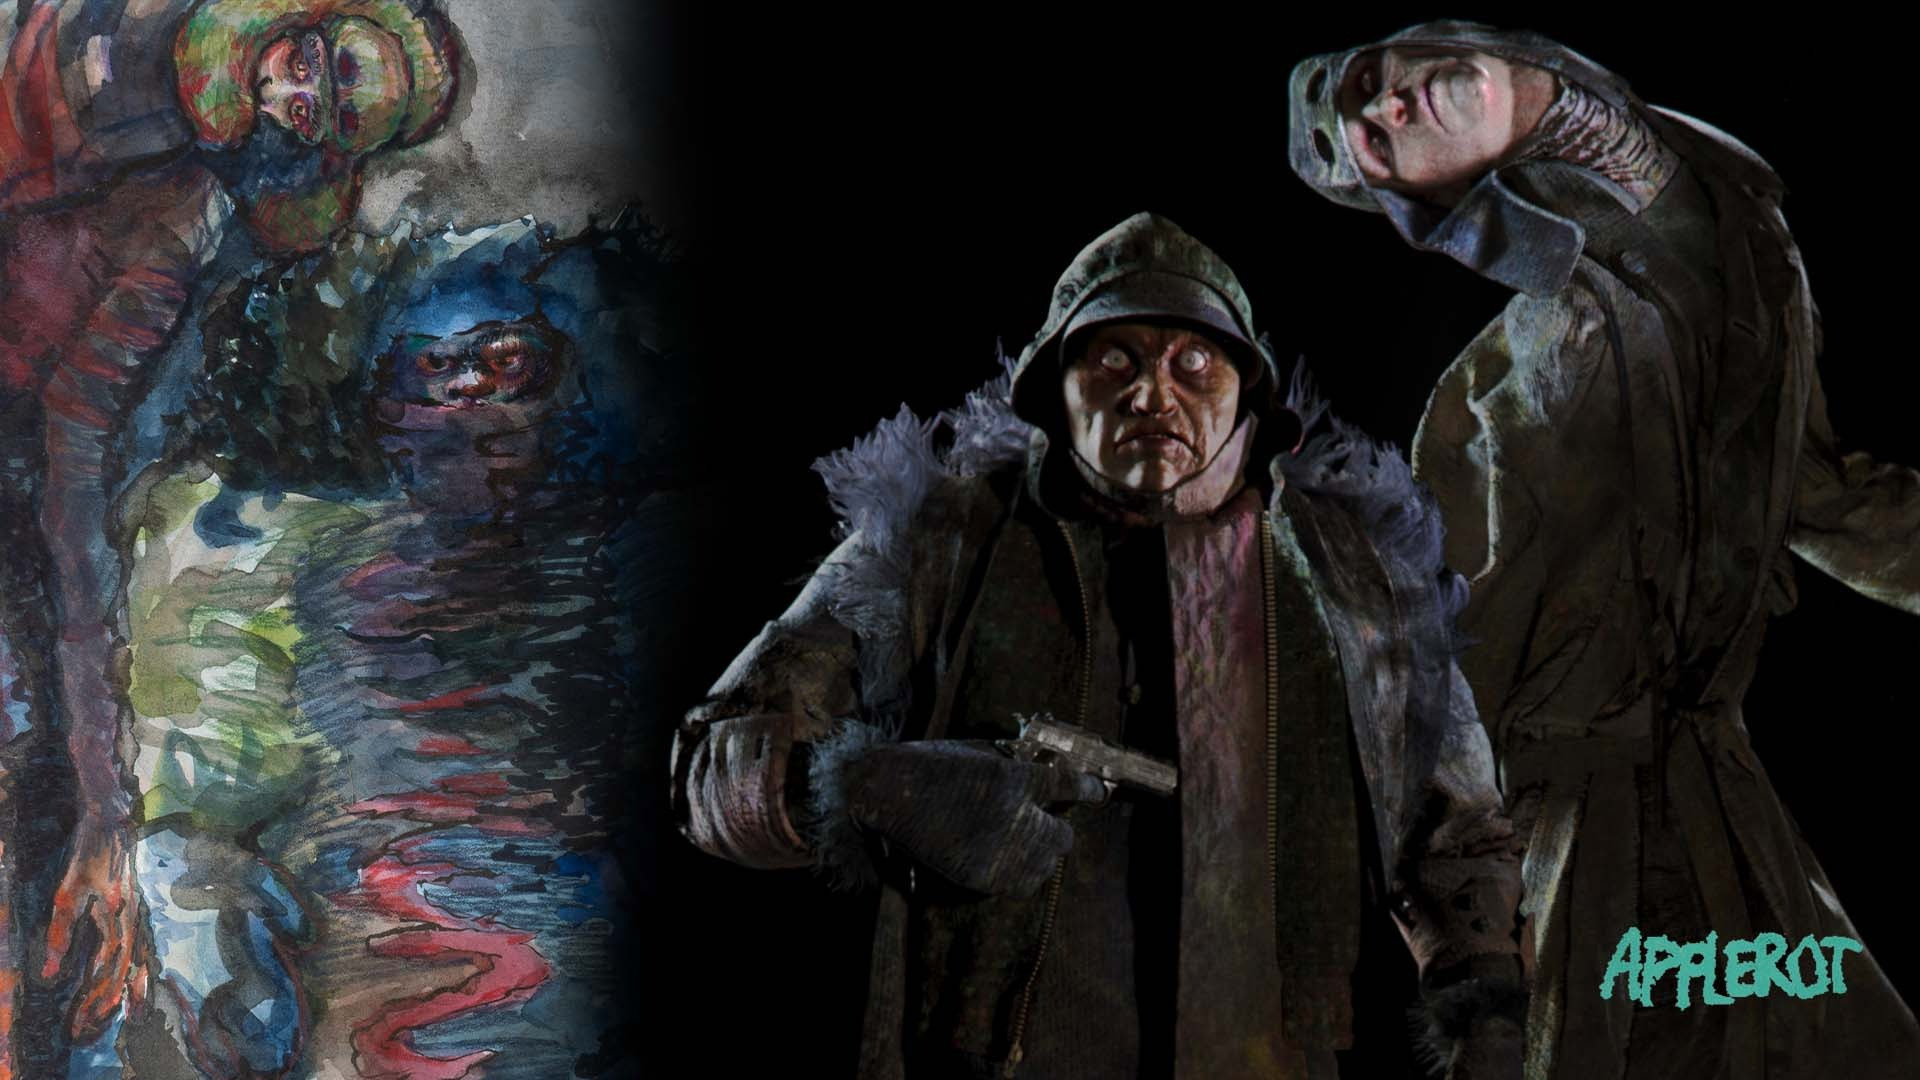
We had previously discussed what the design was going to look like. Especially as it has a spiritual counterpart in the Combat Diver design.
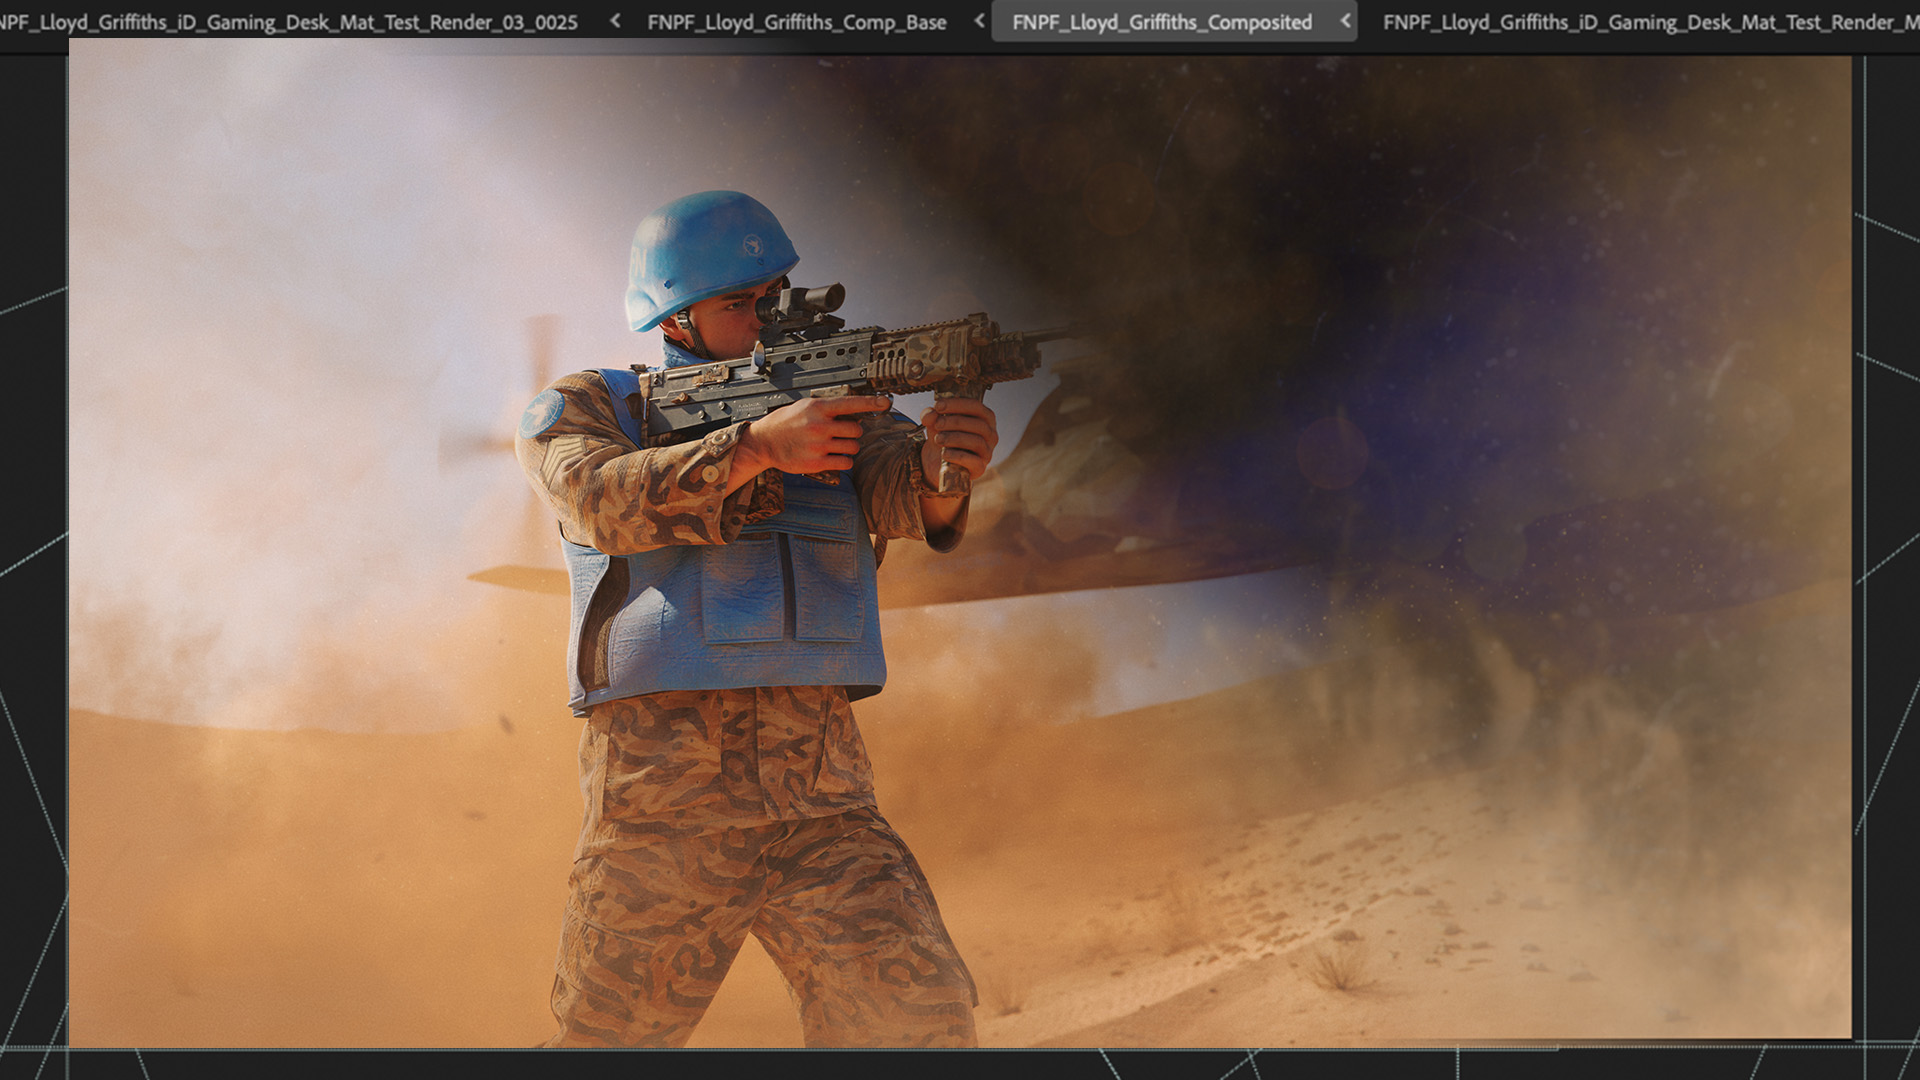
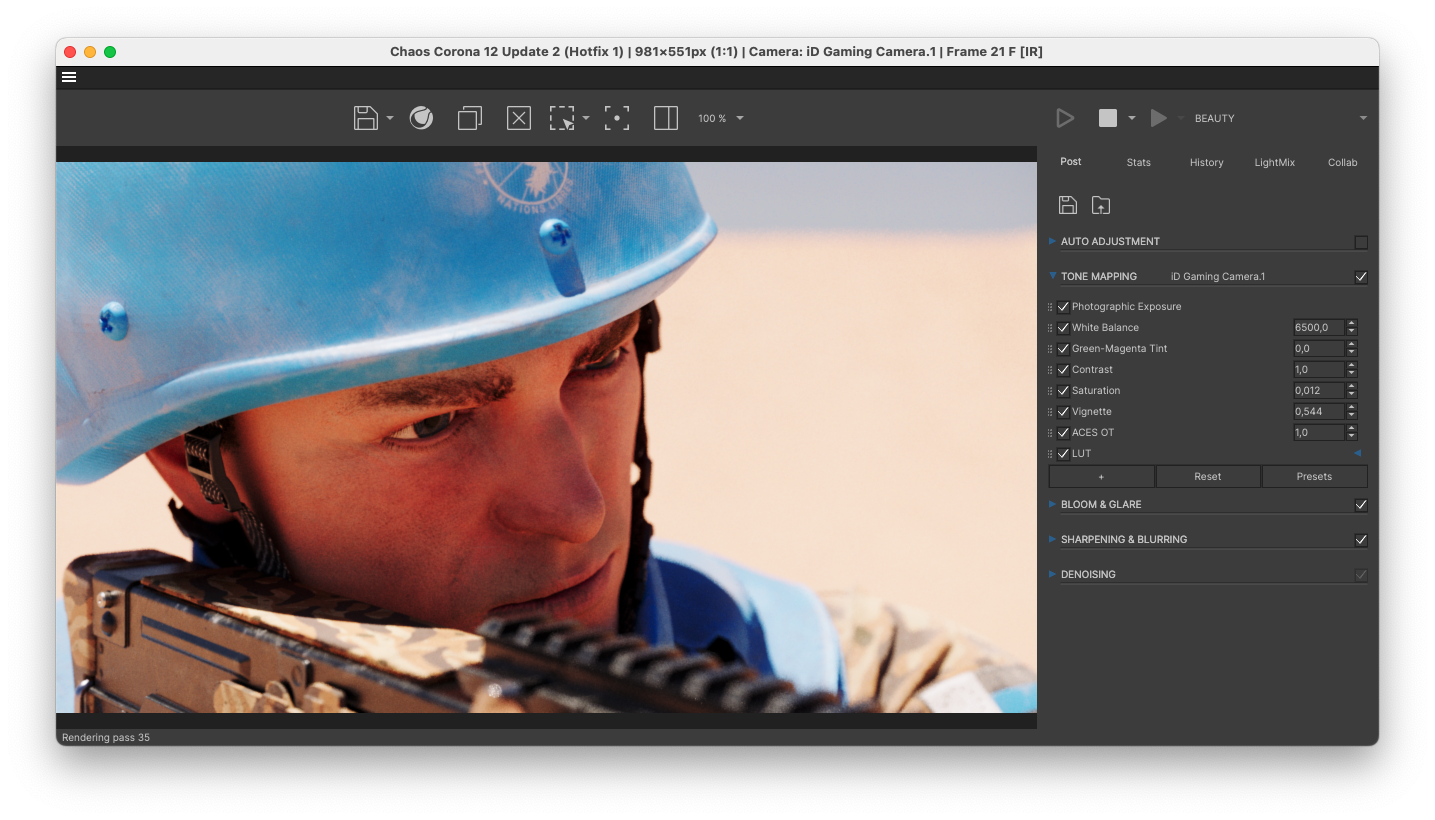
However, after placing the camera in the same position and adding the Blackhawk, the first problem was that the character was holding the rifle too high up. As you can see it’s obscuring the character’s face too much for it to look good.

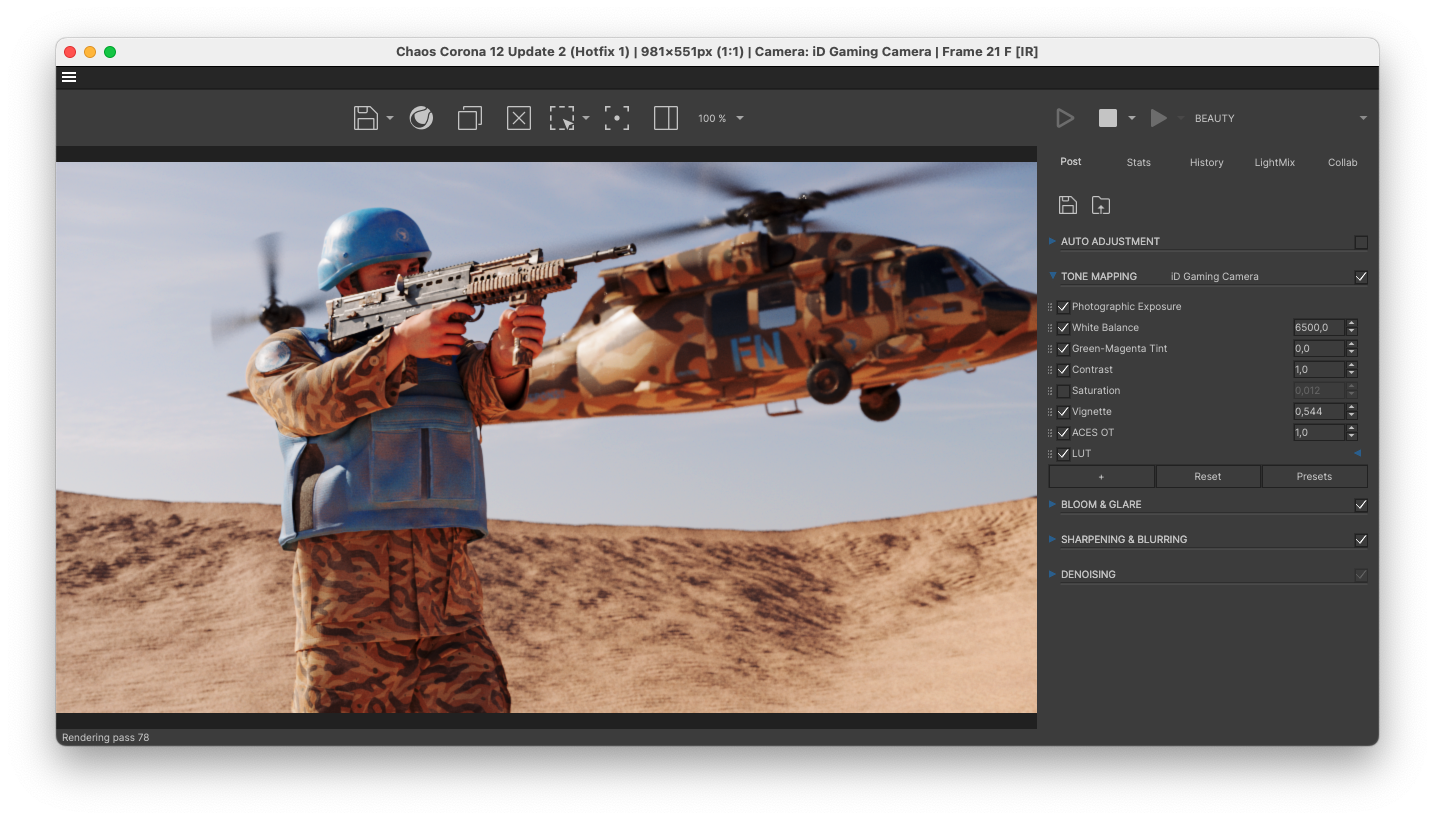
While Charlotte Simons was updating the character pose, I’ve started adding VDB dust from EmberGen to create the sand blowing up by the Blackhawk. Below you’ll see two previews of after the pose-change was implemented.
The next level of detail to add to Sgt. Lloyd Griffiths is arm- and finger hair. This might seem like it doesn’t add much, but instinctively a character like this feels “empty” when he doesn’t have it.

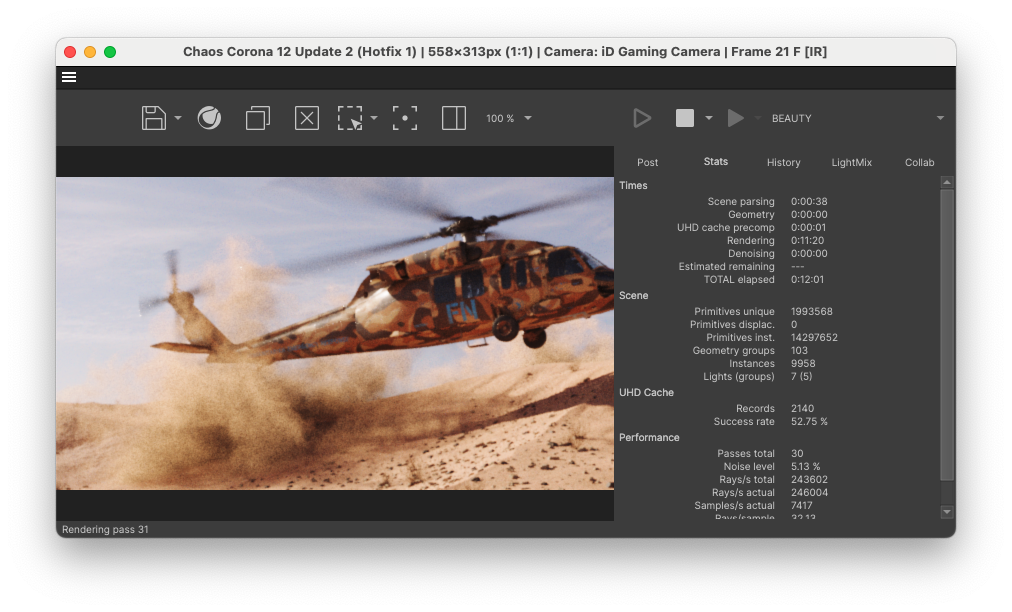
The next step was making sure that the density of the dust was correct. For this it was important to find good reference material of desert dust being kicked up by a helicopter and matching the density.

Finally, we’ve reached the detailing phase. Using Chaos Scatter I’ve placed a variety of small dried bushes and rocks all cross of the the desert dunes. Using splines and the Spline Includes option inside the Areas tab I could control where exactly the details would spawn.
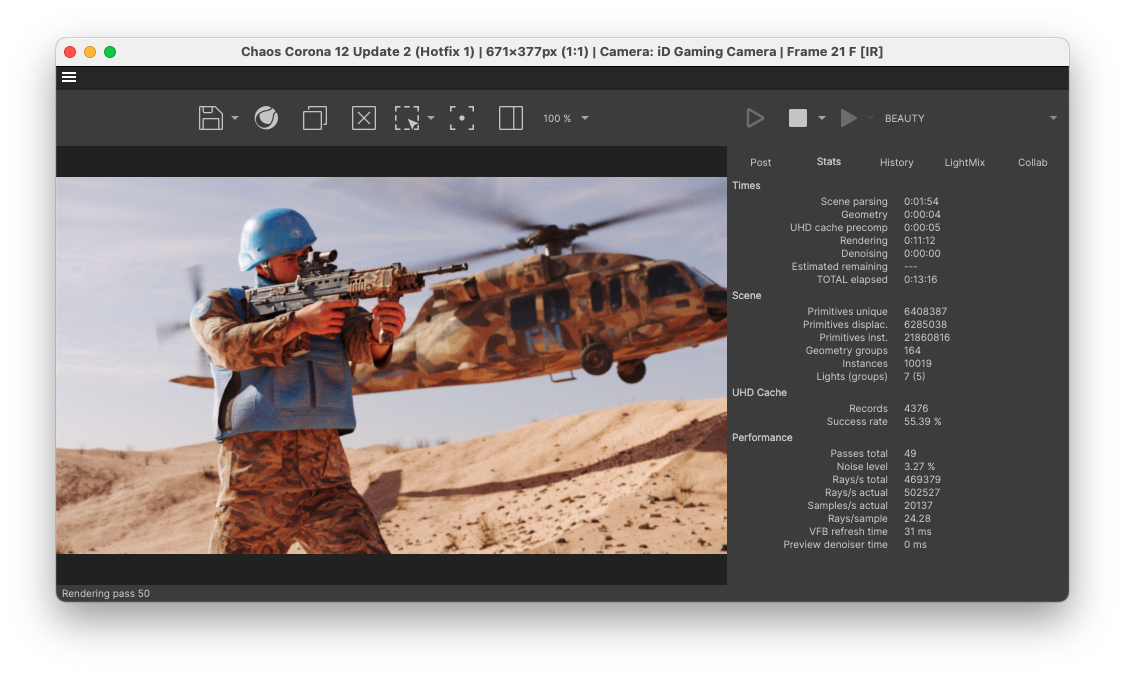
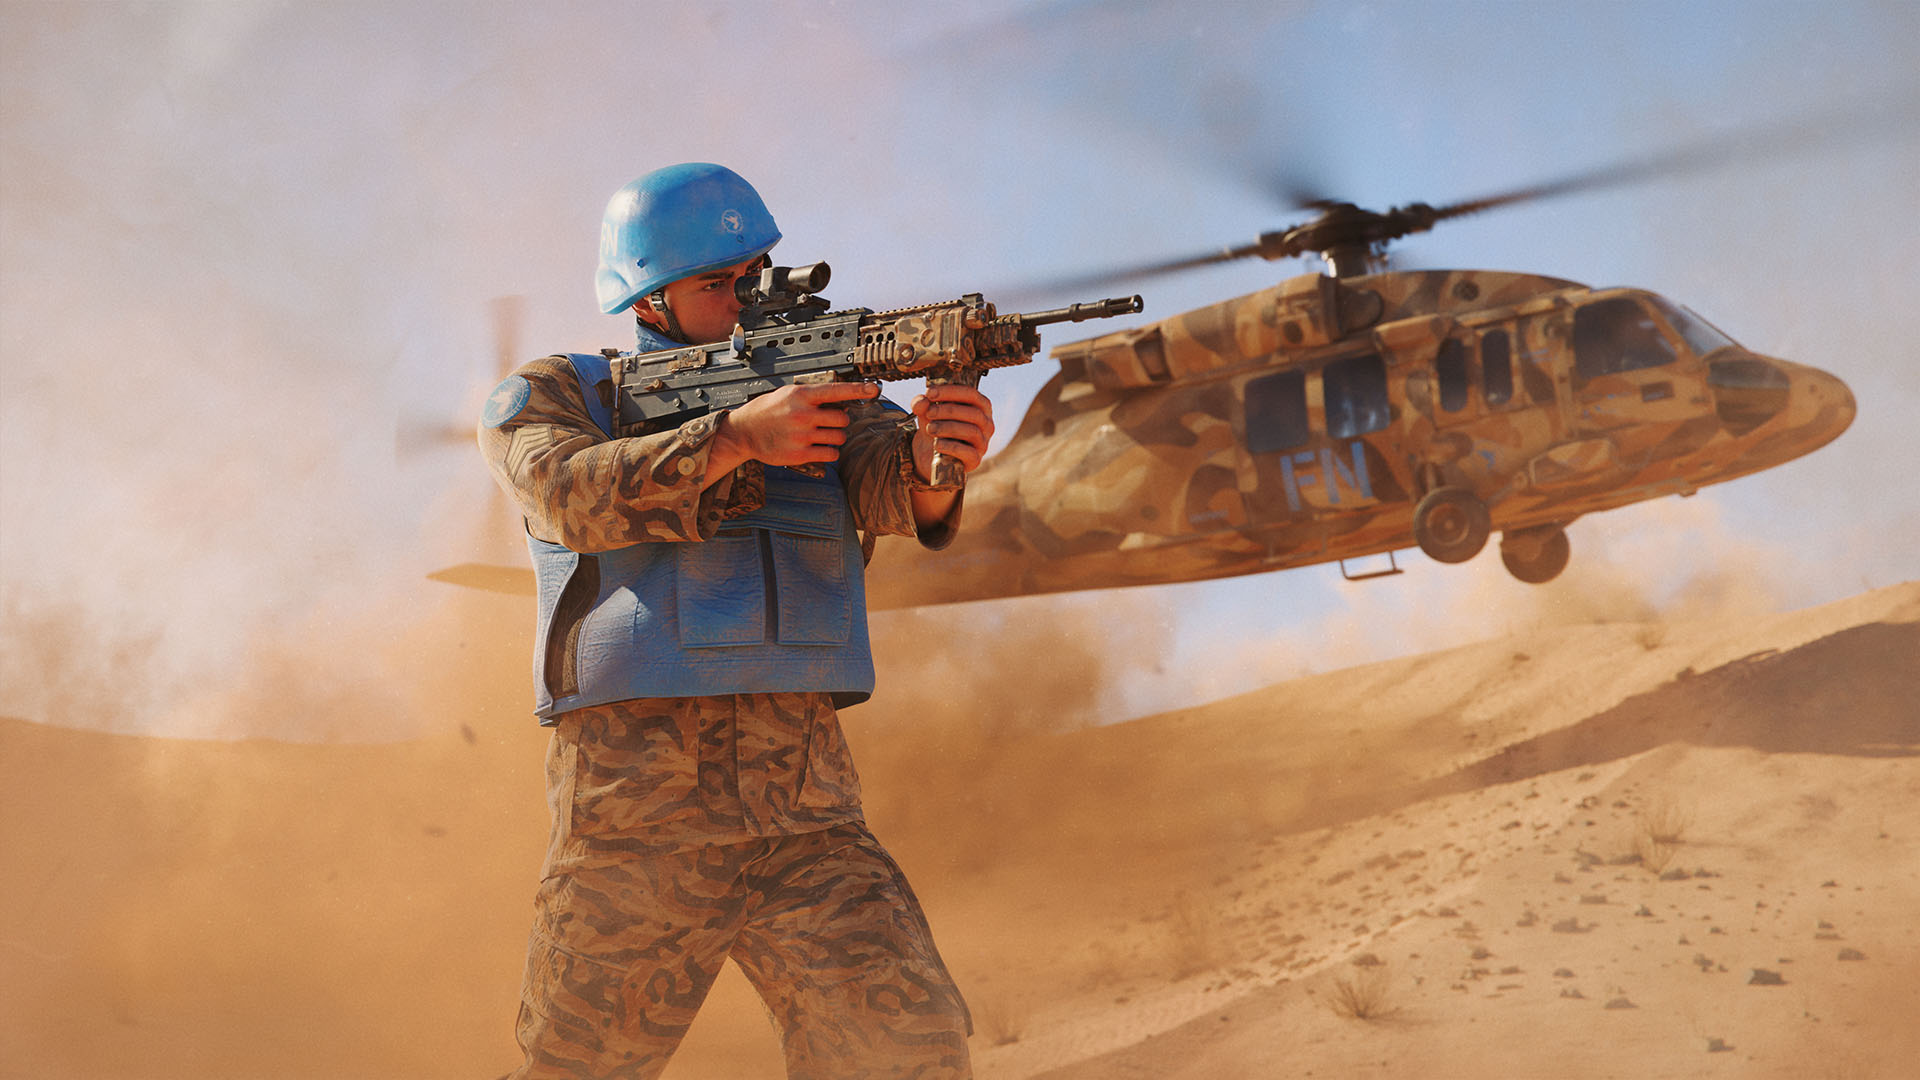
Now it’s time to render the image in 32-bit .exr for compositing.
Compositing the Scene
After rendering the Desert Soldier scene in 32-Bit with Multi Passes it was time to bring it all together inside of Compositing.
I’m using Adobe After Effects, as that’s the software I have most experience with. But the results can be achieved in both Nuke and Fusion as well.
Using the different passes like zDepth, NormalsShading, Reflect, Refract and Volumetrics I could mask out every asset I wanted to composite. Especially dust from ActionVFX, dust and atmospheres from FX Elements and even early Lens grime from Action Essentials 2 by VideoCopilot.

The compositing process was both meditative and straightforward.
Placing an asset, matching Color, matching Focus, matching Grain (if needed), masking for accurate placement in 3D-Space, repeat.
In the end these are all the compositing layers that have been added to the scene to create the final artwork.
Conclusion
It’s an incredible opportunity to be working with iD Gaming and bringing the world of Operation: Deli Platter to physical products this early on!

For the uninitiated: Operation: Deli Platter is a world in early development at Blauw Films. A 3D-animated series lies far into the future, but the IP expands beyond that.
Games, collectibles, conspiracies, and beyond…
But today we’re starting with eSports desk mats.


Reading List
References
- iD Gaming x Operation: Deli Platter — Website
- Bakermat Antwerp Virtual Library — Website
- Maxon Cinema 4D — Website
- Chaos Corona — Website
- Style3D — Website
- Polyhaven HDRIs — Website
- Adobe Photoshop — Website
- Adobe After Effects — Website
- Foundry Nuke — Website
- DaVinci Resolve Fusion — Website
- ActionVFX — Website
- FXElements — Website
- VideoCopilot — Website


%20by%20Ivan%20Aivazovsky.jpg)


0 Comments