Adding Realism with Industrial Decals
Small stickers for texturing 3D Models
Blauw Films


Photorealism can be seen as a Sisyphean task. Not directly impossible to achieve, but there will always be more you can do about it.
I've particularly ran into this issue during the asset development stage of Syntactic Labyrinths.
We have countless of hardware assets to develop — as well as the interior design of a construction site. During the texturing stage I quickly realized that each scene was missing a key-element of natural realism.
Small decals that are based on real life "non-design".
Realistic Decals "without Design"
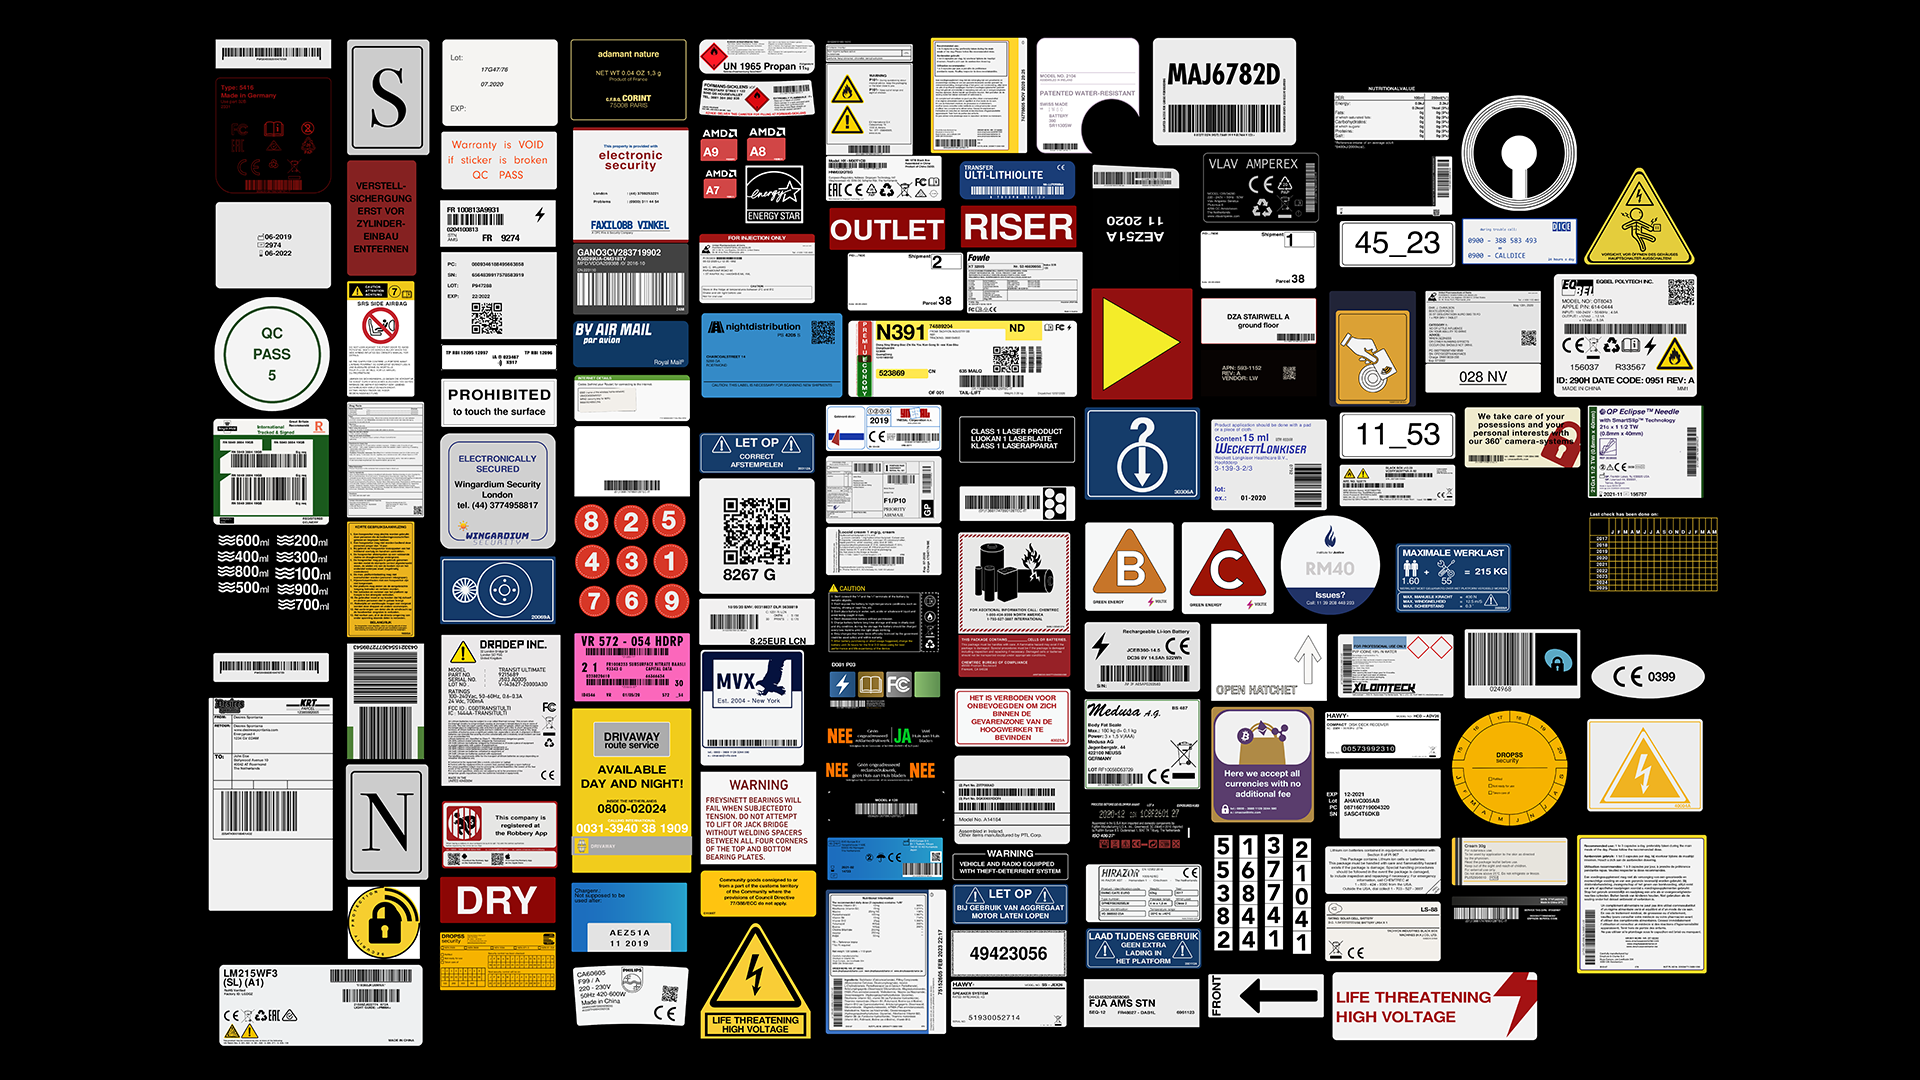
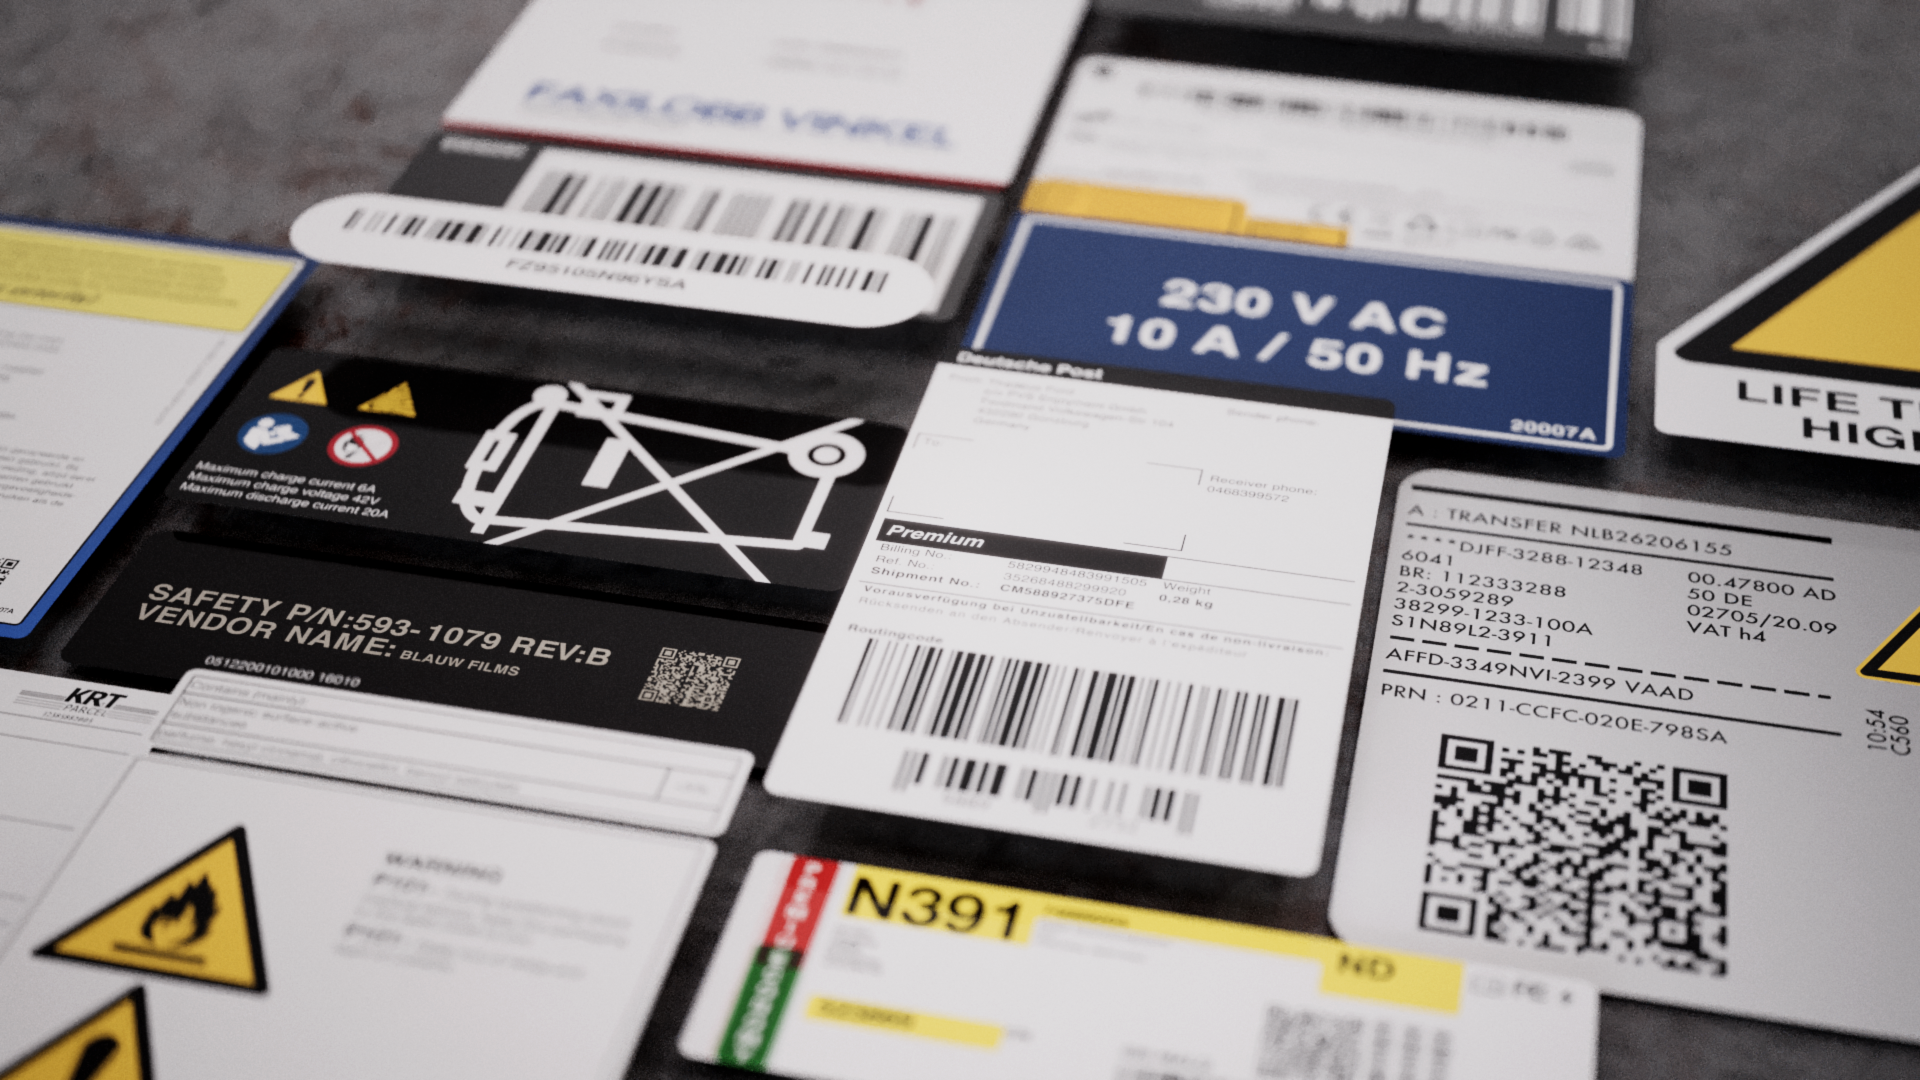
In the real world there are thousands if not hundreds-of-thousands of companies or institutions that contribute to our modern infrastructure. And you can be sure that they leave their mark.
Whether it be a small barcode used as a product identifier, or a safety label that warns users of potential dangers, these "invisible" design elements are ever present in the world around us. But due to their innate non-design aesthetics they are often missing in 3D-renders.
It was clear to us that we needed as solution for this —
An ever expanding decal pack dedicated to industrial design elements, directly inspired by real-world examples. *Including imperfections in all their organic glory!
There are many methods of applying decals into your 3D-render. From using a 2D-card, to projection mapping to adding the decal directly into your UV-texture. Each has a slightly different use-case as well as their own pros and cons which we will get into in a bit.
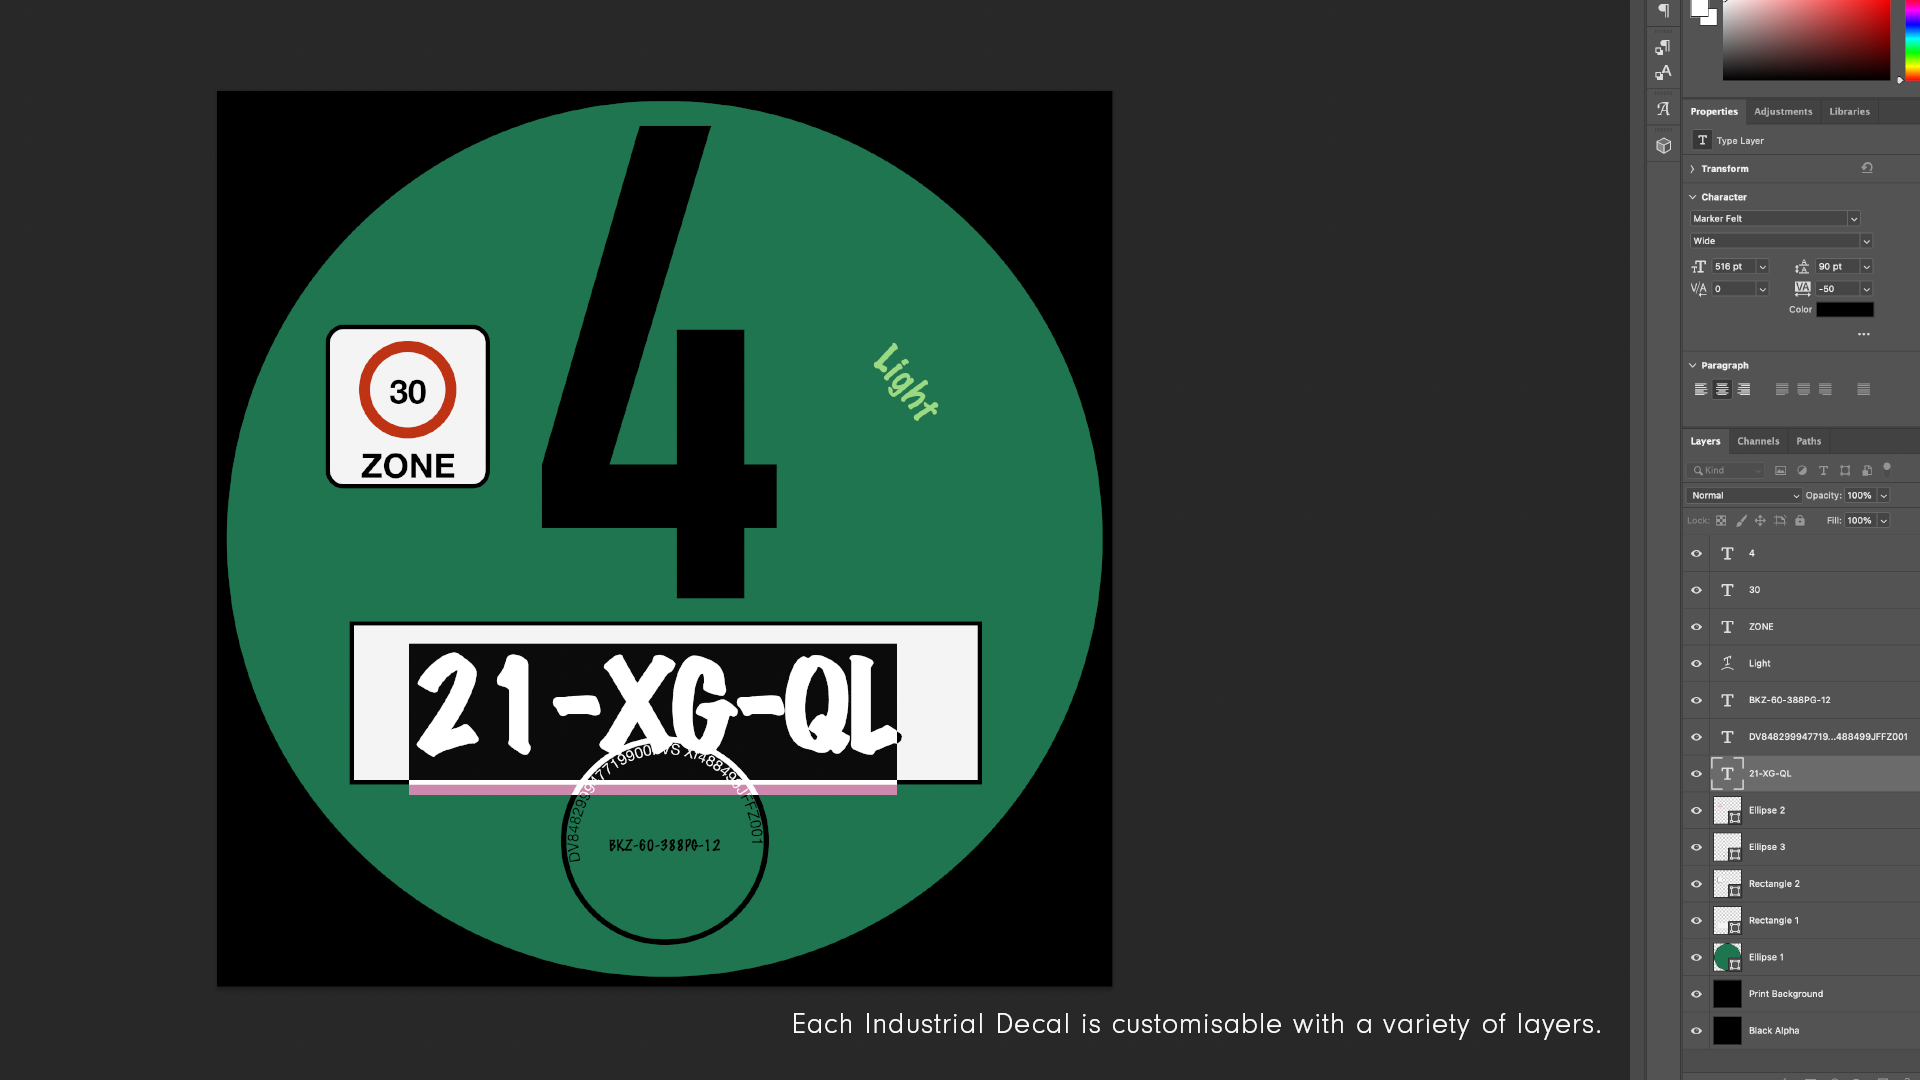
And before you start placing your decals it actually starts with choosing and customizing the ones your project needs.
For the Industrial Decals pack it was clear we had to provide customizable Photoshop files (.psd). Storytelling is a part of every 3D-render, even in the most subtle ways.
And decals have an incredible ability of hinting at a story outside the borders of your image.
How to apply Decals to your 3D Models
Let's first have a look at how to apply a decal using the Chaos Corona Decal object (available in Cinema 4D and 3DS Max).
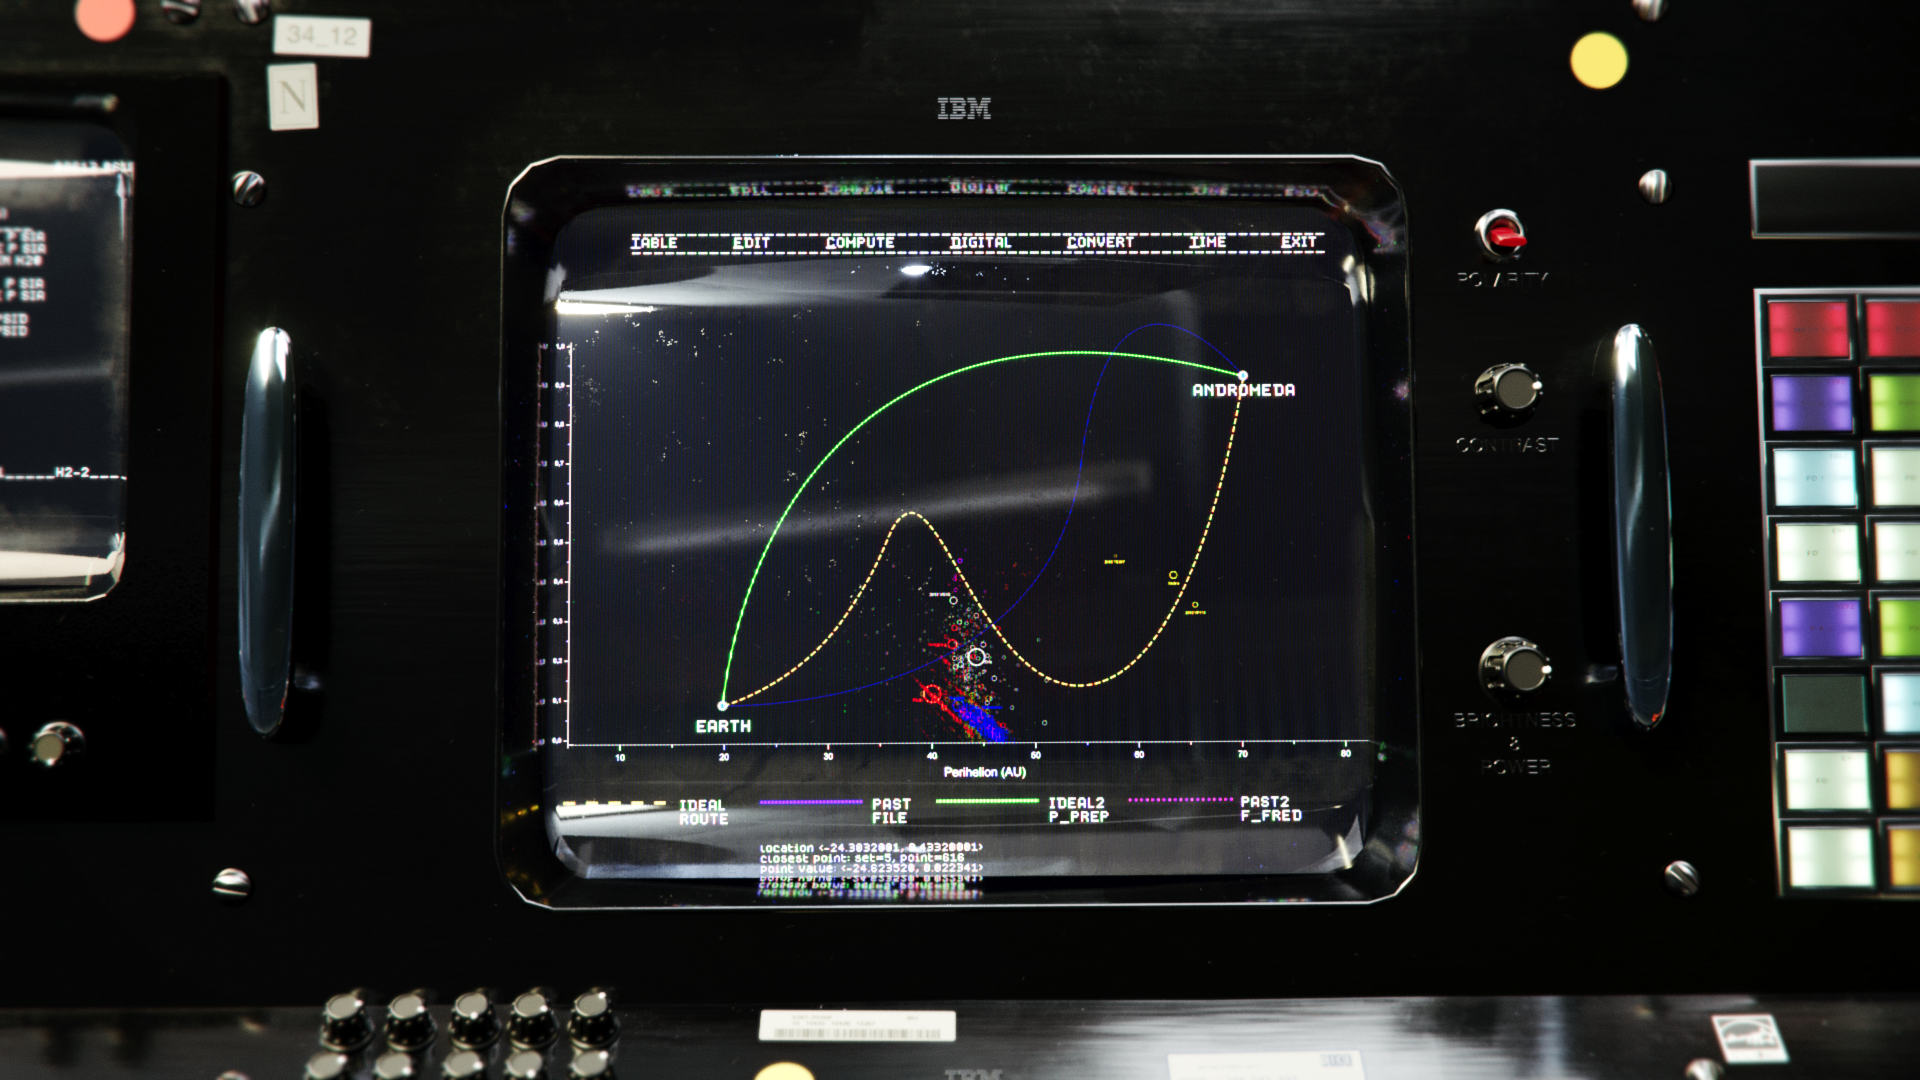
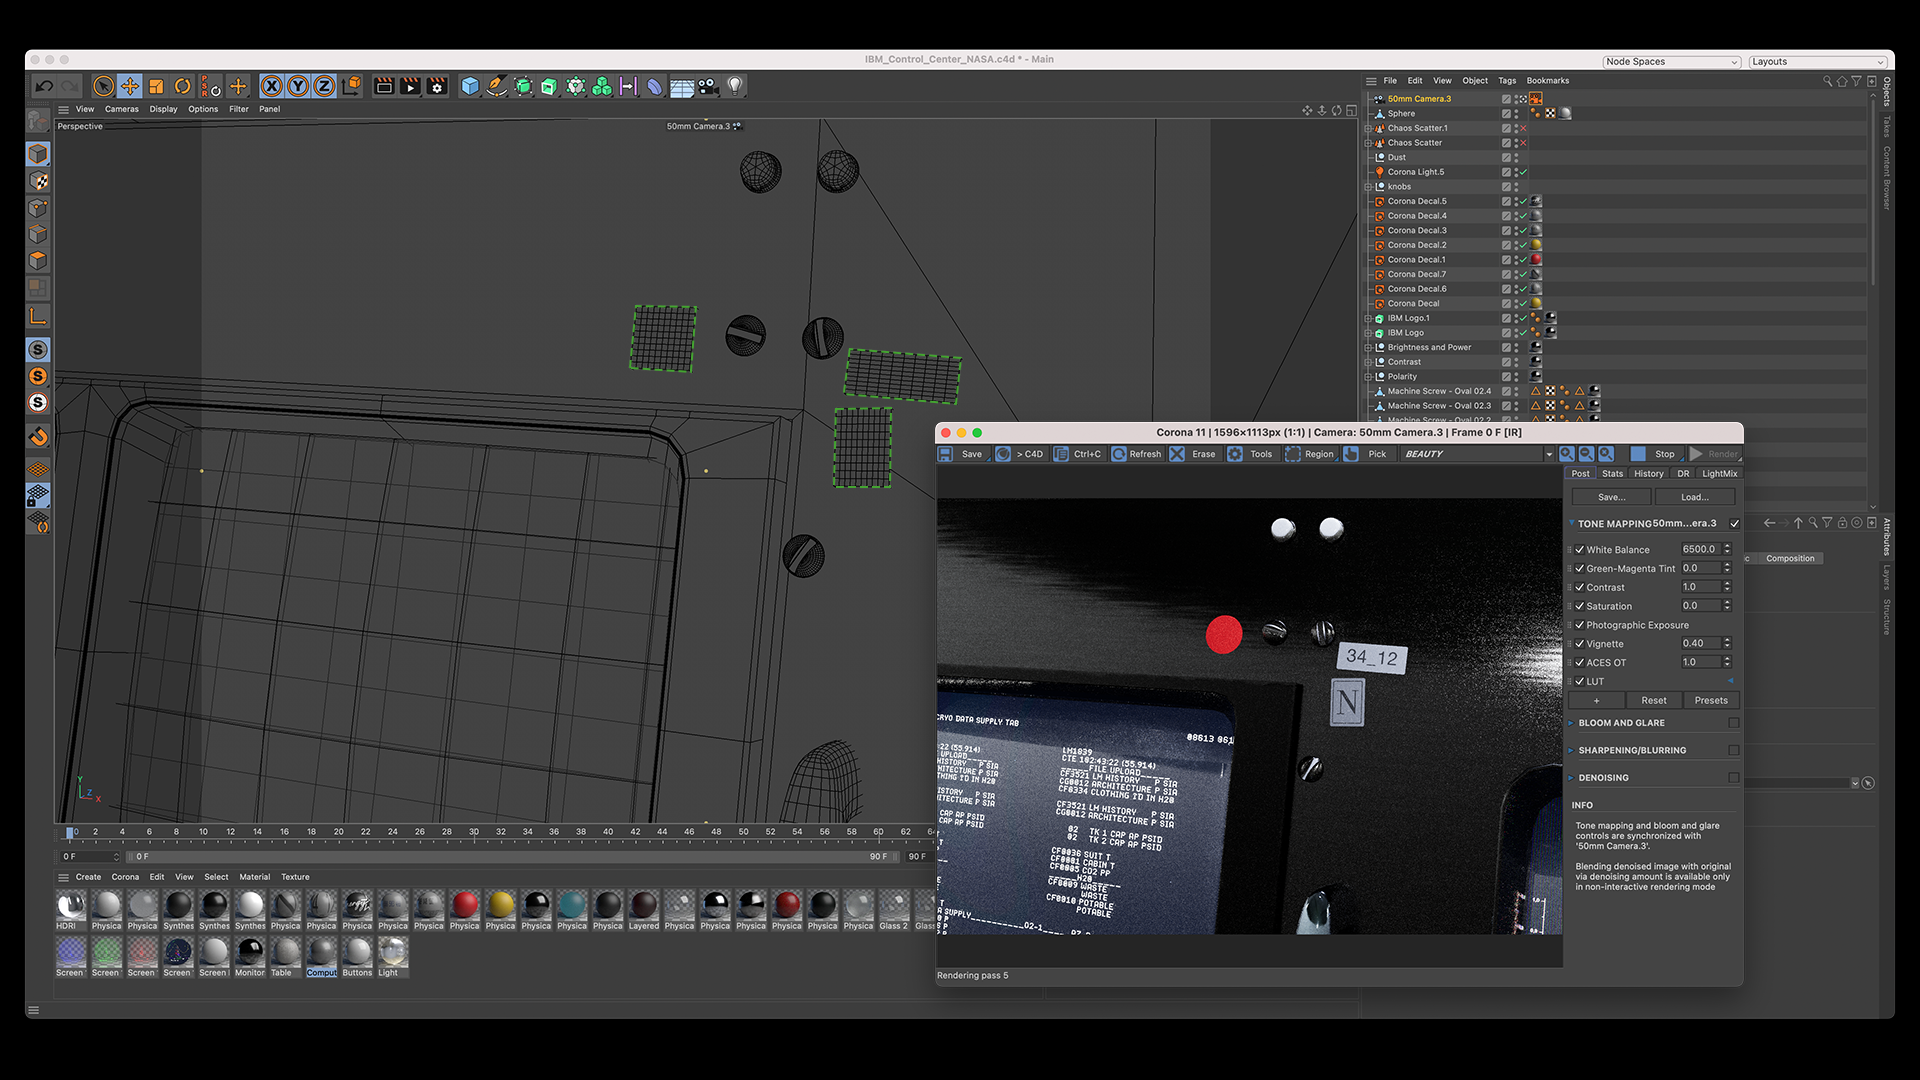
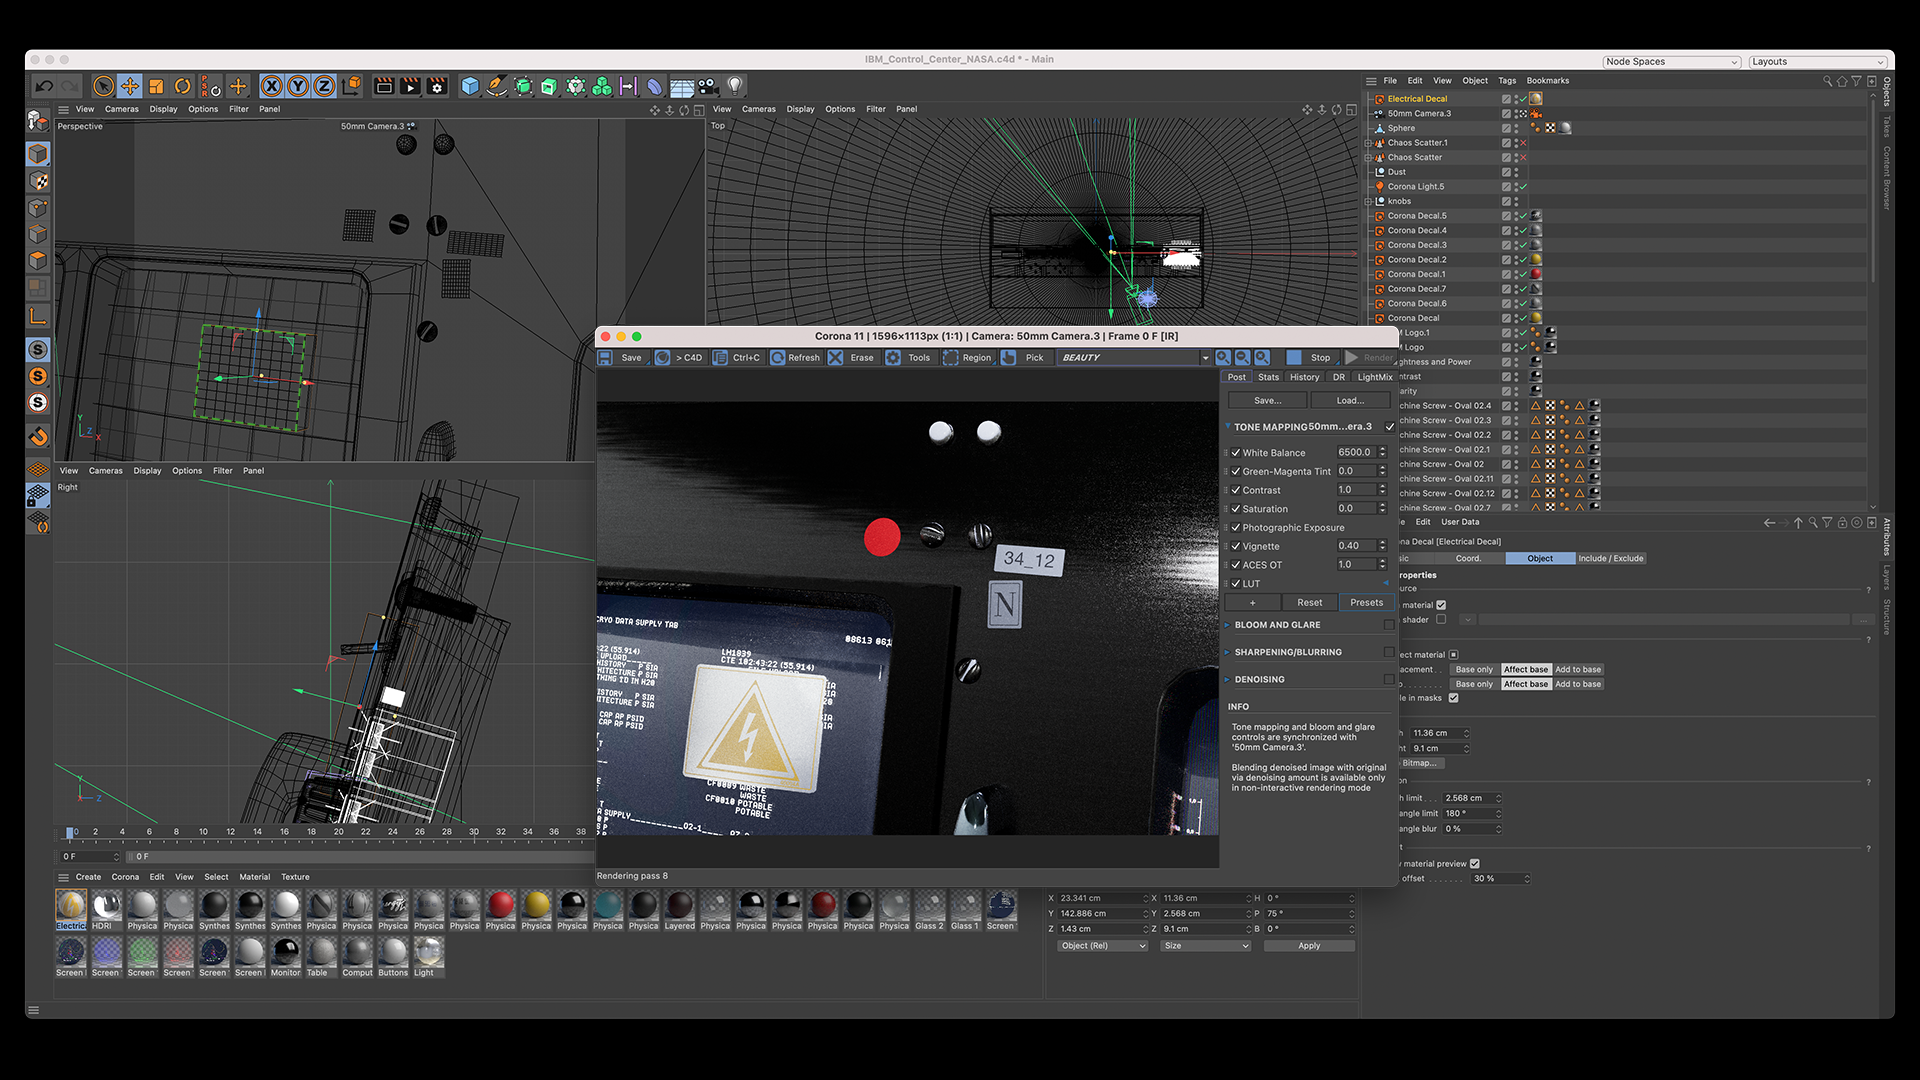
Below is a still from Syntactic Labyrinths in which we look at the journey from Earth to the Andromeda Galaxy. We are looking at an IBM mission control computer that has a variety of small decals on its surface.
The decals are there to add a sense of realism and dare I say "randomness" to the image.
For a shot like this I wanted to have control over the decal placement after the placement of the camera. That way I could be sure that the important decals would be "in frame" — and could quickly be iterated on during testing.
The 2D-card decal is the best way to go in this situation.
As you can see below, I have highlighted the 3 decals that have been placed with a green outline. These decals were placed using the Corona Decal object.
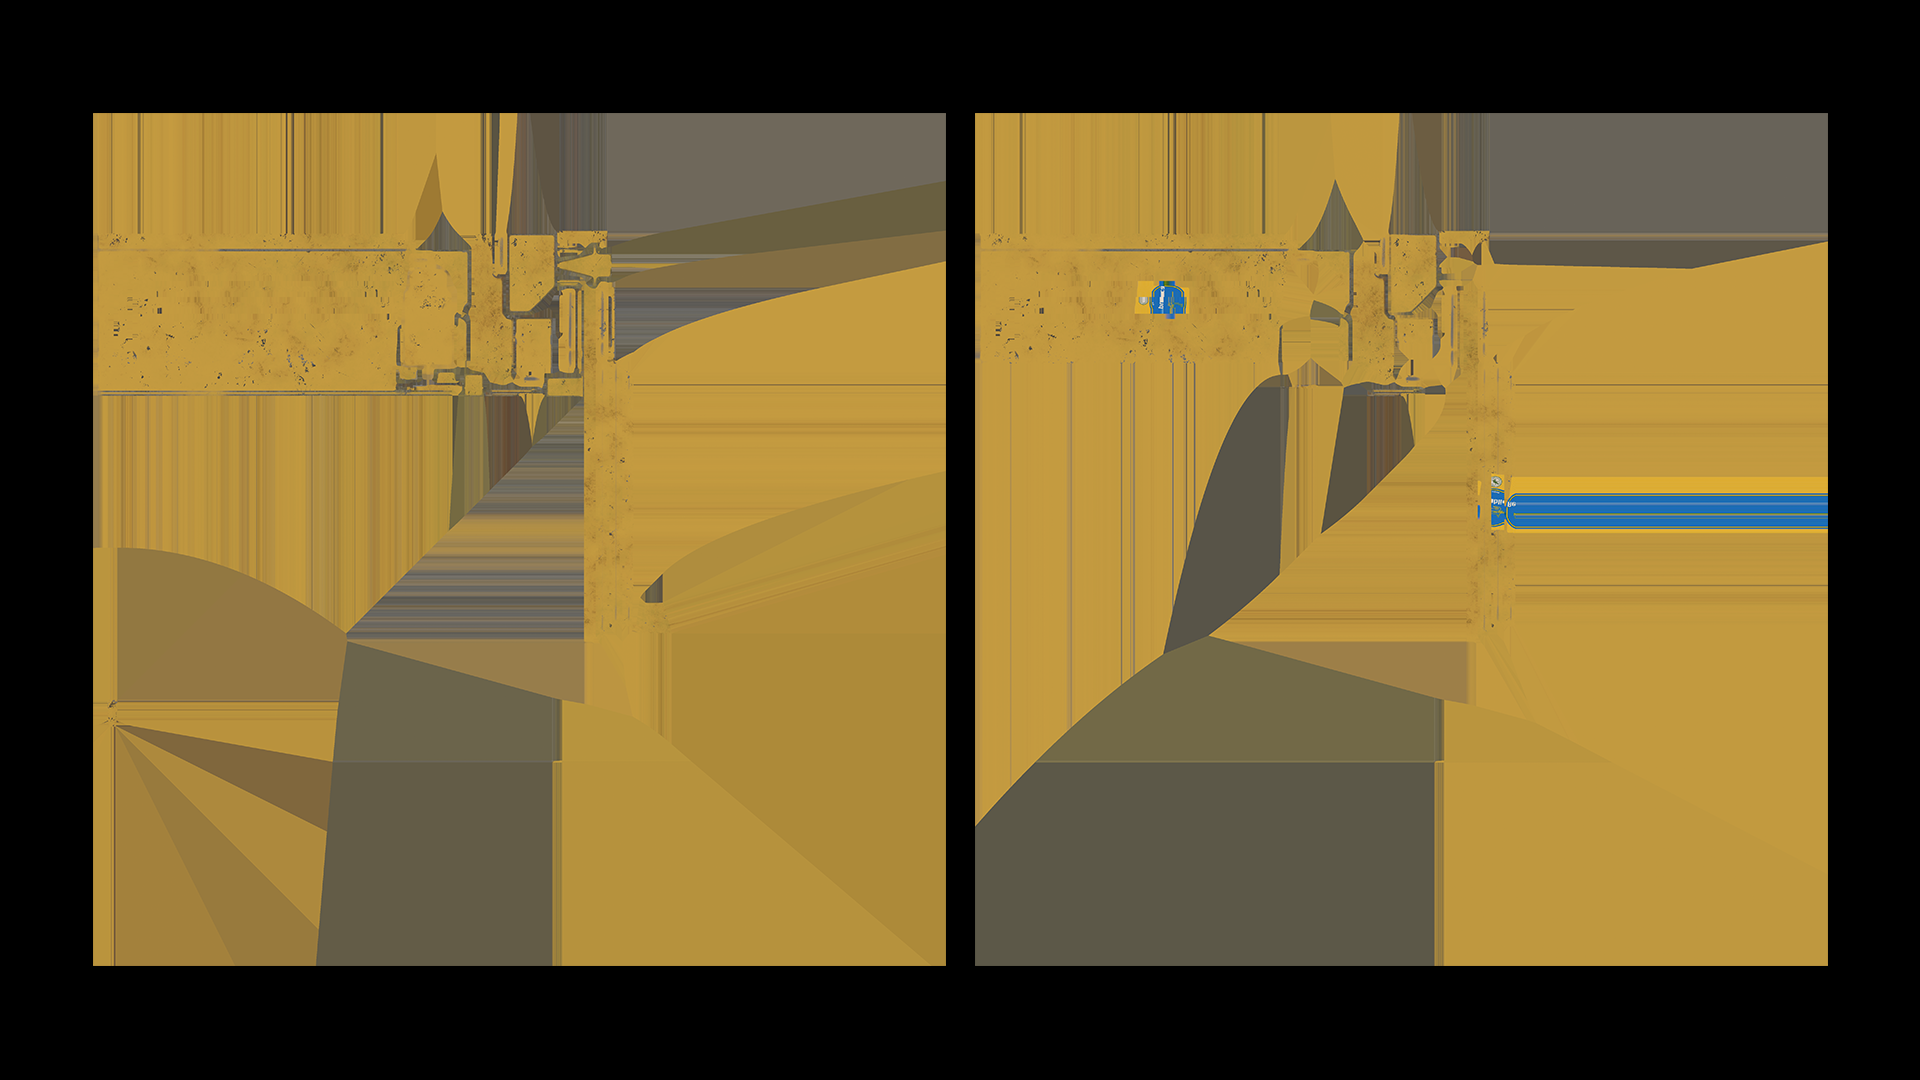
By intersecting the Corona Decal with the object you want to have decal-ed, you will "project" a material onto that surface.
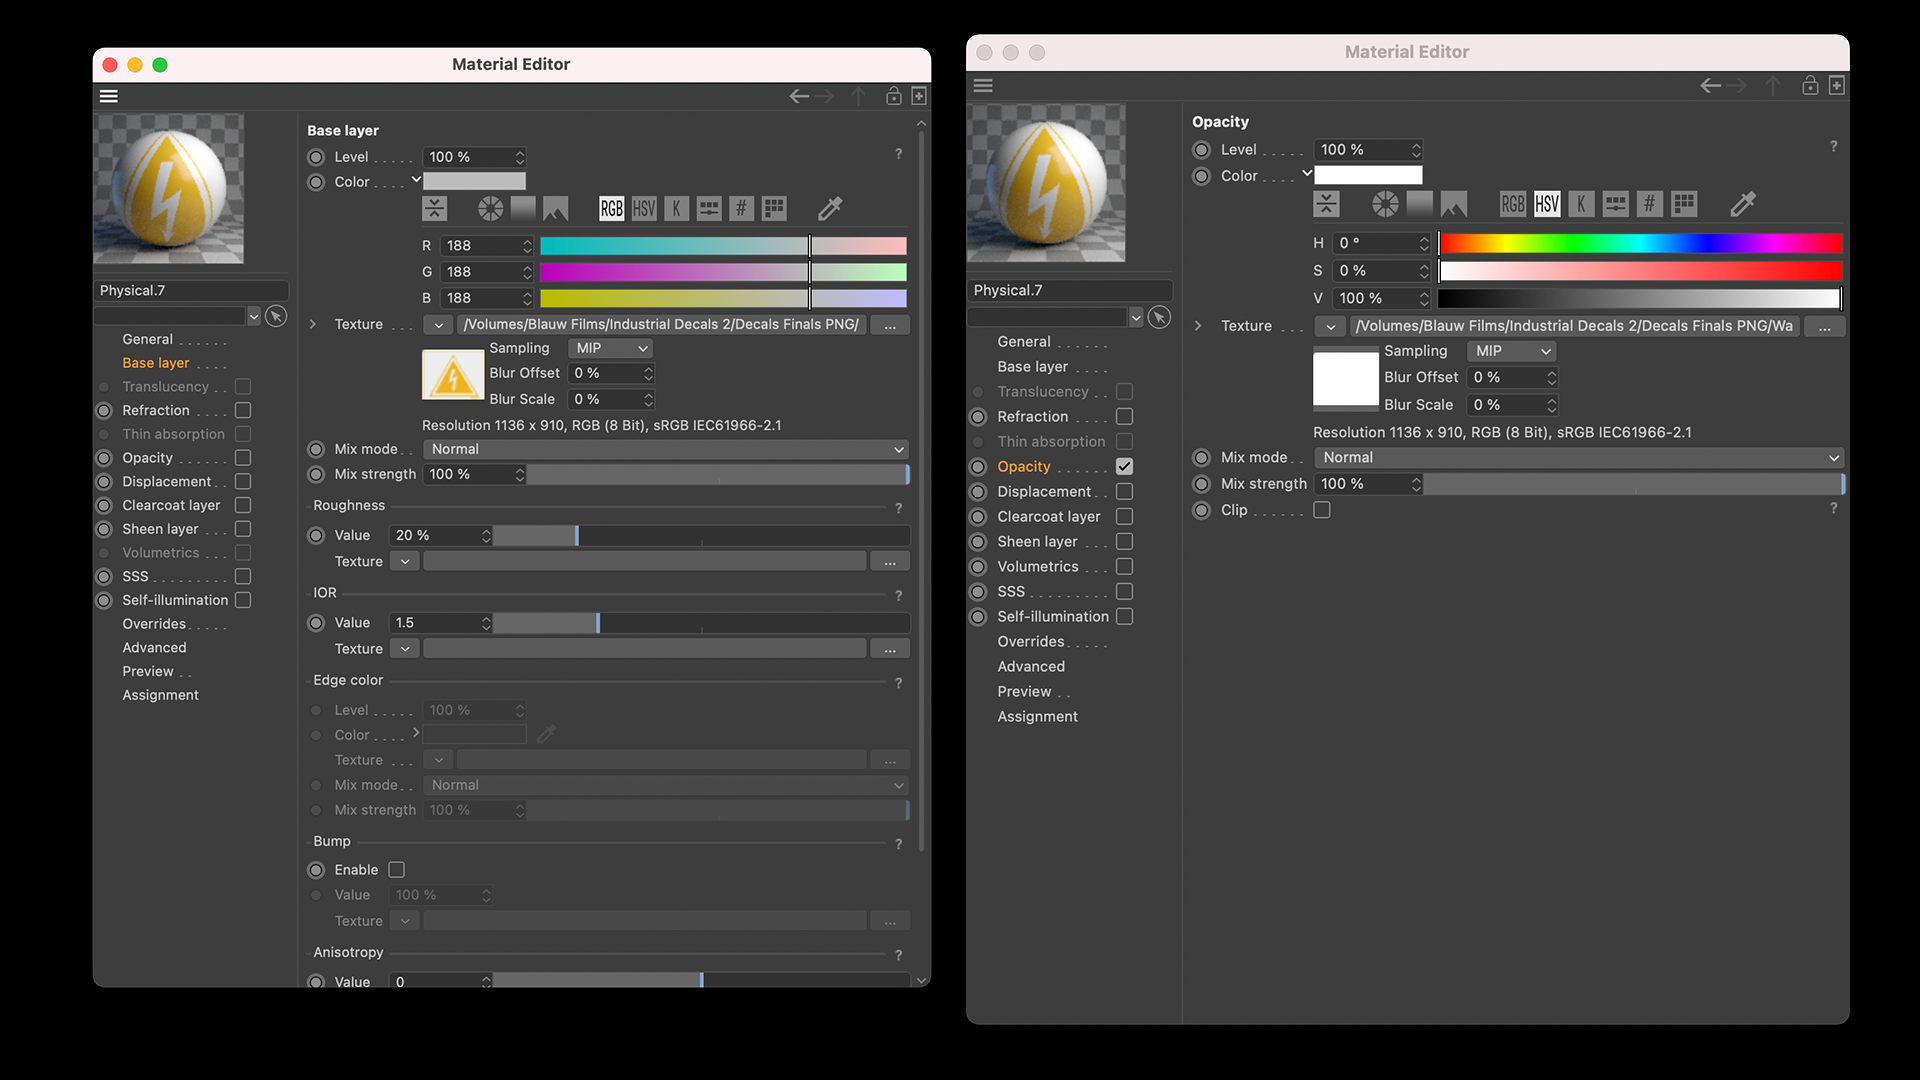
To show this in action, let's make a new Corona Decal and give it a new decal material.
Here I have a simple material for a sticker that uses a Diffuse, Roughness and Opacity. The mask used in the Opacity can also be applied to the Displacement channel to add a very thin Height to the sticker.
I've rotated and positioned the Corona Decal to nicely intersect the mission control computer.
To make sure your Corona Decal is not intersecting every other object in its way you can either
- Decrease the depth of the Corona Decal object
(its bounding box works similar to a cube object) - Manually select which object you would like to Include/Exclude
As you can see below, the decal I have highlighted green is now visible in the Interactive Renderer. And if I want to rotate or move it, I can simply move the Corona Decal object.
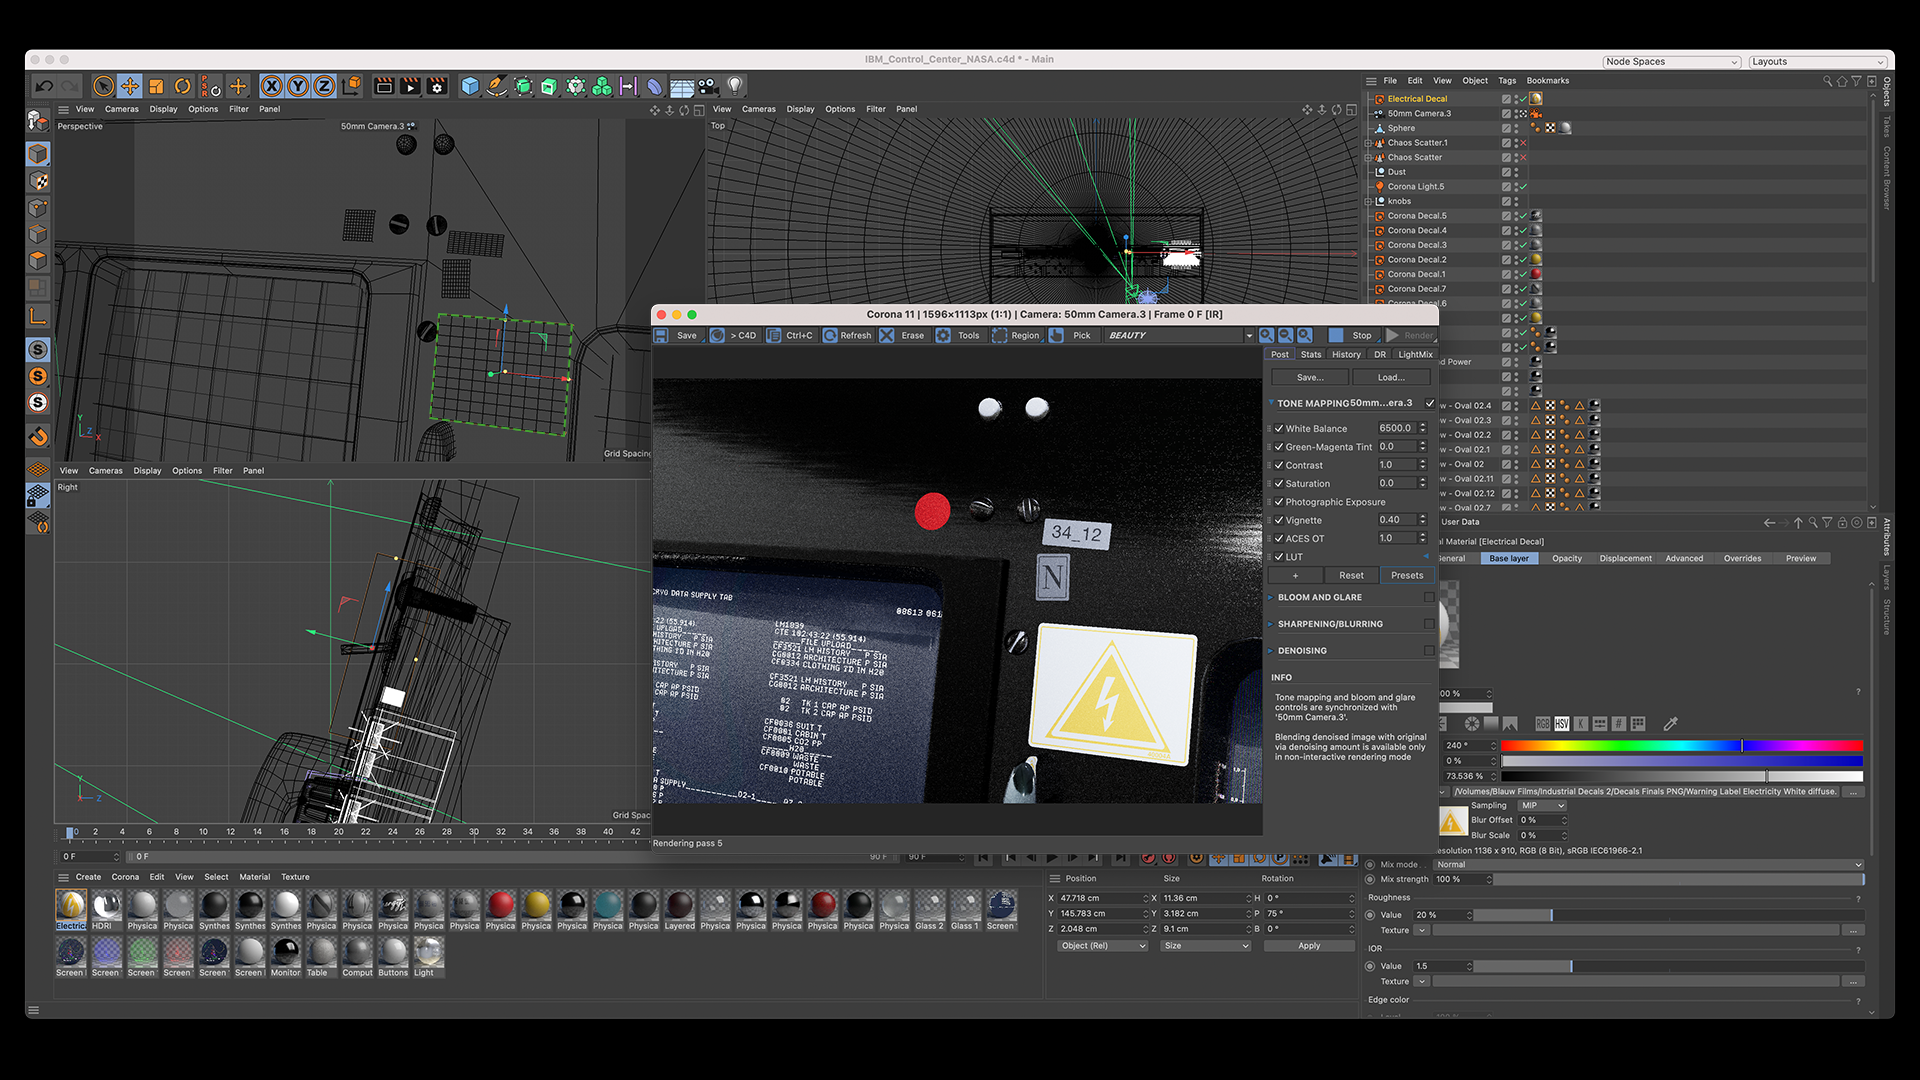
What I personally find incredibly powerful with the Corona Decal method is that you can wrap the decal around curved surfaced. I remember that before using this solution you would often be using the Shrink Wrap Deformer inside of Cinema 4D.
With the Corona Decal you can work around any surface as long as
- Your Bounding Box intersects with the entire area of interest
- Your Target surface has decent topology to avoid glitching results

Now remember that the decal we are applying is just a Material inside your material library. You can make materials as complex as you'd like using Layered Materials, combining textures or adding effects such as a holographic foil.
The Corona Decal simply projects that material including all its detail onto the intersecting surface.
But let's do one simple adjustment to add a tiny bit of extra realism. Let's make the Material a "Thin shell" and then let's turn on Translucency.
This will allow the light from the computer screen behind this sticker to shine through and scatter into the paper. I'm using a darkened version of the original image as the Faction Value so that the "printed" area of the sticker is less translucent than the white paper.
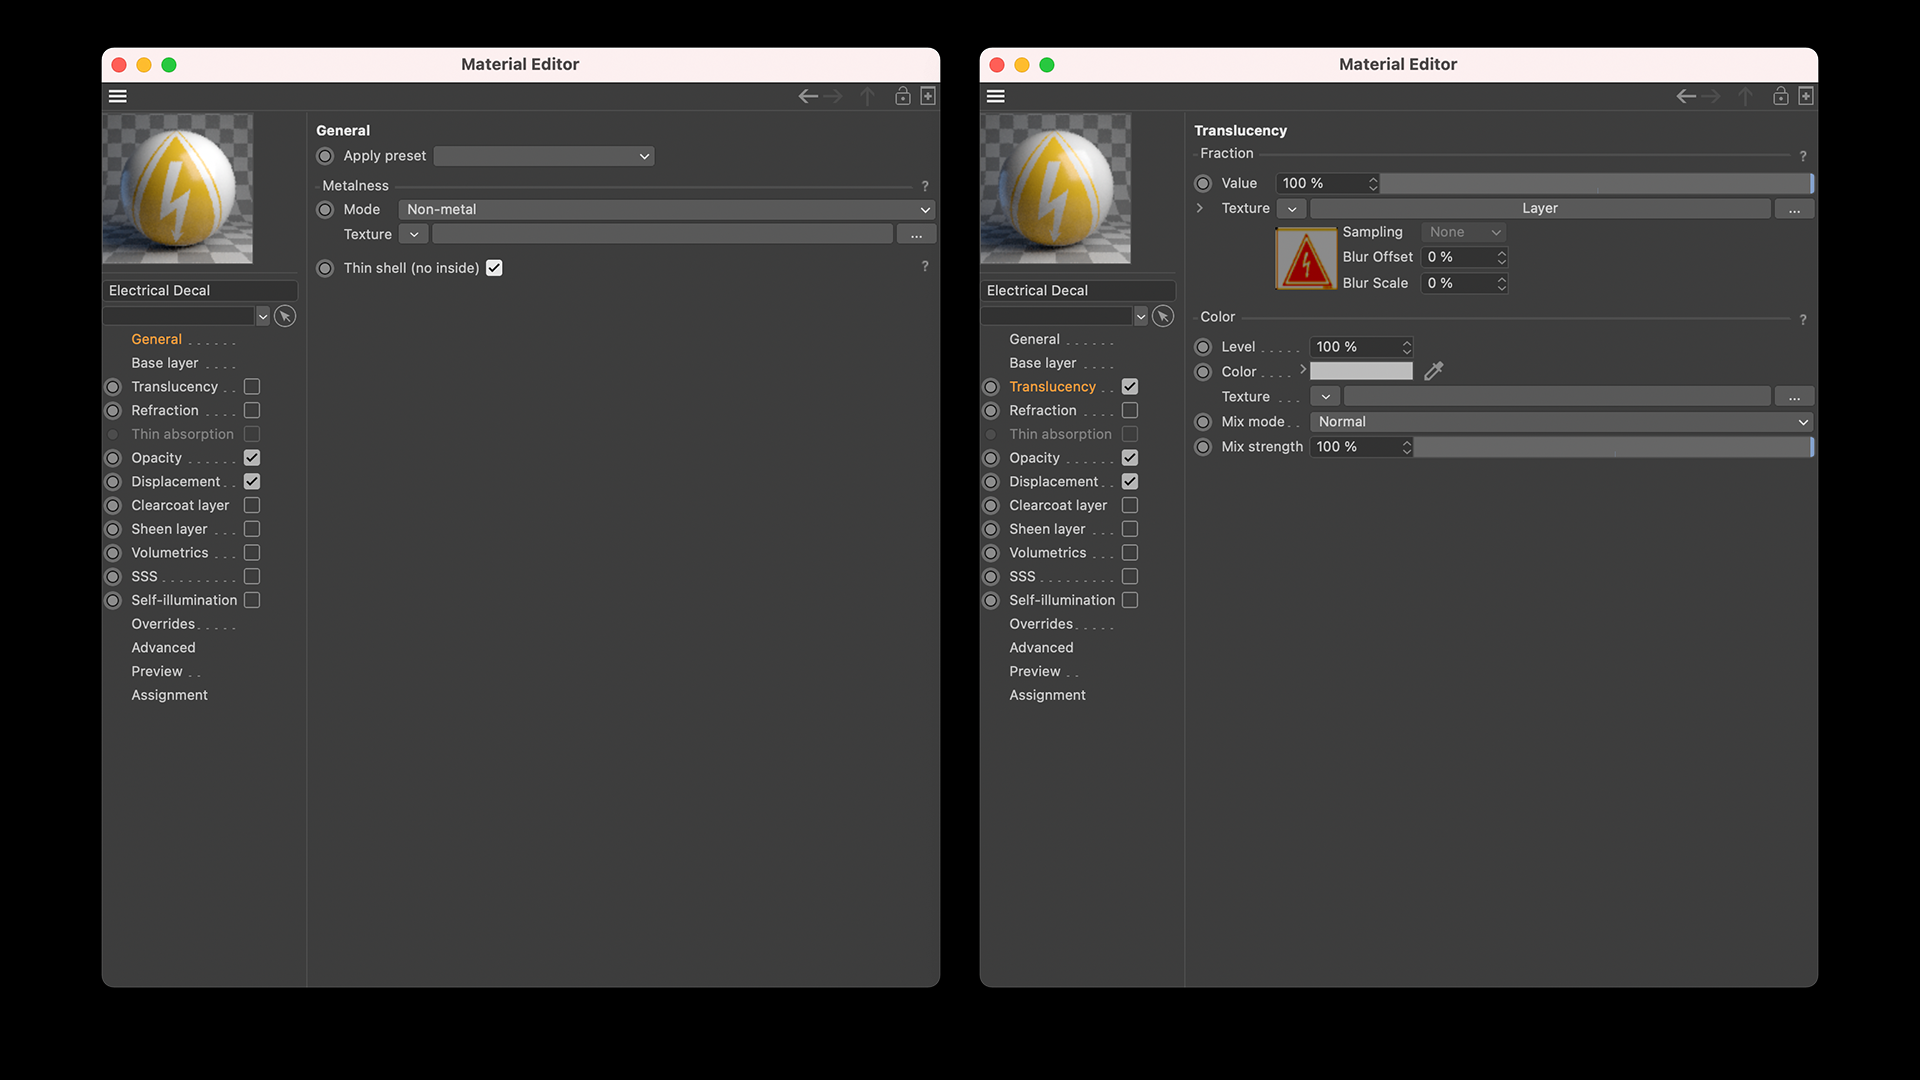
And there you go! As you can see below we have reduced the opaqueness of the sticker. Now it gets a tiny bit illuminated by the light coming from underneath.
Decals are an incredibly versatile tool to achieving more realism in your 3D-renders. In the example below I have Gundam RX-78-2 with very simple materials.
The 3D-model has not been textured to the same level as the computer in the previous example. But with a small collection of Safety stickers from the pack we can add new points of interest in the image.
The decals communicate a story that add to a viewer's perception of this object.
A downside however of working with 2D-card decals is that it can be time-consuming to manually place each decal in 3D-space. As well as you now having to group all decals inside the corresponding objects to ensure you have no issues when animating. That is when applying the decal directly to the UV-map in way more efficient.

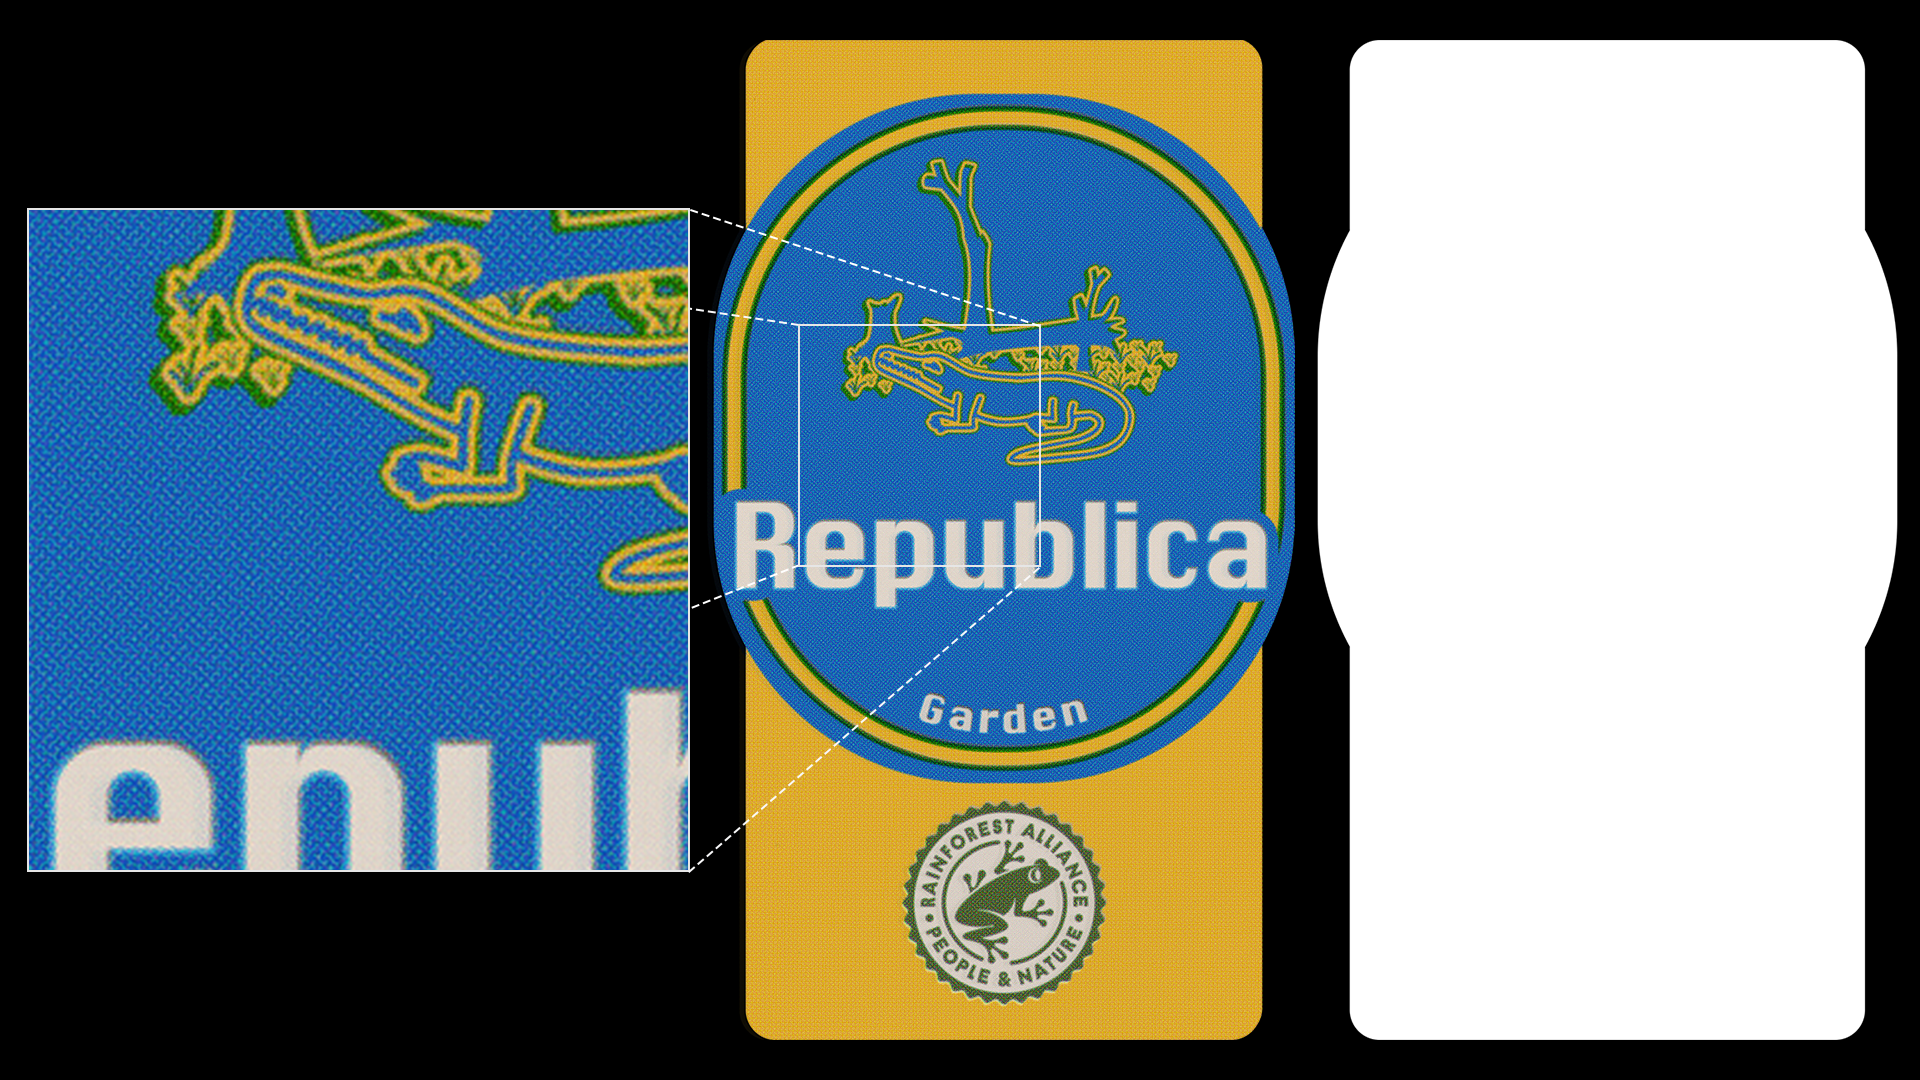
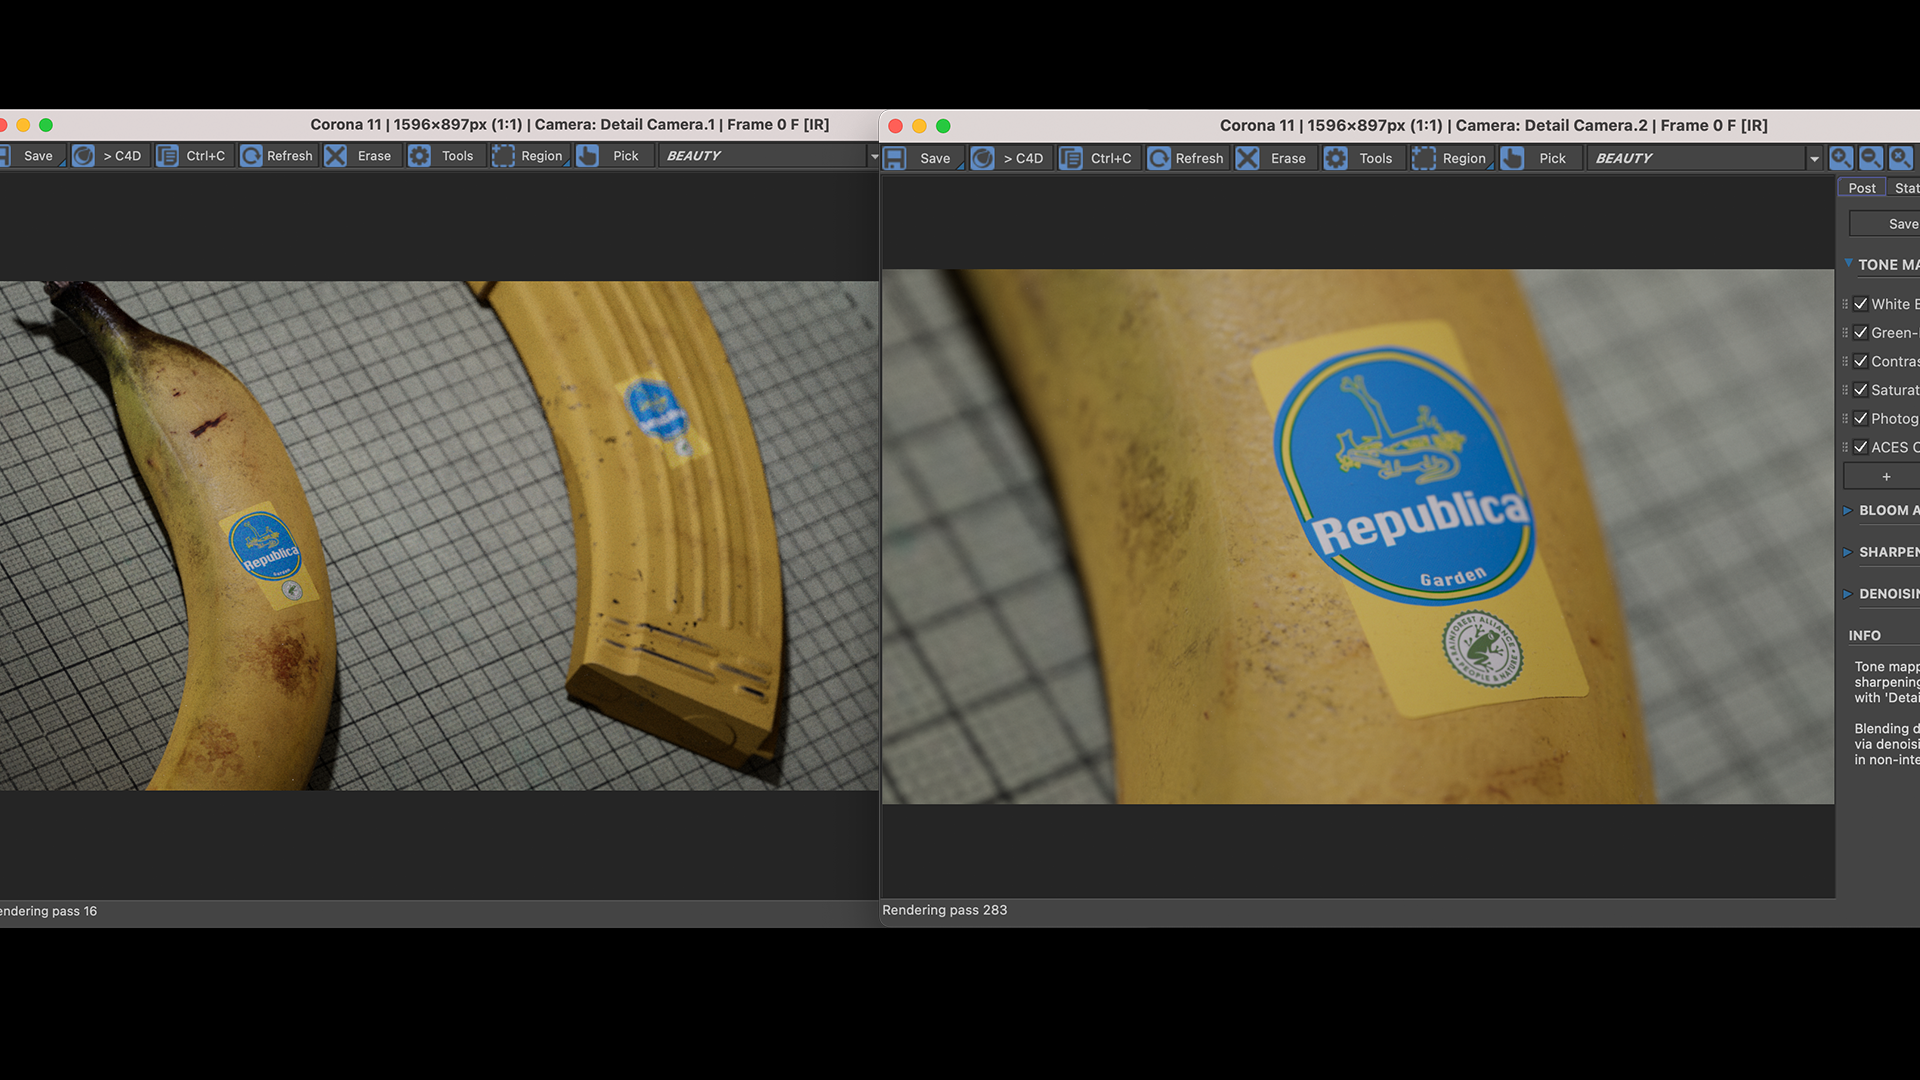
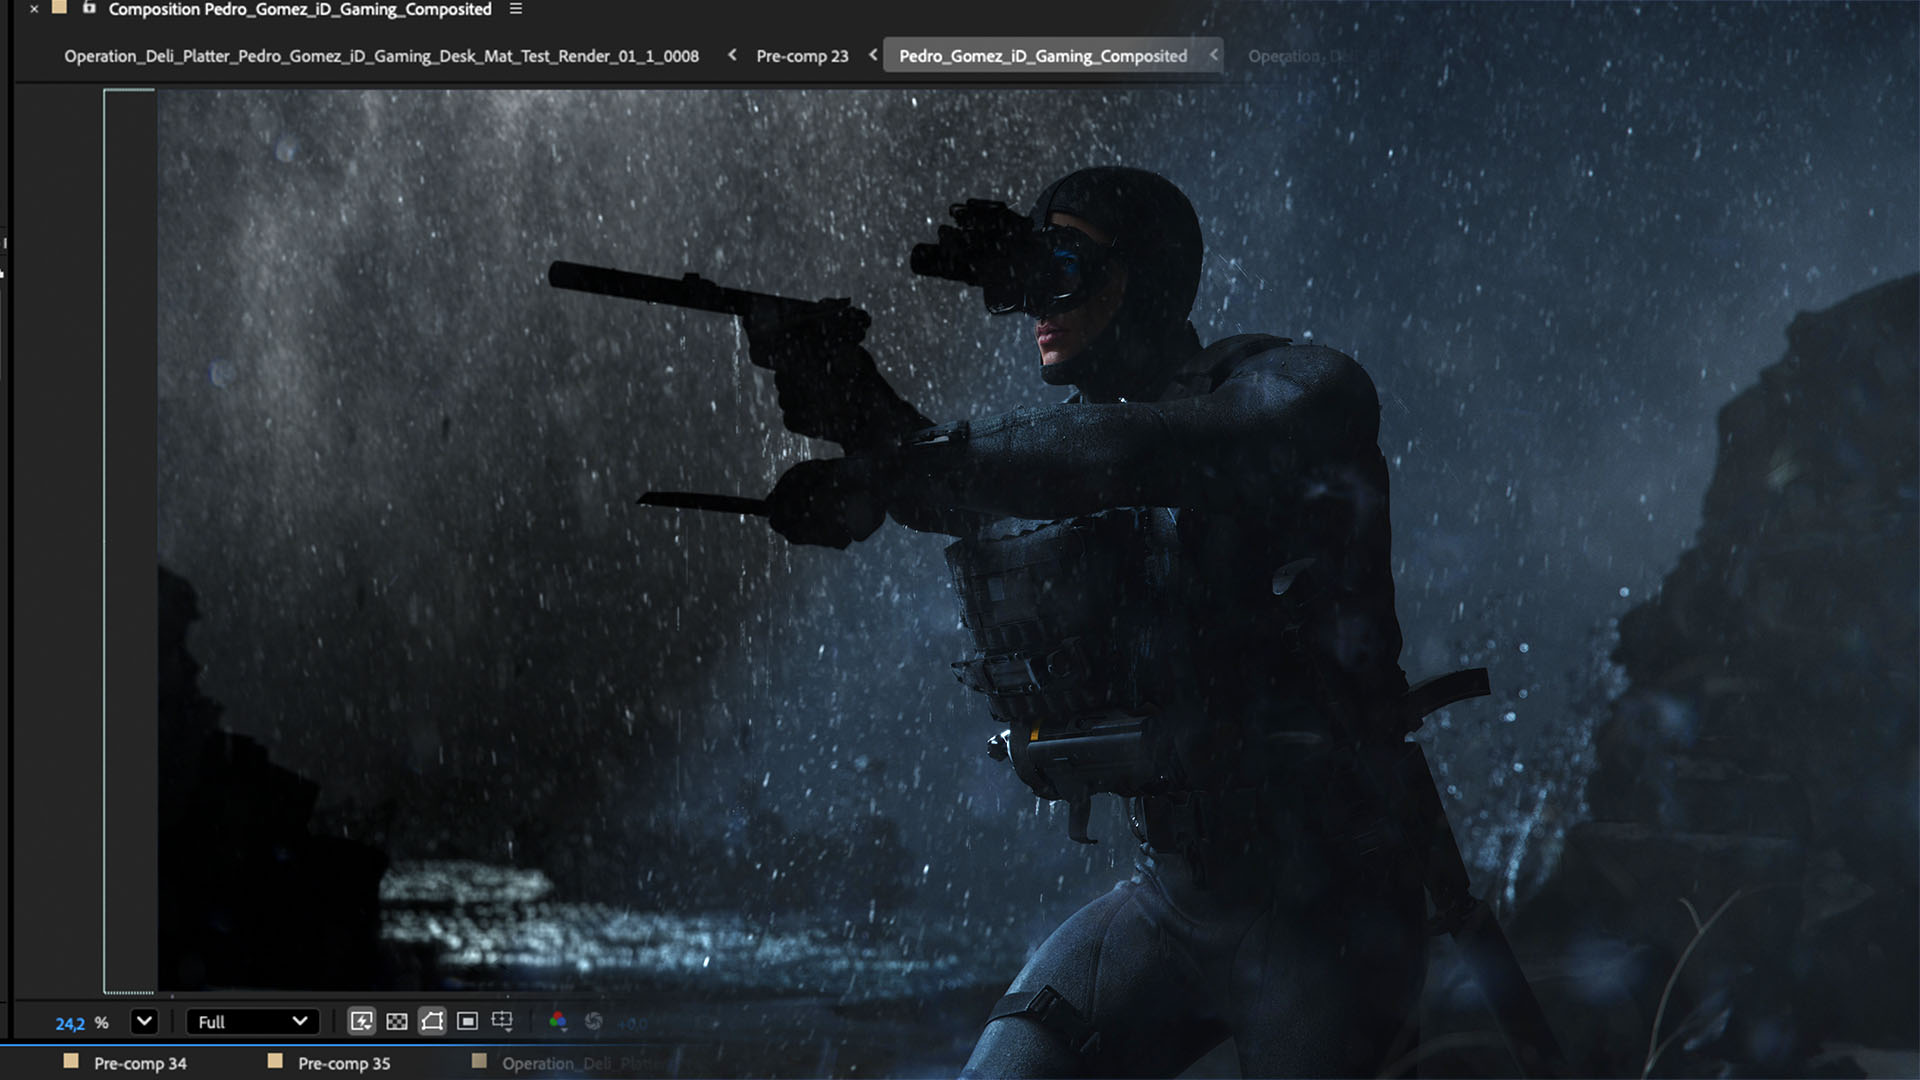
An example of a decal added to the UV-map of an object is the Republica sticker on the banana clips from Operation: Deli Platter.
.png)
As we needed a crate full of these magazines it becomes illogical to manually place each decal. This is exactly when adding the decal directly to the UV-map will save you tremendous resources.
Each banana clip requires the same sticker in the same place. If you want to create variations you can do that by making adjustments inside your UV-texturing tool (I used Substance 3D Painter) and then exporting an alternate texture set.
Another small piece of advice I'd like to give is about processing your decal map before applying it to your scene. The Industrial Decals pack includes over 200 different assets, each customizable to have the text and colors you need for your asset.
But I've purposefully left them untouched in the post-processing side of things.
I'm talking about adding grunge maps on top of your decals such as scratches or fading of the ink.
Or what I like to do with any focal-point decals: Adding a Half-tone effect on top.I do this directly inside of Photoshop by first increasing the Image Size of the file followed by Filter - Pixelate - Color Halftone...
*Increasing the image size is important for the half-tone effect to render with enough resolution.
As you saw, the banana clip made use of the UV-map to have the decal baked in to the texture maps.
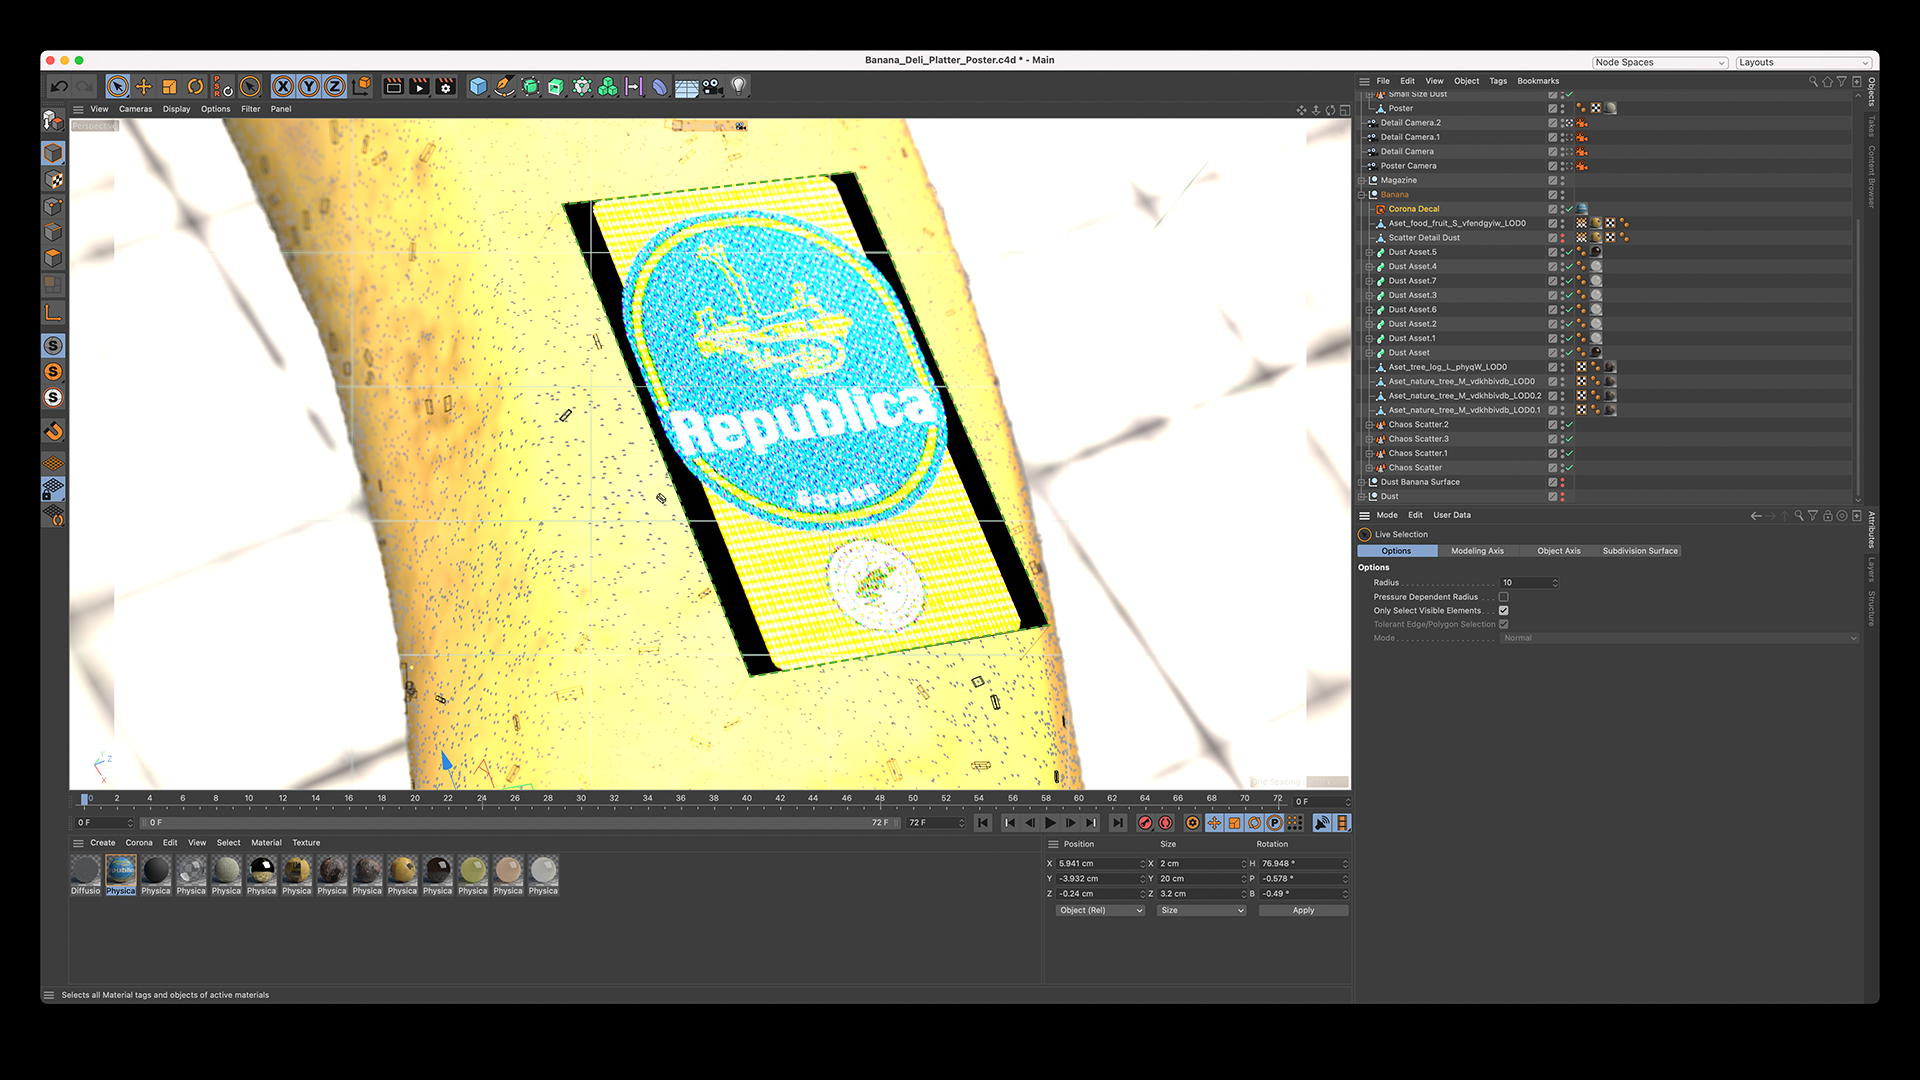
For a banana itself as a piece of fruit, I'd rather use the Corona Decal again. We have an organically curved surface with Displacement levels that I wish to control further during lighting.
I do not want to be tied to the placement of the decal on the UV-map, as well as that I don't want to affect the decal's Displacement levels together with that of the banana.
So, Corona Decal it is:
Adding decals to your scene is an incredibly effective way of bringing your assets to the next level. And the way you apply your decals really depends on the situation.
The look and feel of your decal is just as important as the technique behind its application. Thus leveling-up your 3D-render to be even cooler!
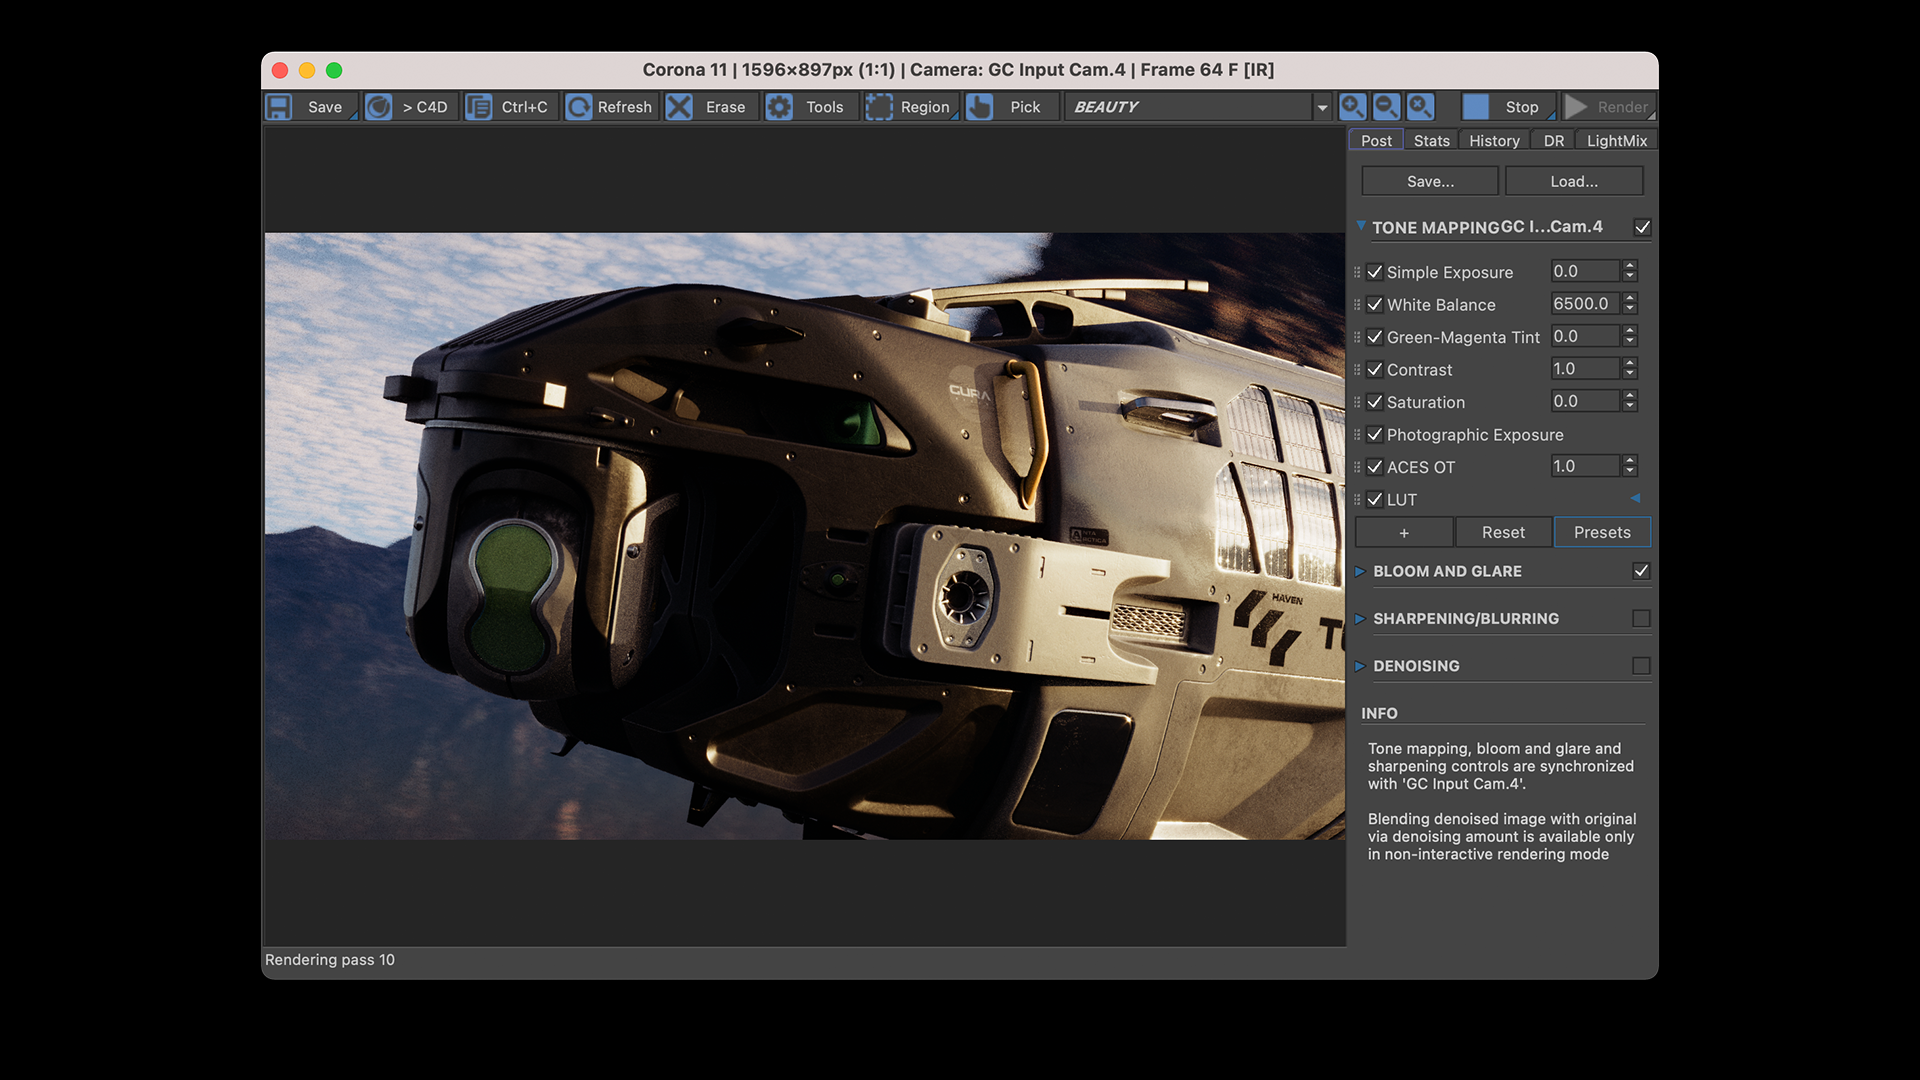
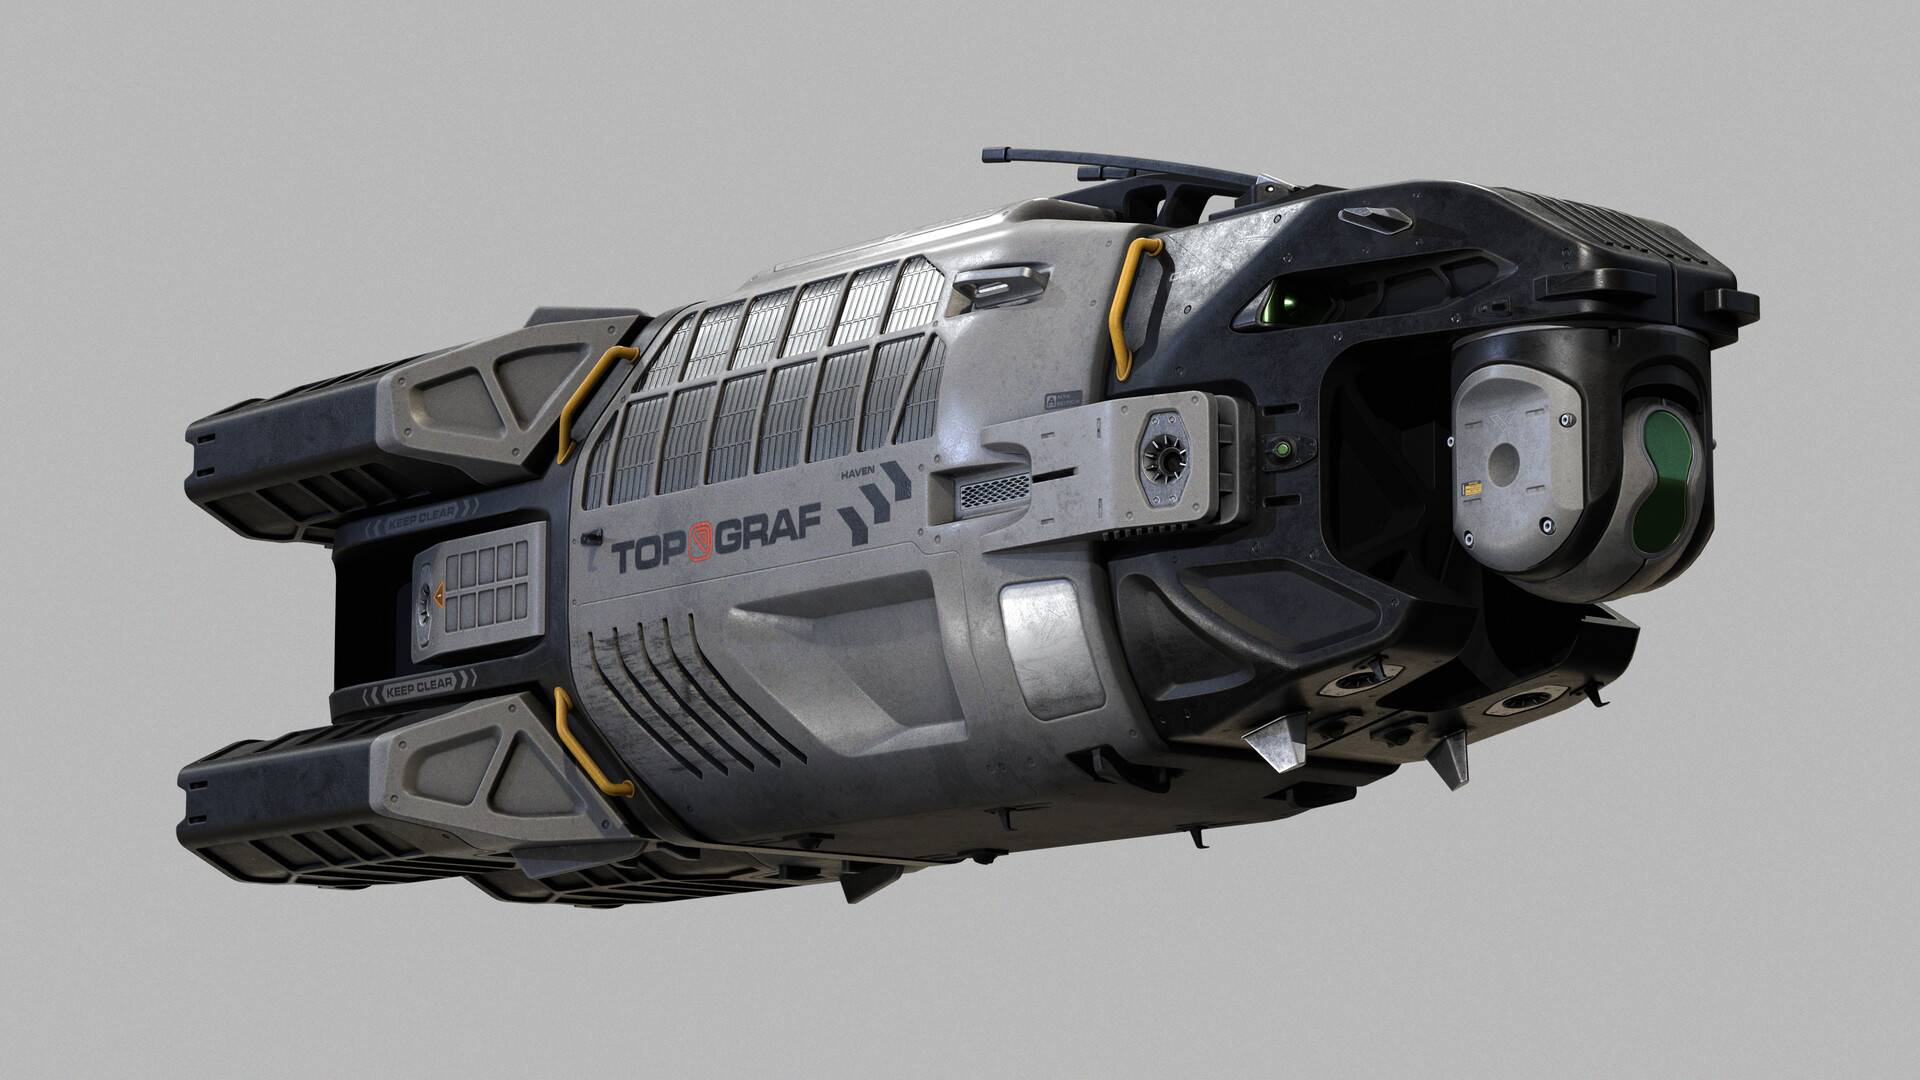
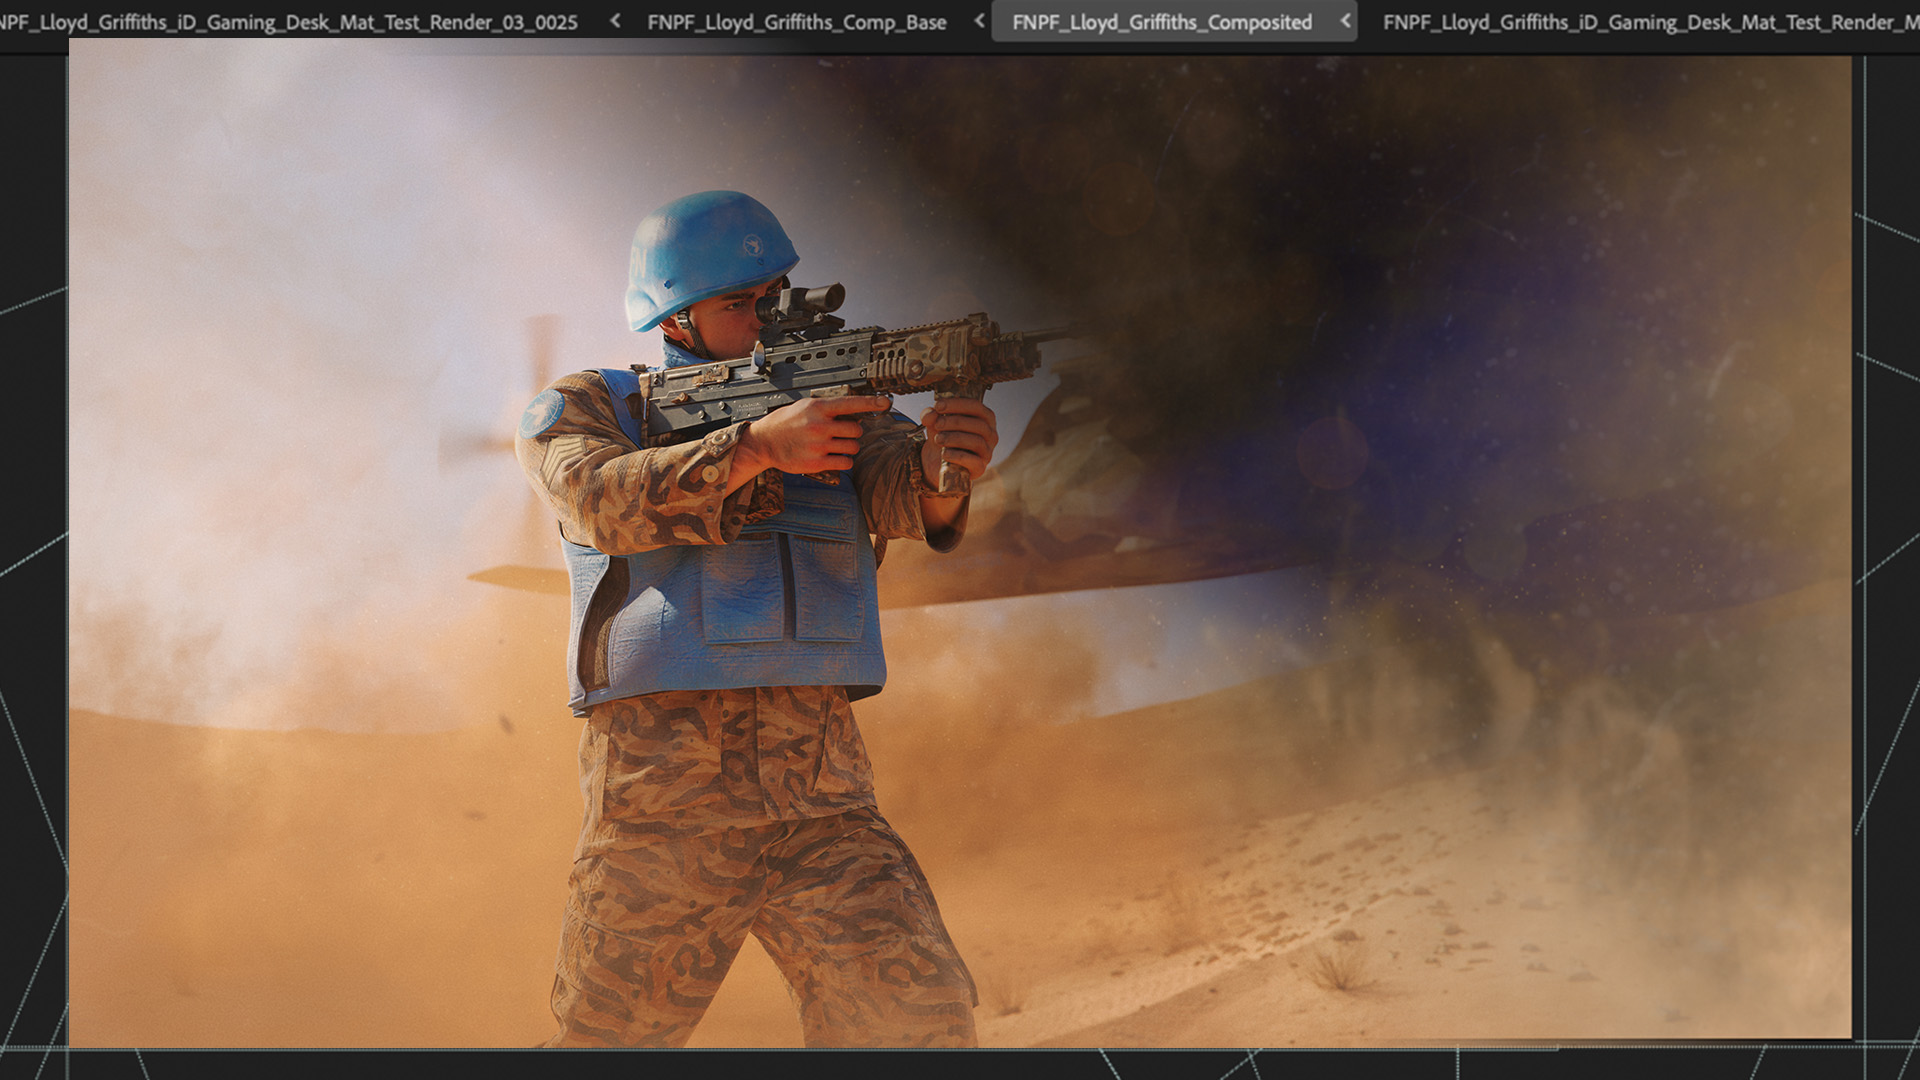
I'd like to end this post with this example from the GURA® AORU Cinematic Trailer.
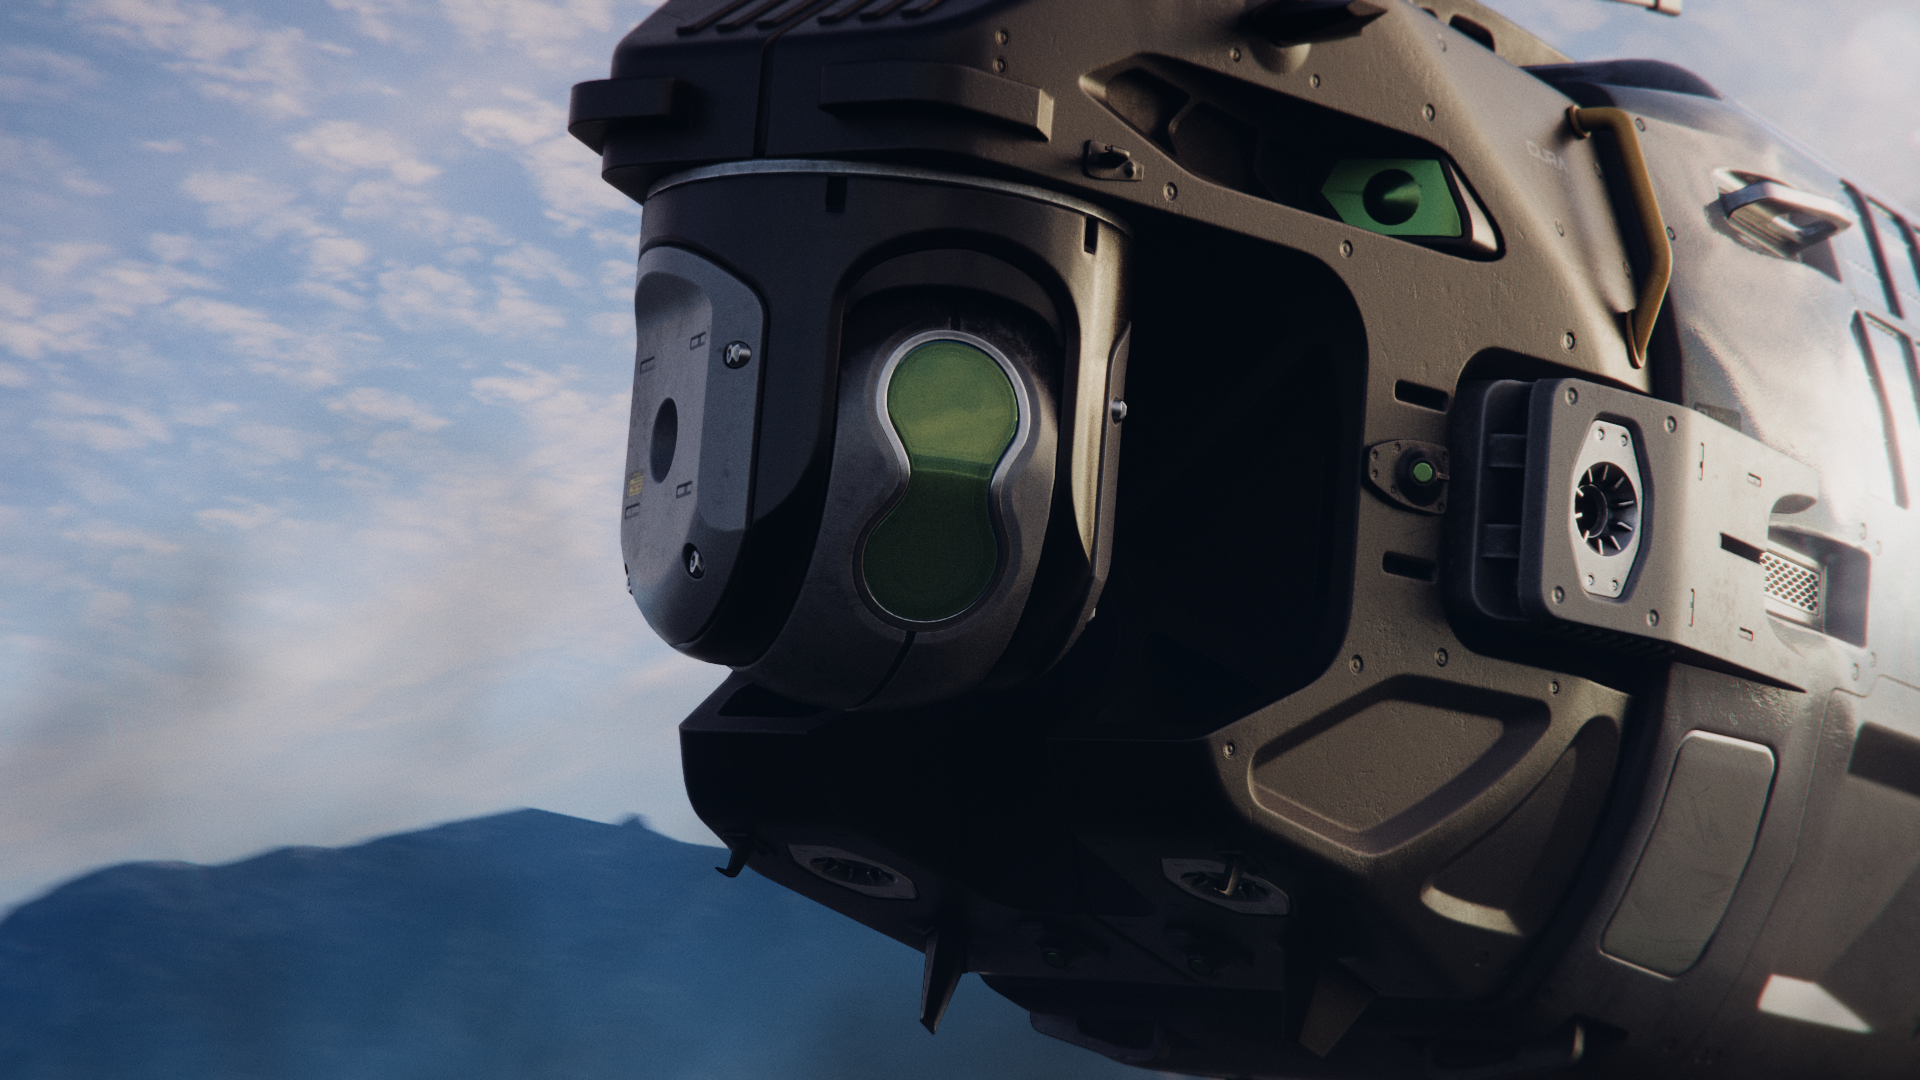
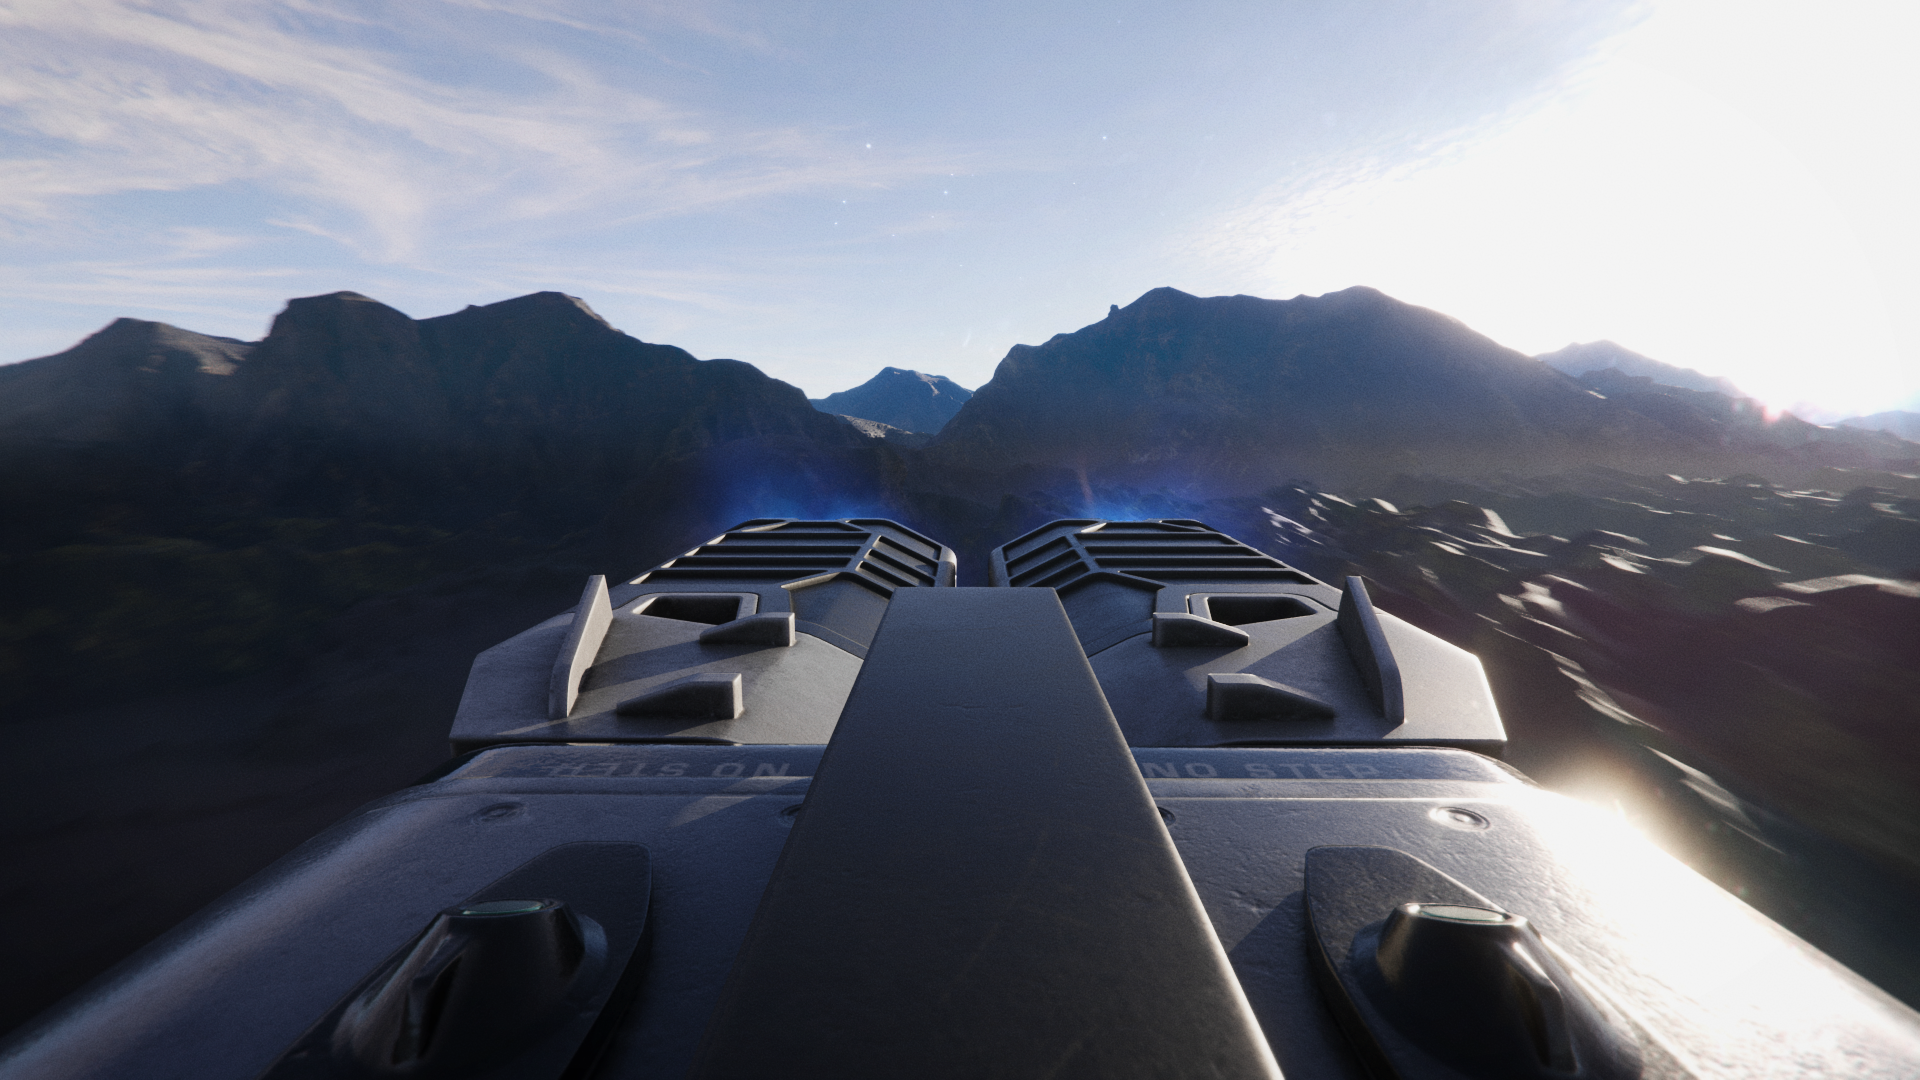
This machine, designed by Edon Guraziu and Textured by Jimmy Le Duigou with Decals by Ivan Santic, had to look realistic. But more importantly, it had to look as if it was in-use.
That is the perfect use-case for baking your decals directly into your UV-map. As this process allows you the finest control over blending and integrating the decals into the 3D-model.
The decals are not placed "on-top" of your object as much as they are "a part" of the object.
Conclusion
In the world around us there are countless invisible design elements. Especially surfaces that have been processed industrially are covered in decals. And if you want to add that extra layer of realism to your 3D renders you'll have to add these decals into your textures.
To make sure your texturing process is accelerated we've developed the Industrial Decals, a Free Resource you can download from our Resources page. Good luck with texturing :)


Reading List
References


.jpg)


%20by%20Ivan%20Aivazovsky.jpg)


0 Comments