3 Dimensional Holography in Chaos Corona
Making Holograms in Cinema 4D
Blauw Films


The Magic of Holography
As far back as I can remember I have been in love with holography.
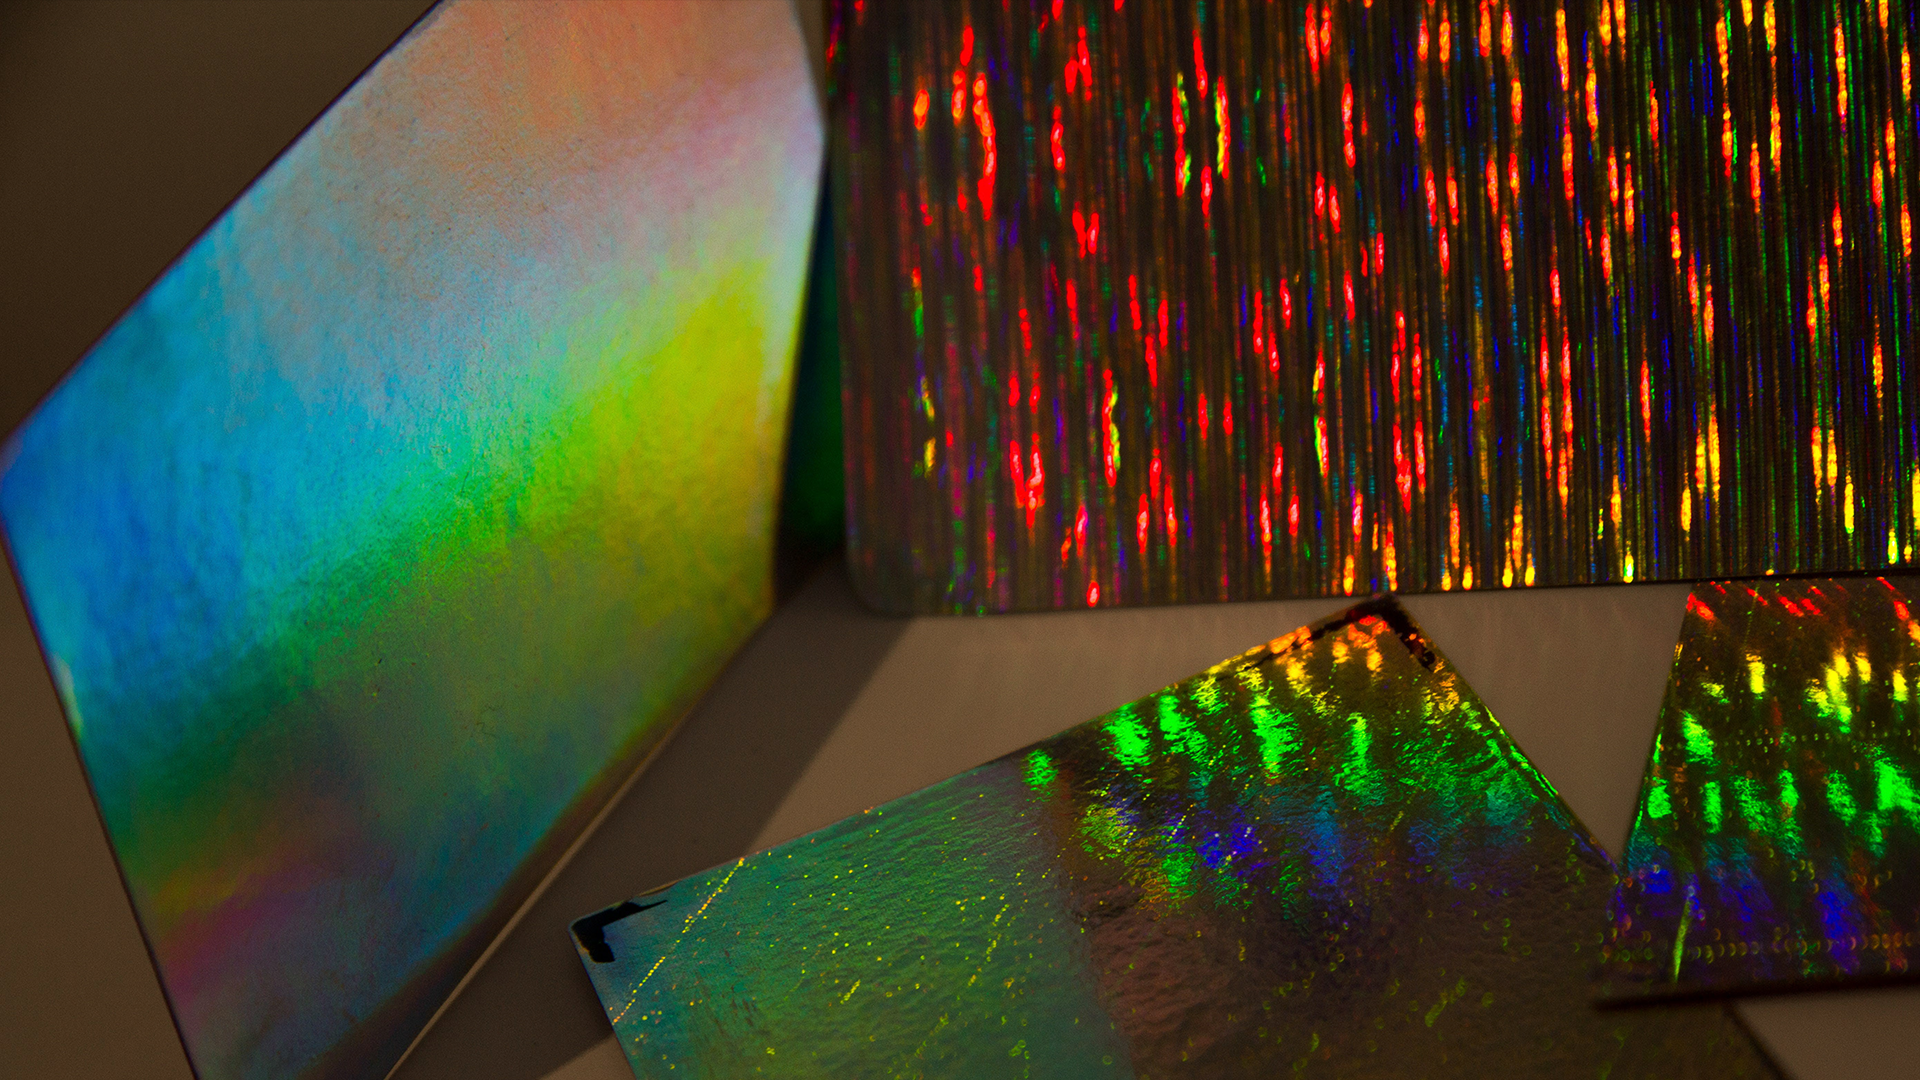
From the beautiful foil patterns on Pokémon® and Yu-Gi-Oh!® cards to the more complex full-3D security stickers on credit-cards or passports, they never fail to amaze me.
Physics, is in fact, magical.
To start things of simply, what exactly is a hologram?
"A hologram is a recording of an interference pattern that can reproduce a 3D light field using diffraction." — Wikipedia
Under a certain angle of light hitting the hologram it reveals itself in radiant colors. Thus creating the illusion of a 3-Dimensional image inside a planar surface.
Before we look at an example in CGI, have a look below at a general process of creating a hologram. An object is "frozen" into the reactive medium through the interference pattern of the object and the laser.

Creating Holograms in a 3D Shaders
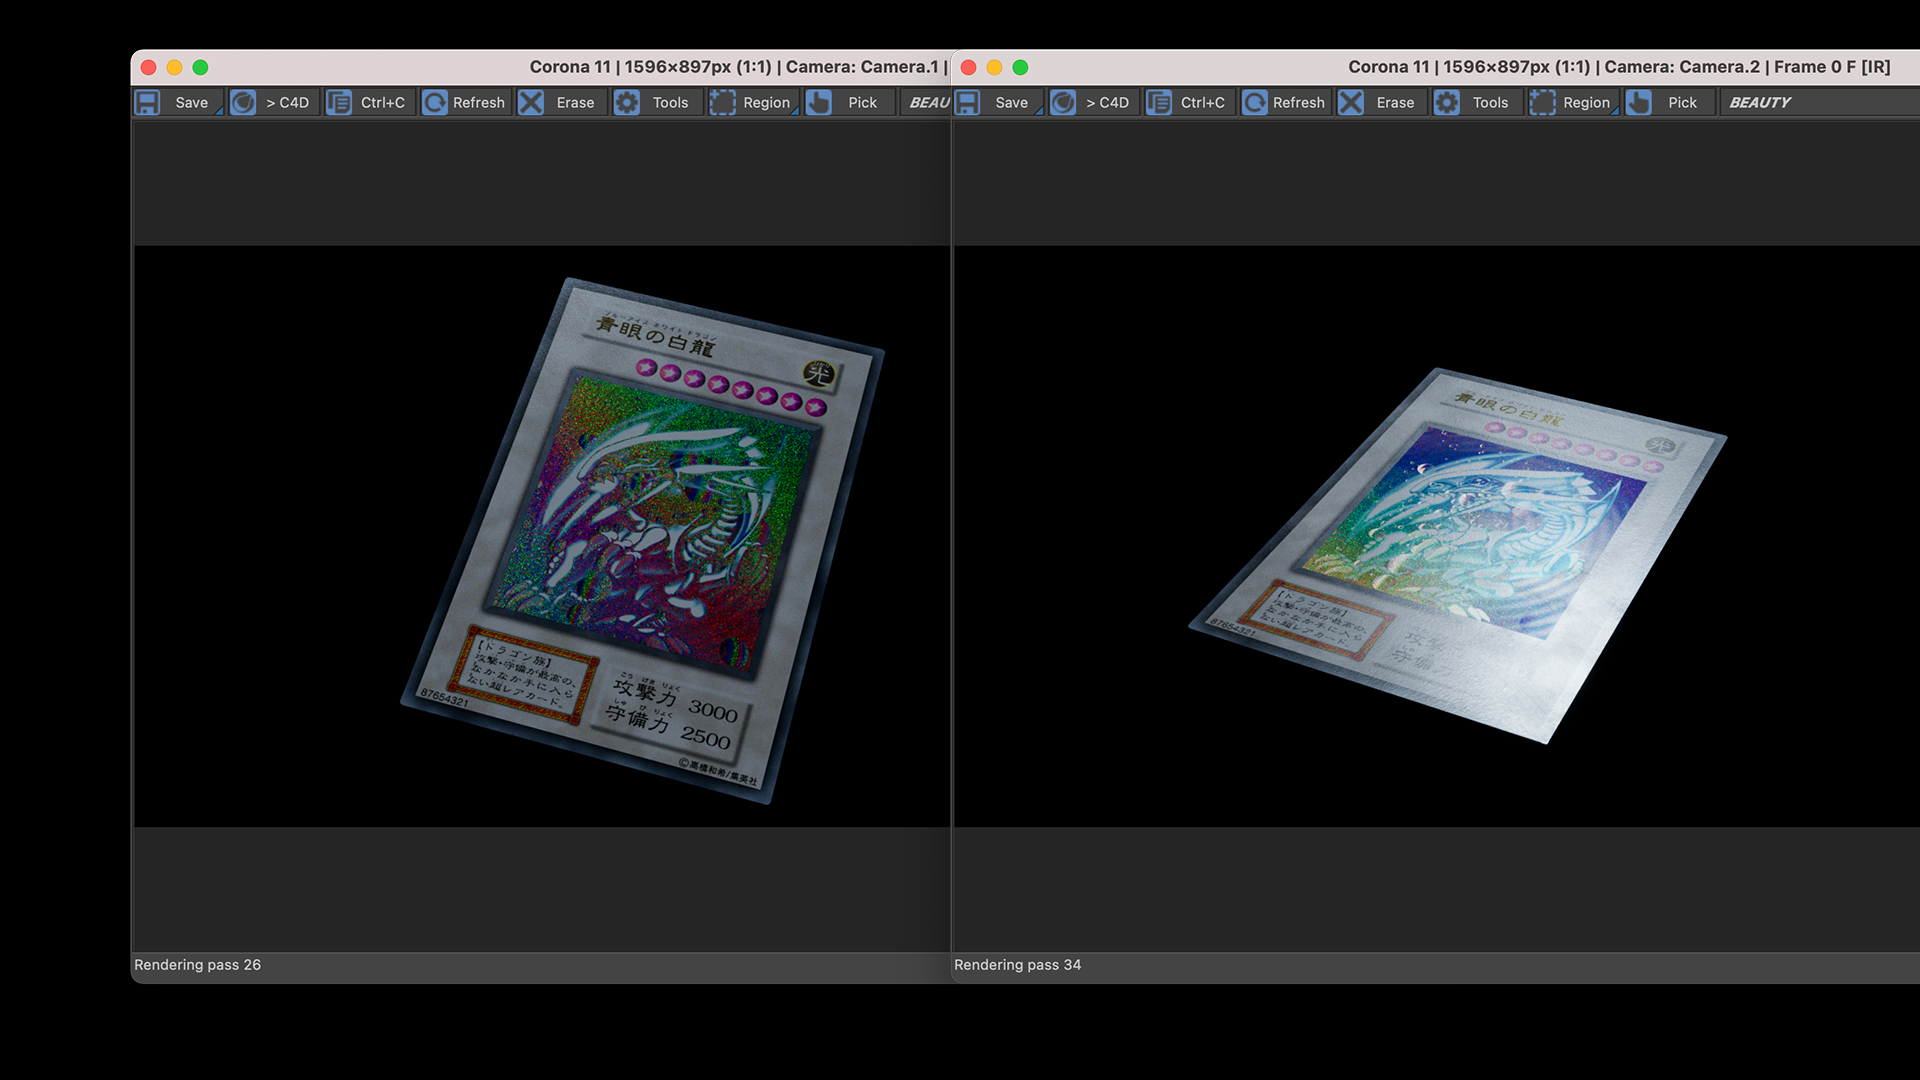
In our case we are looking at a Computer Generated Hologram (CGH). Ideally we want to have two angles of an object to be visible in our hologram.
With a hologram we are looking at light-scattering due to a variety of interference patterns. If the light that comes in can break/split into a color range only to then be reflected back at a specific angle, we are getting very close to holography.
In CGI this actually becomes quite a challenge as not that many render engines are capable of true Spectral Rendering. This means that not all render engines can split white light into their true colored light values.
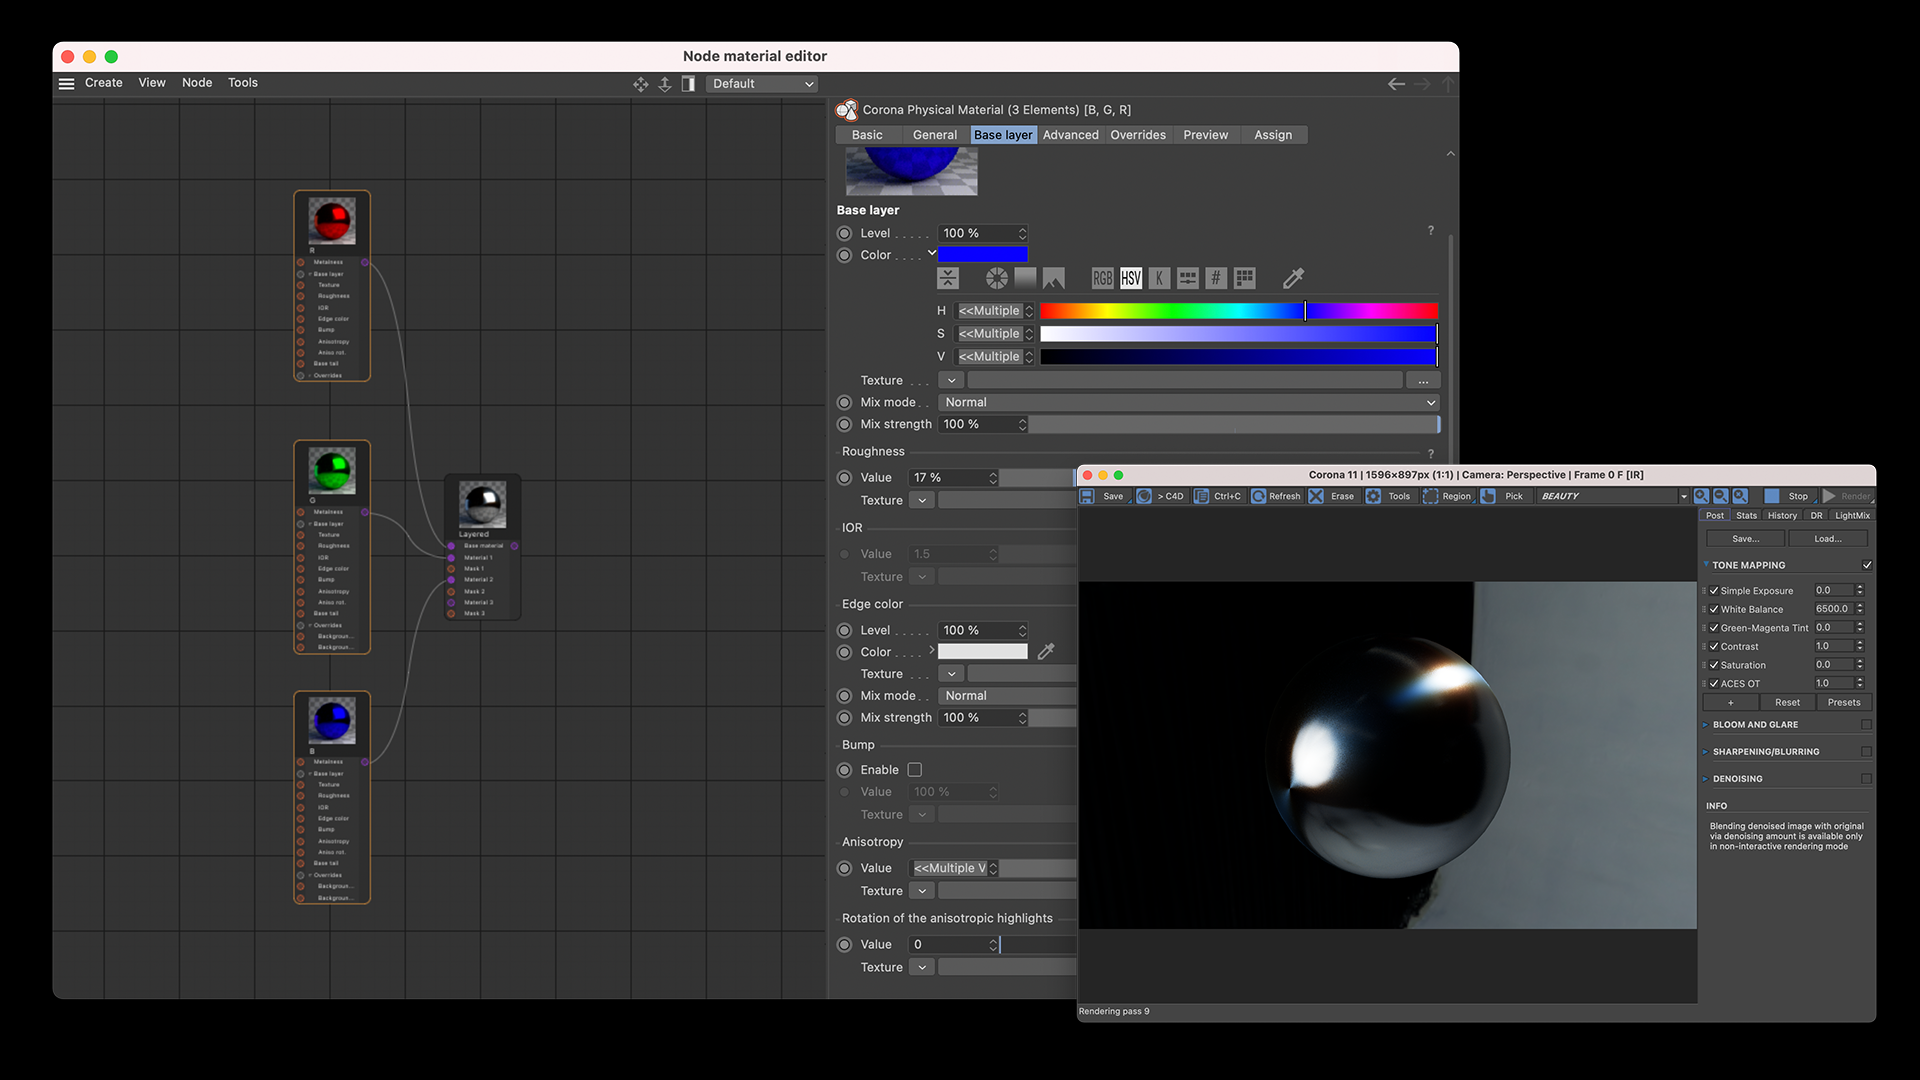
An alternative that was brought to my attention thanks to Raphael Rau (Silverwing VFX) in a tutorial on creating a CD Shader. This techniques uses metallic Layered Materials that reflect a single color of light.
Full Red, full Green and full Blue.
By each having a slightly different
- anisotropy strength and
- anisotropic angle
we get a diffraction effect.
Light that comes in is being angled at different intensities, thus revealing different amounts of the RGB materials.
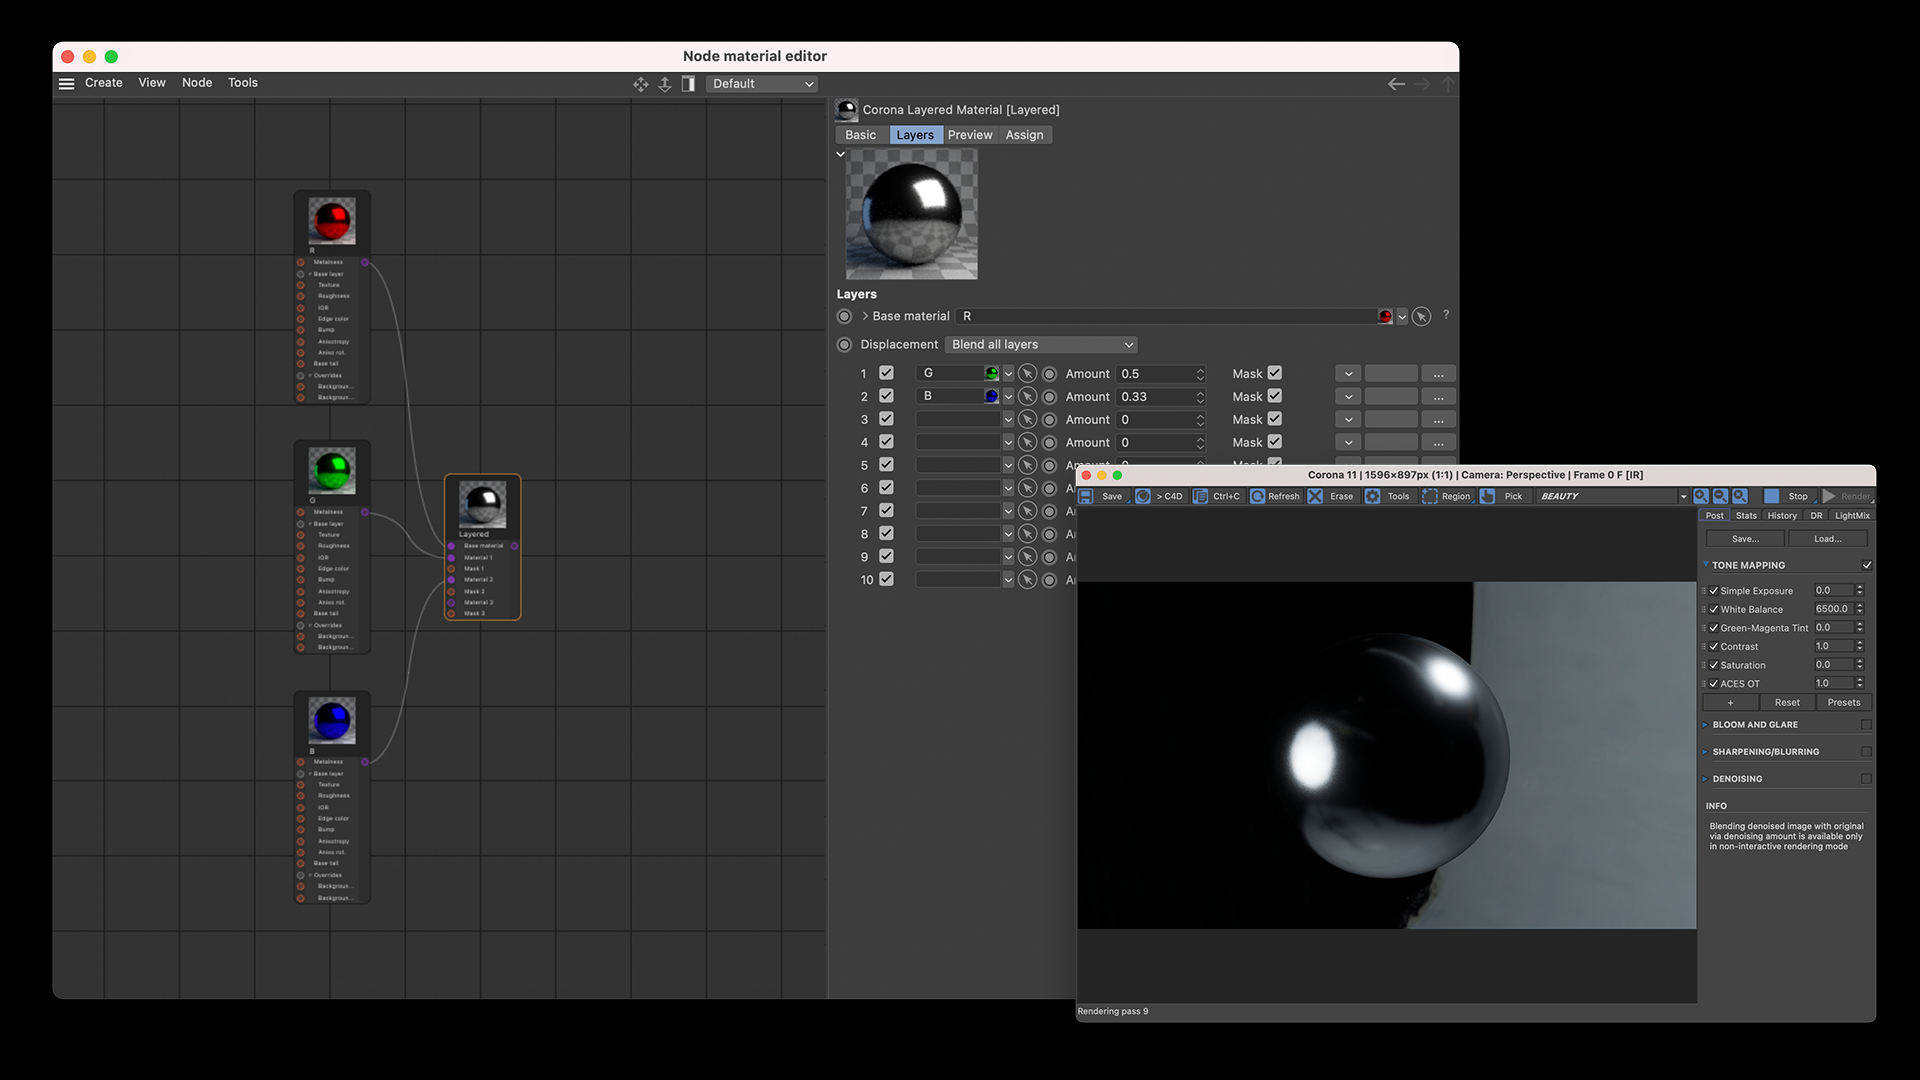
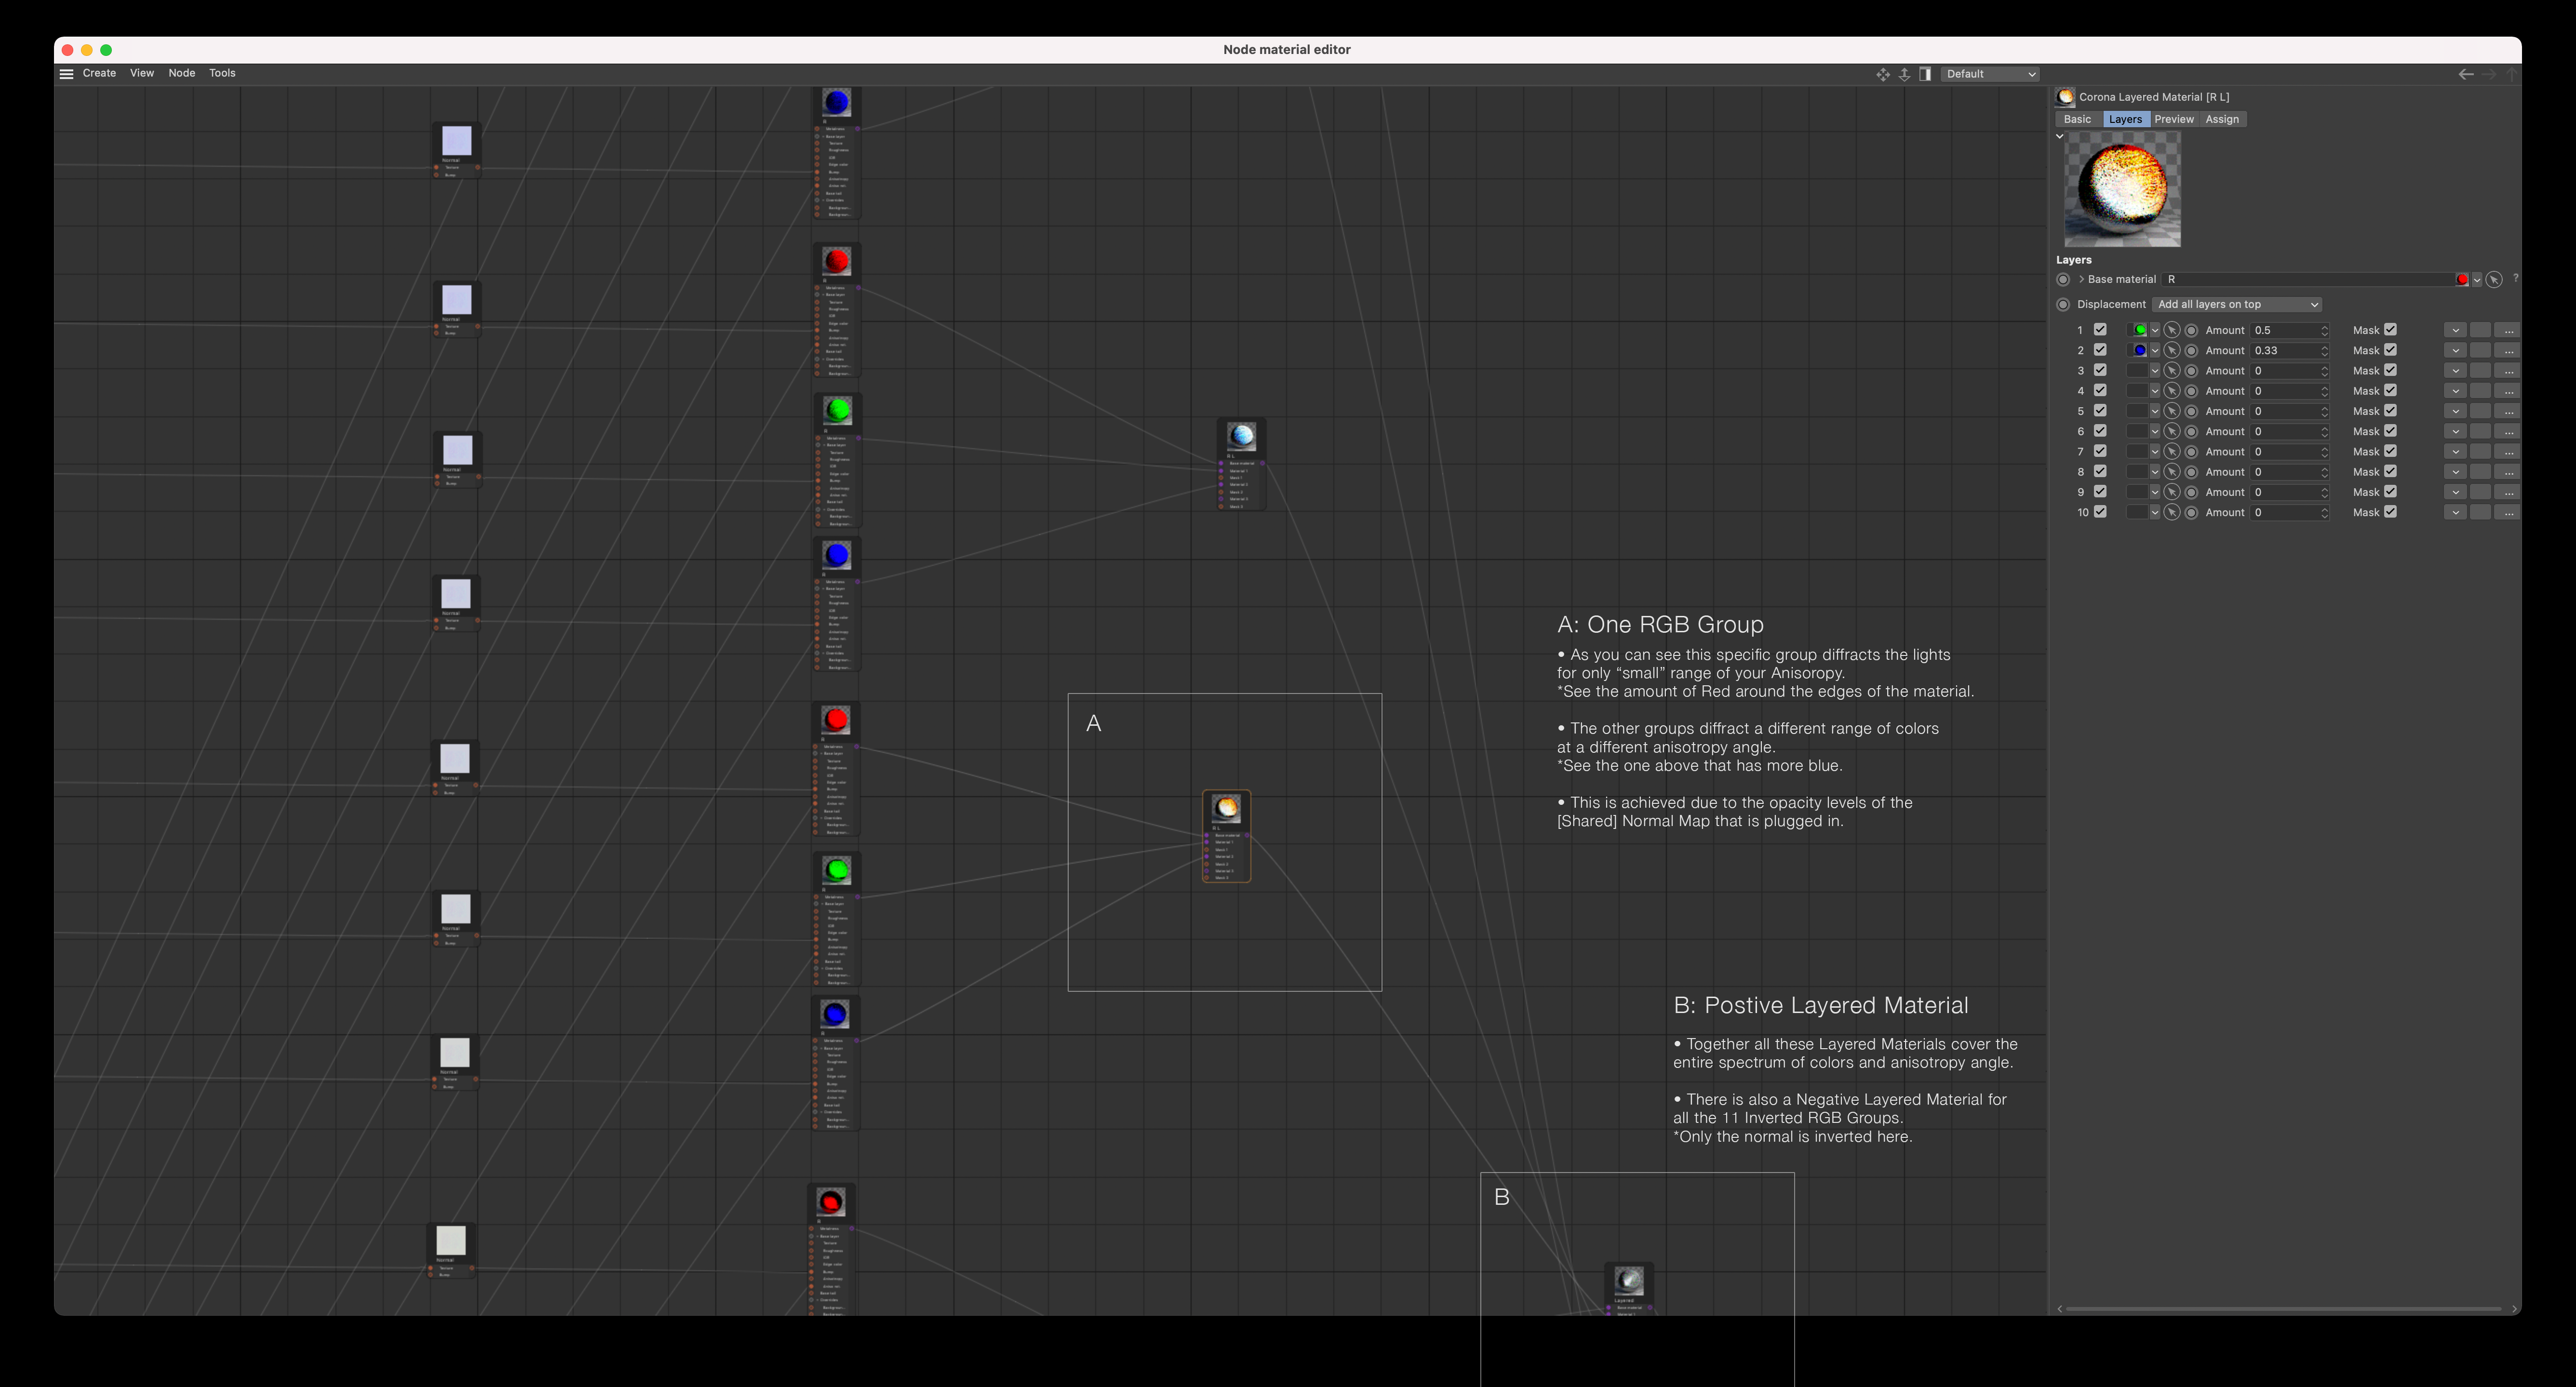
The concept is relatively simple: Red, Green and Blue materials (equally mixed) gives you a full white material.
As you can see in the example above, we have Red as a Base material, Green at an amount of 0.5 (which blends it equally with the base), followed by Blue at 0.33 (mixing it equally with the two materials above).
If we give different values to the Anisotropy of R, G and B we get a color shift:
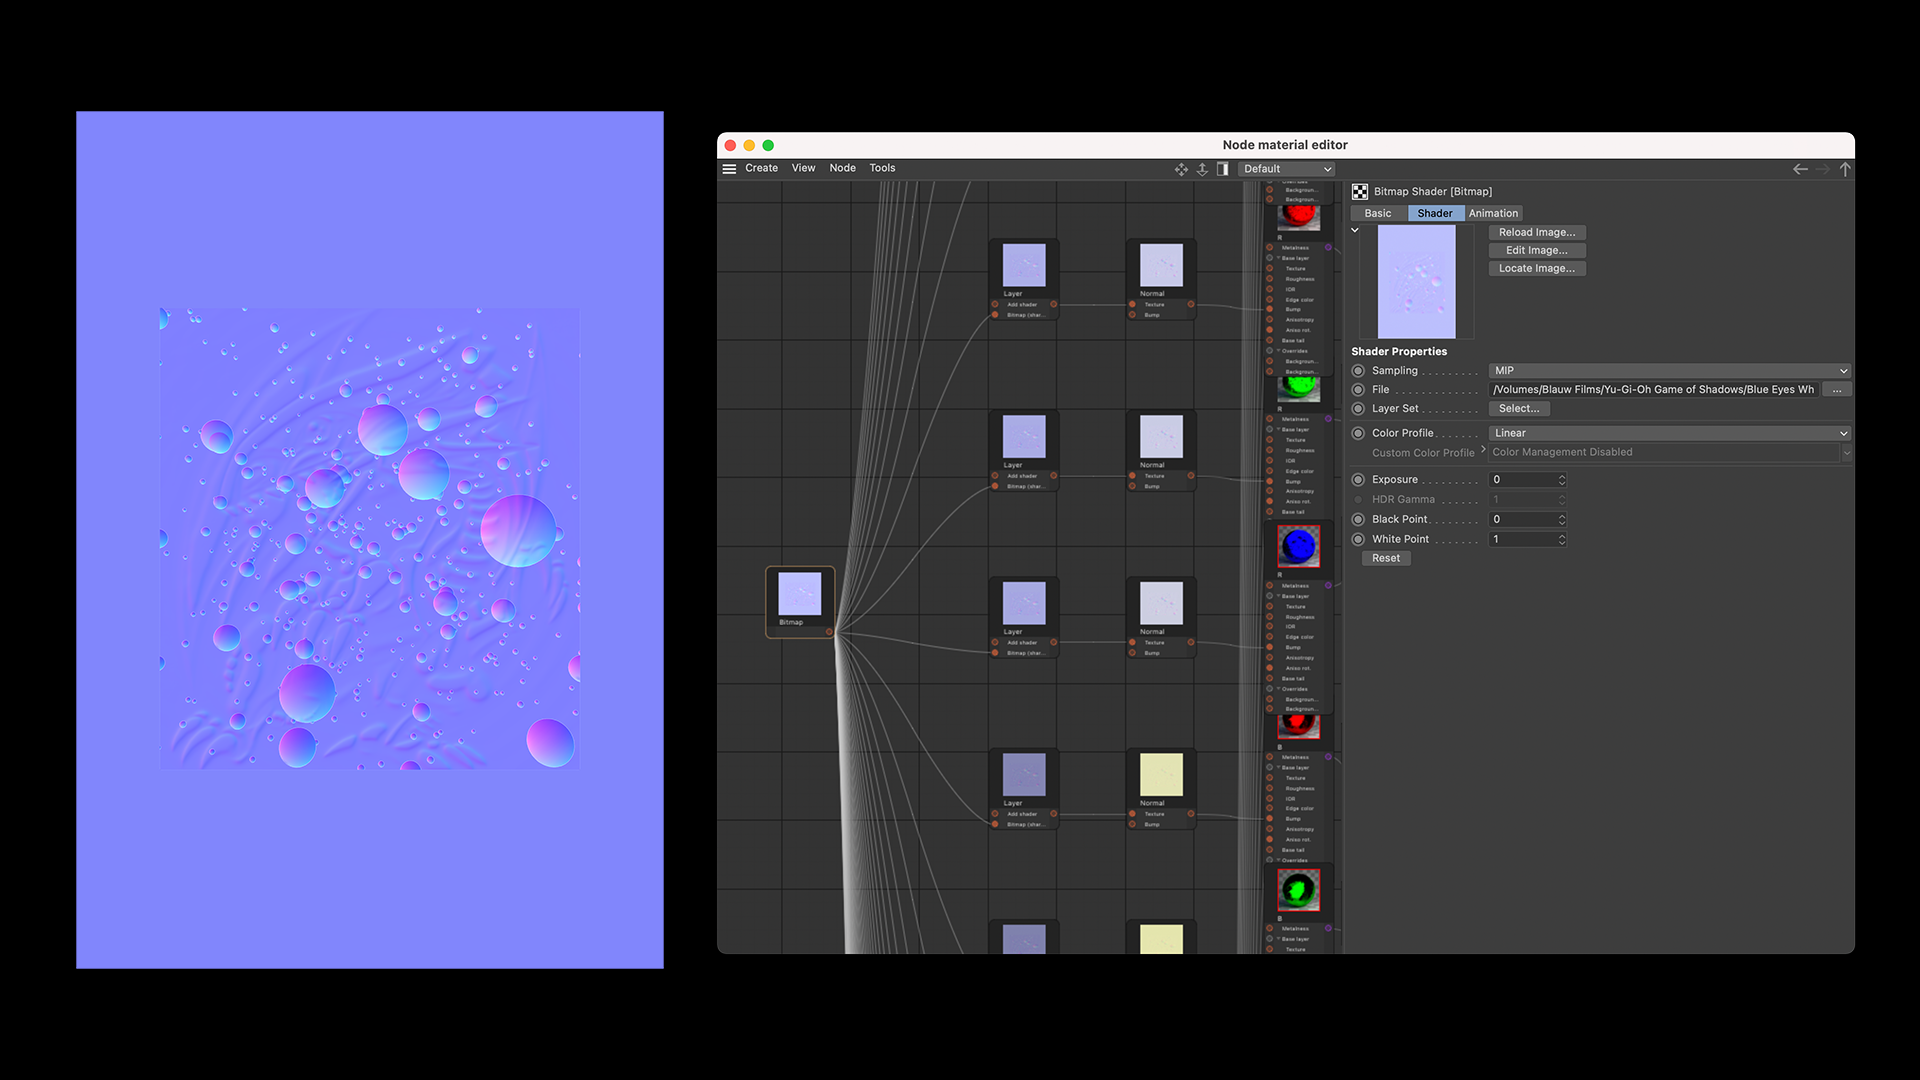
The next thing we need is an RGB representation of a 3D-engraving, for which we will be using a NormalShading pass from a render.
By applying the this map into the Normal map slot of your material (and changing the opacity/intensity on each respective layer) we get something like this:

And that is the core principle behind creating a material that gives the illusion of 3D on a flat surface.
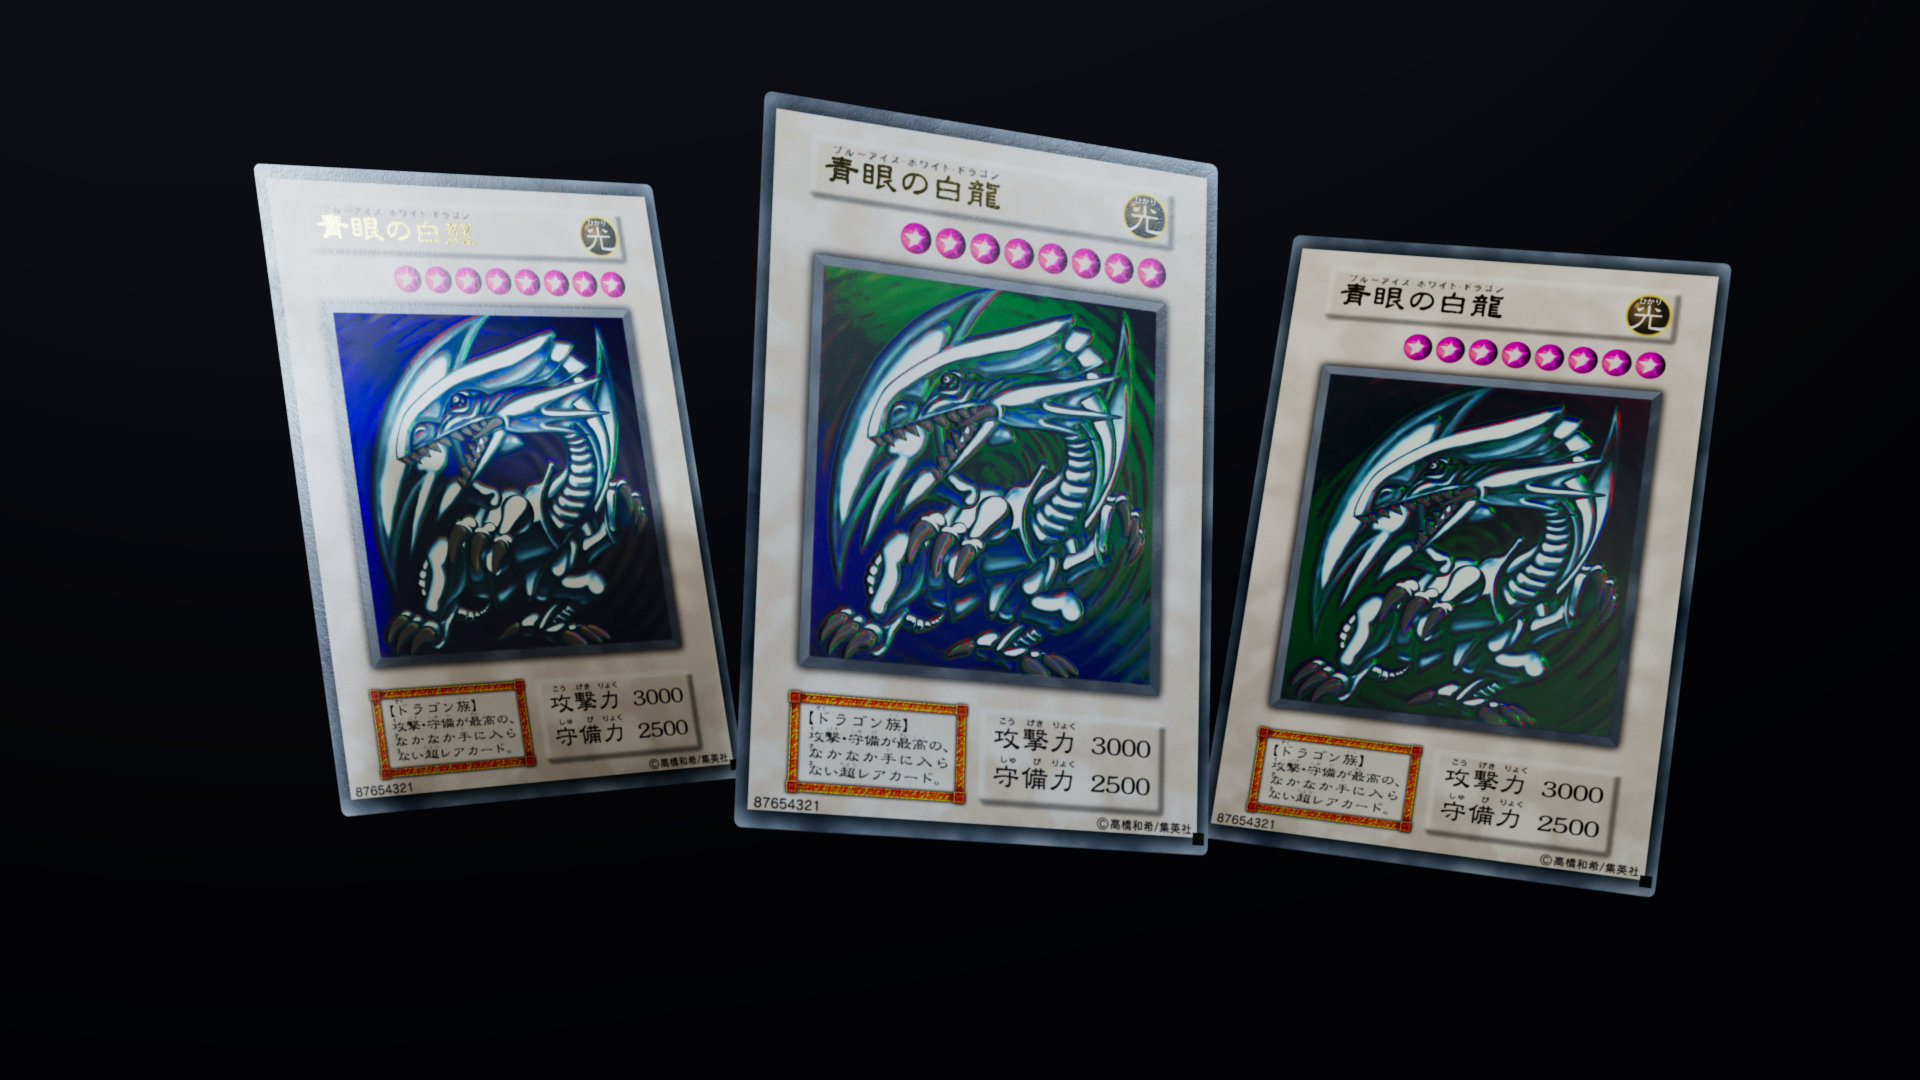
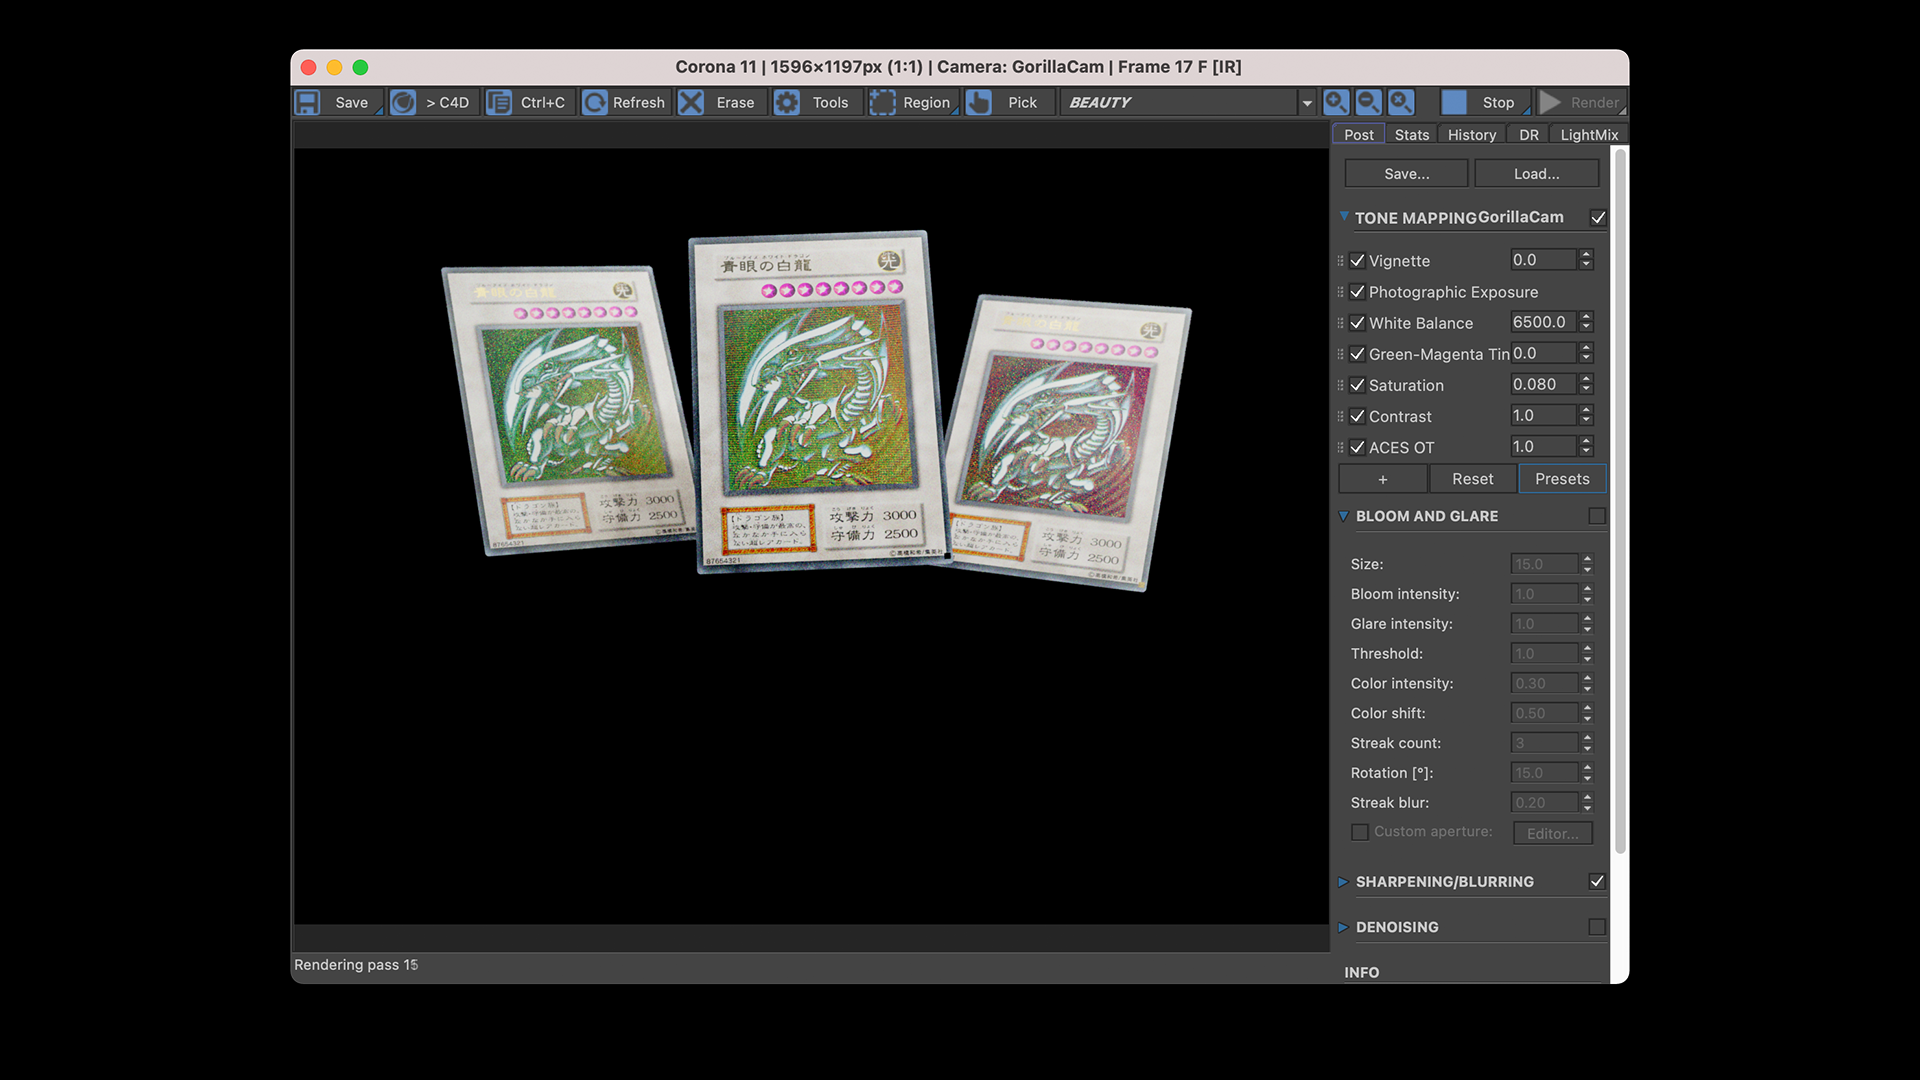
You can use this to create tile-able textures for holographic foils. Or your can make one-off security stickers. Anything you can imagine that uses "limited" holography can be created with this method — including the trading card examples below:
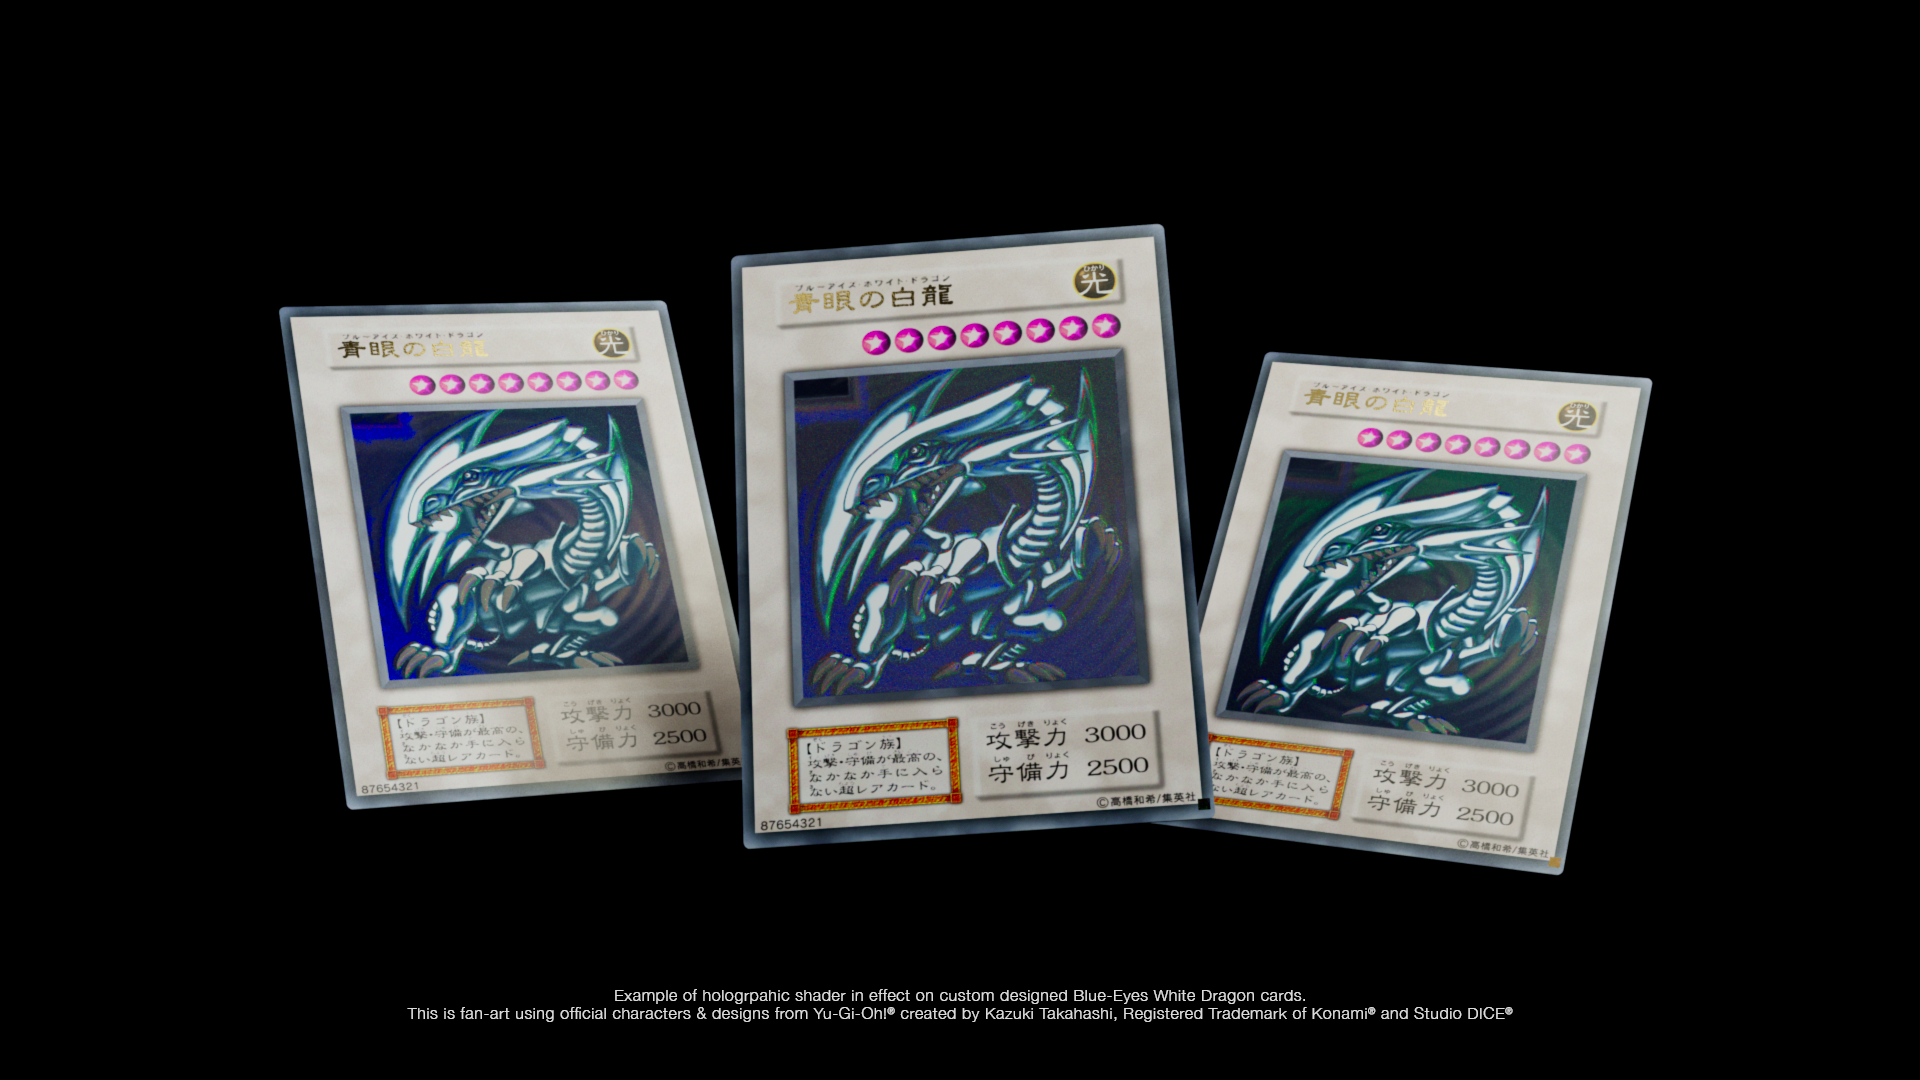
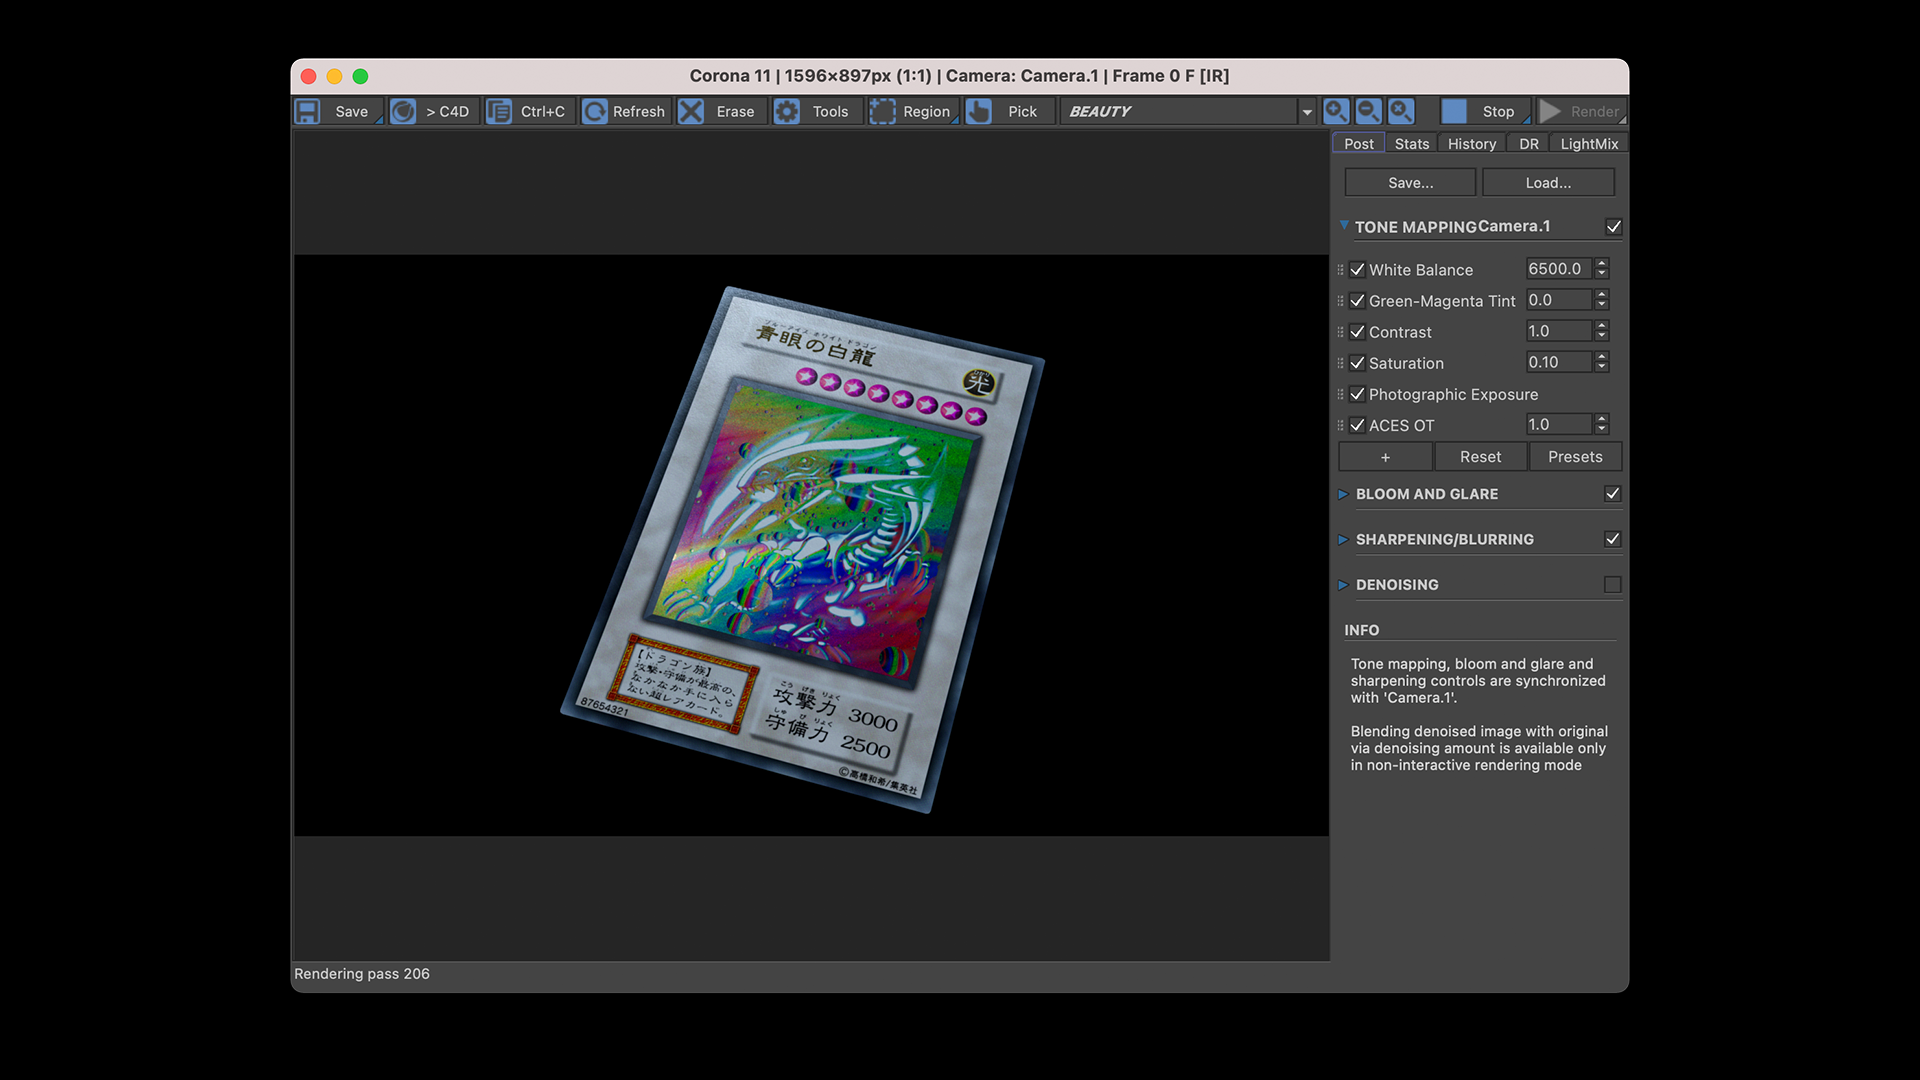
Creating the Blue-Eyes White Dragon required a bit more setup. To truly achieve nice looking effects we want to expand the range of colors we can work with.
So the same setup we previously made is duplicated many, many, many times while bracketing the Normal Map intensity.
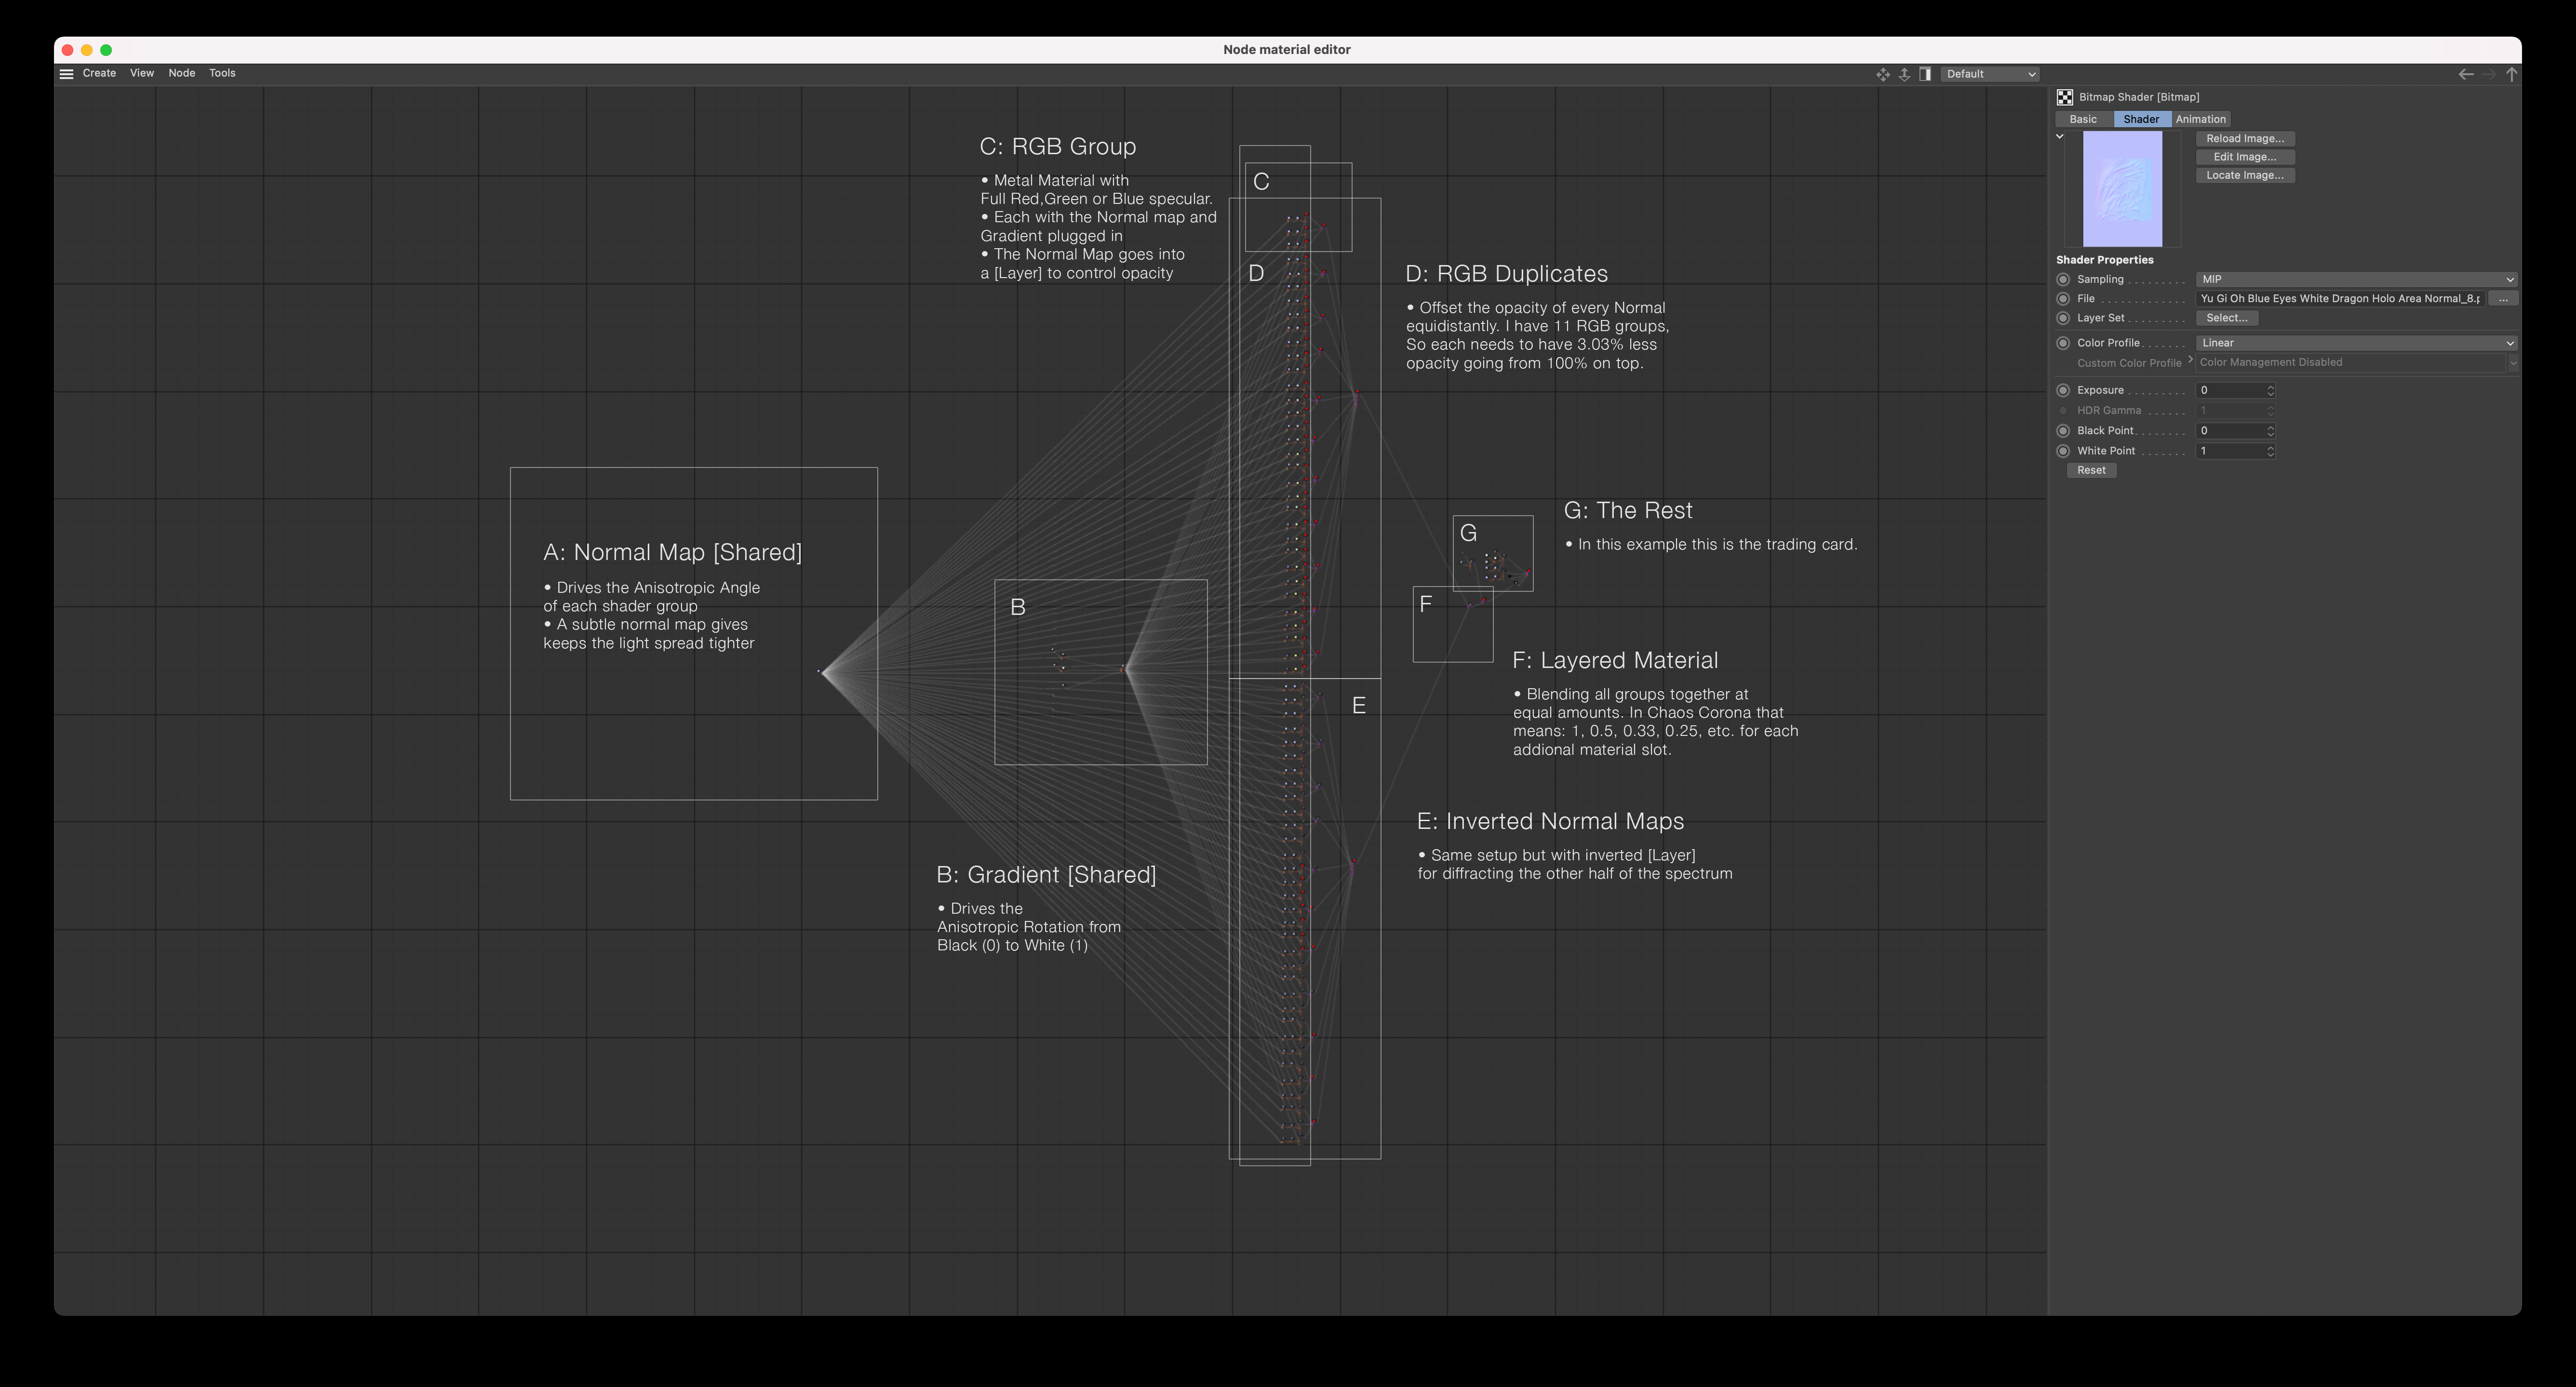
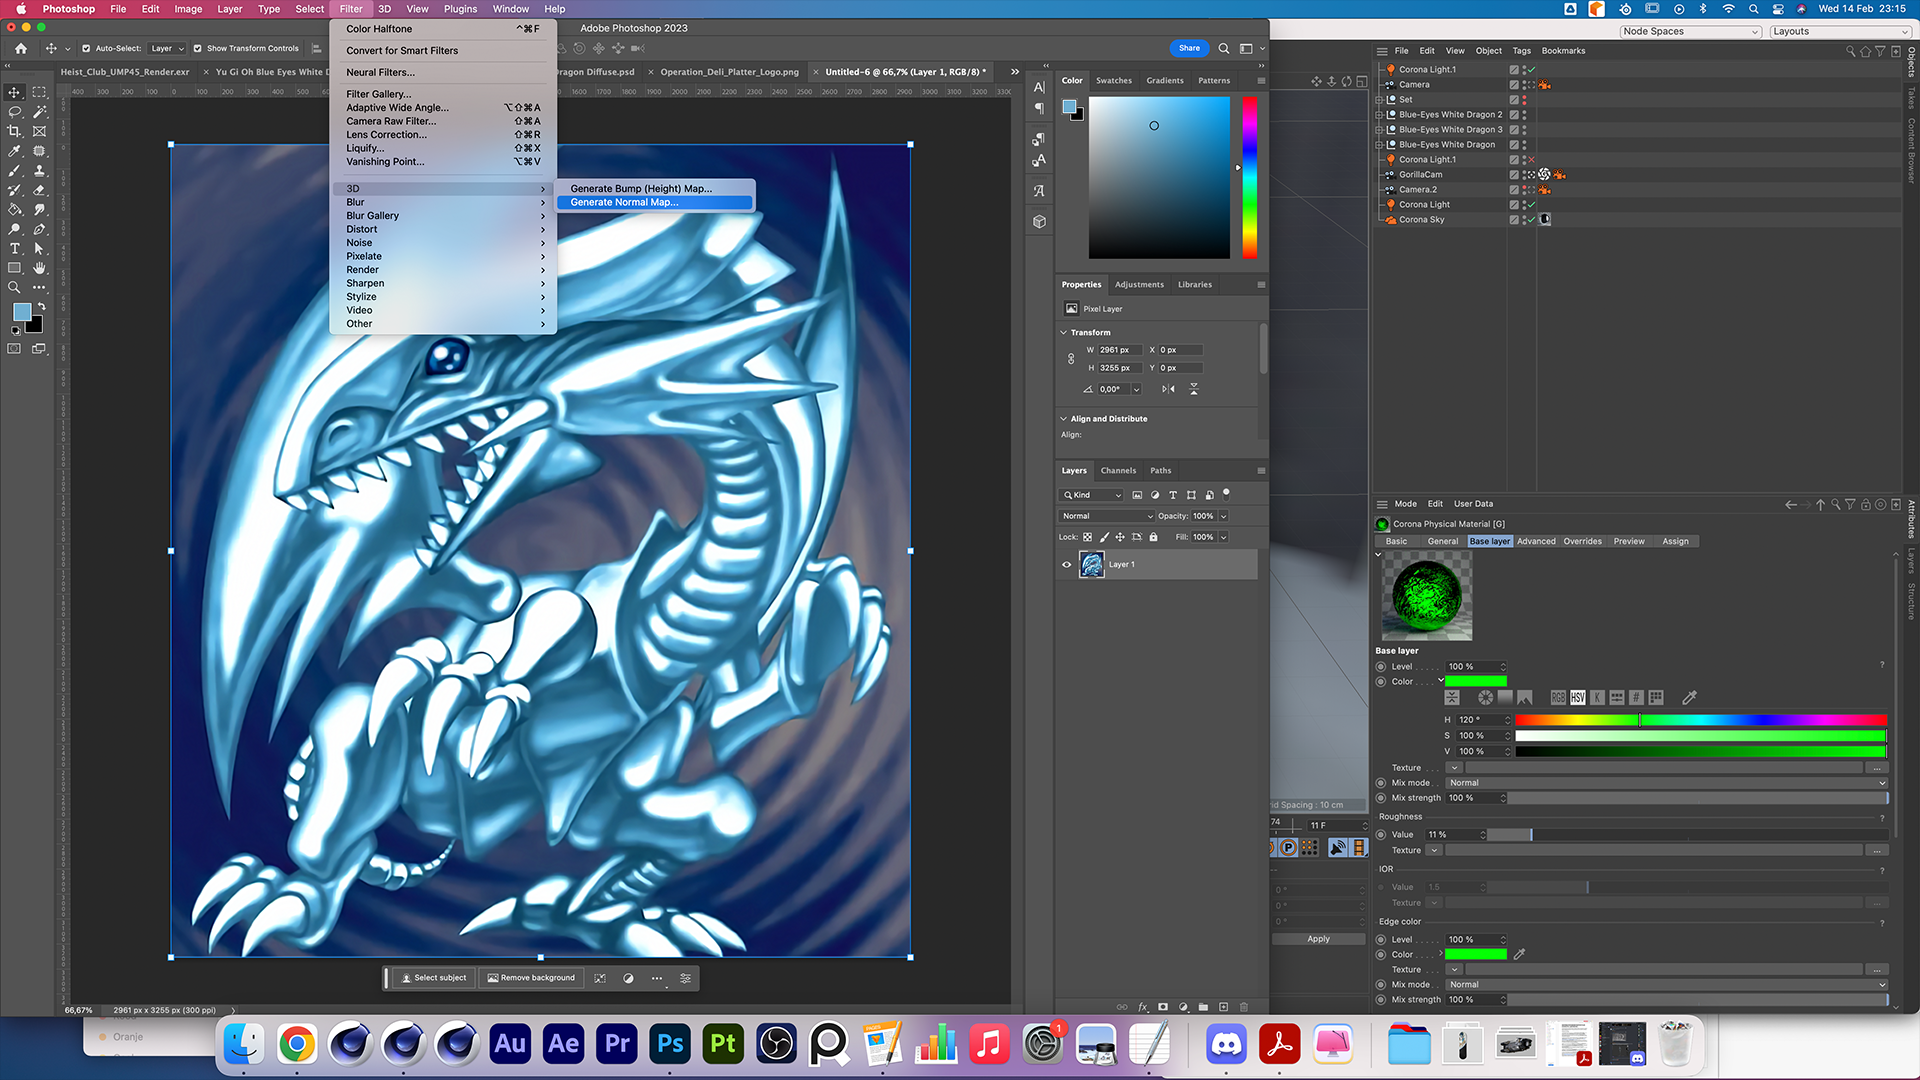
The next step is creating a Normal map that we want to use as our driver. I used the Photoshop 3D filter to Generate a Normal Map from the Blue-Eyes White Dragon artwork. That will work as the base on which I can add additional effects later.
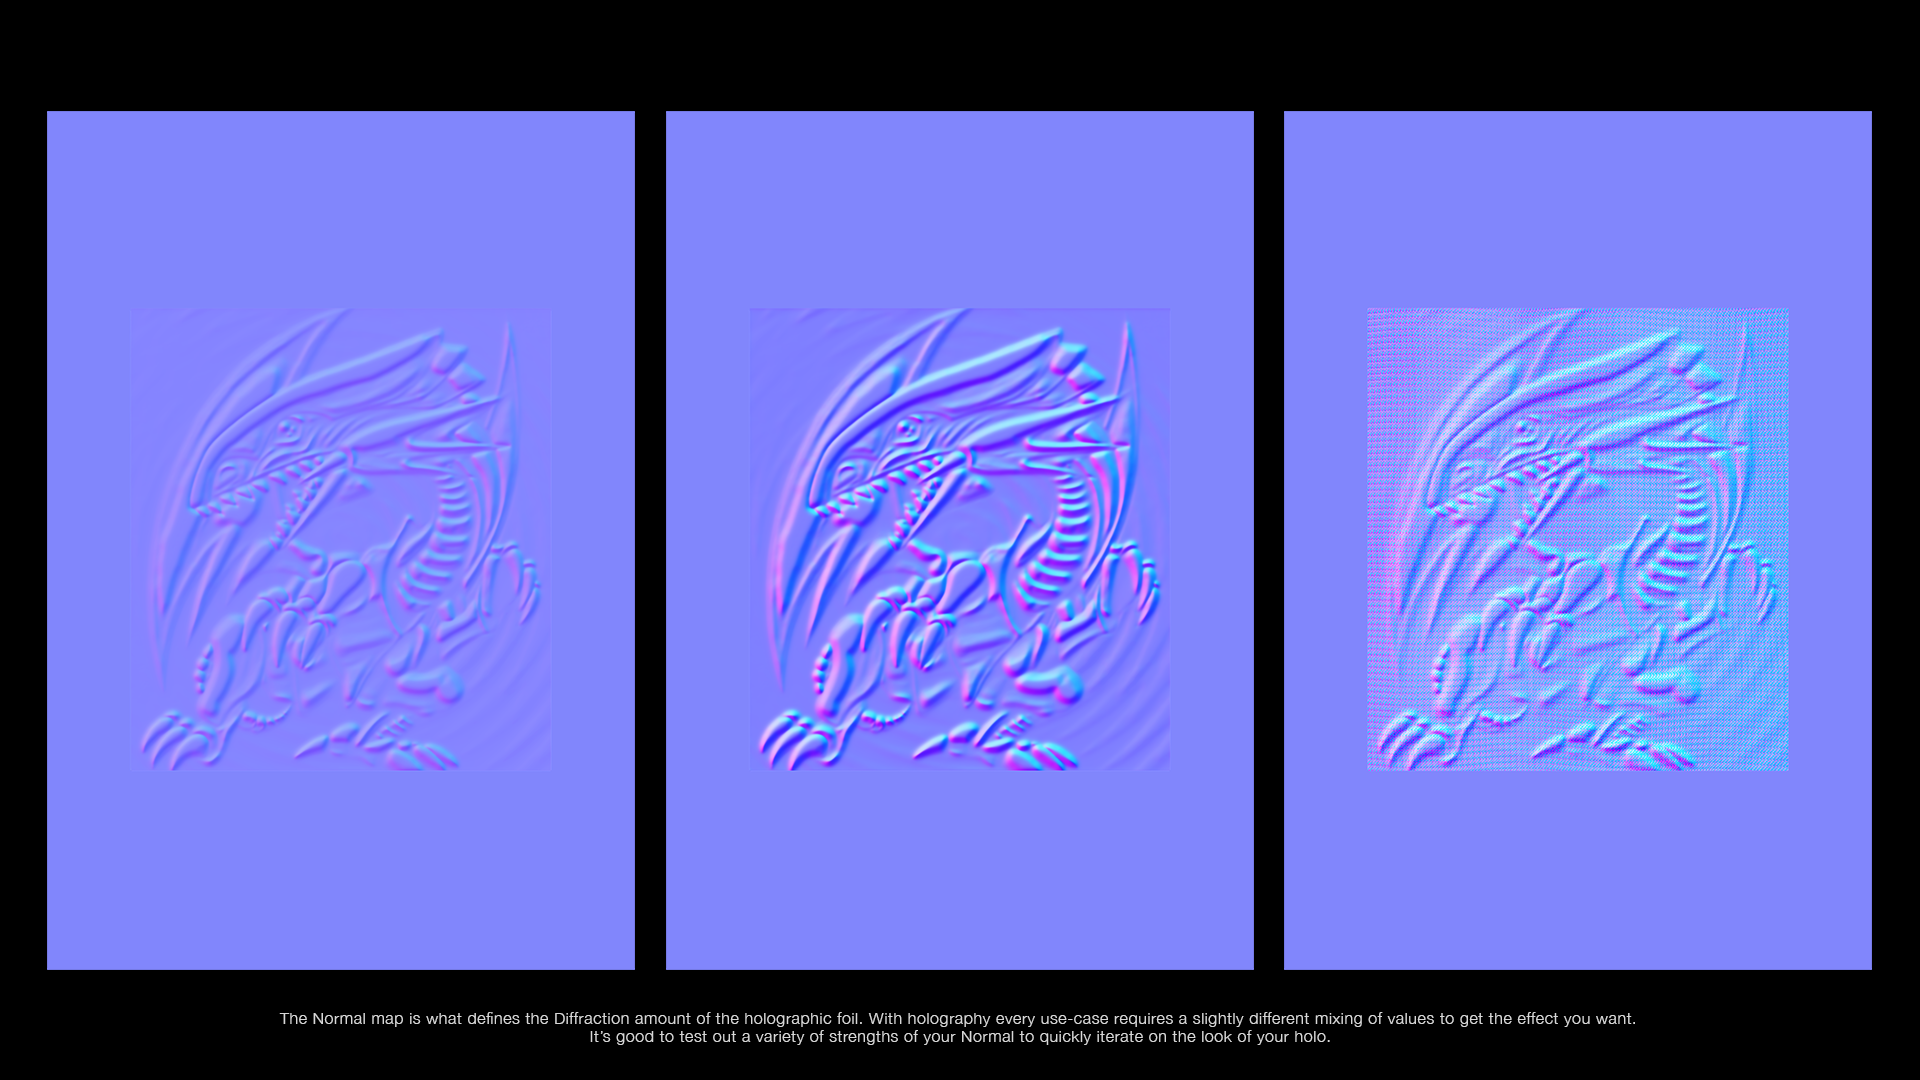
As you can see above and below, different Normal Maps create a completely different result. The Normal Map defines the relation between the light rays coming in and how they are reflected back to the camera.
Similar to in real holographic foil, the effect is actually only visible at a very limited range of angles.
"A hologram is usually unintelligible when viewed under diffuse ambient light." — Wikipedia
Finding the right angle for your holo effect to shine can be quite tricky.
And it's also important to know that if you have "too much" light in your scene, you will cancel out most of the diffracted light that gives you the rainbow effect. With too much light you are back to just seeing your base material.
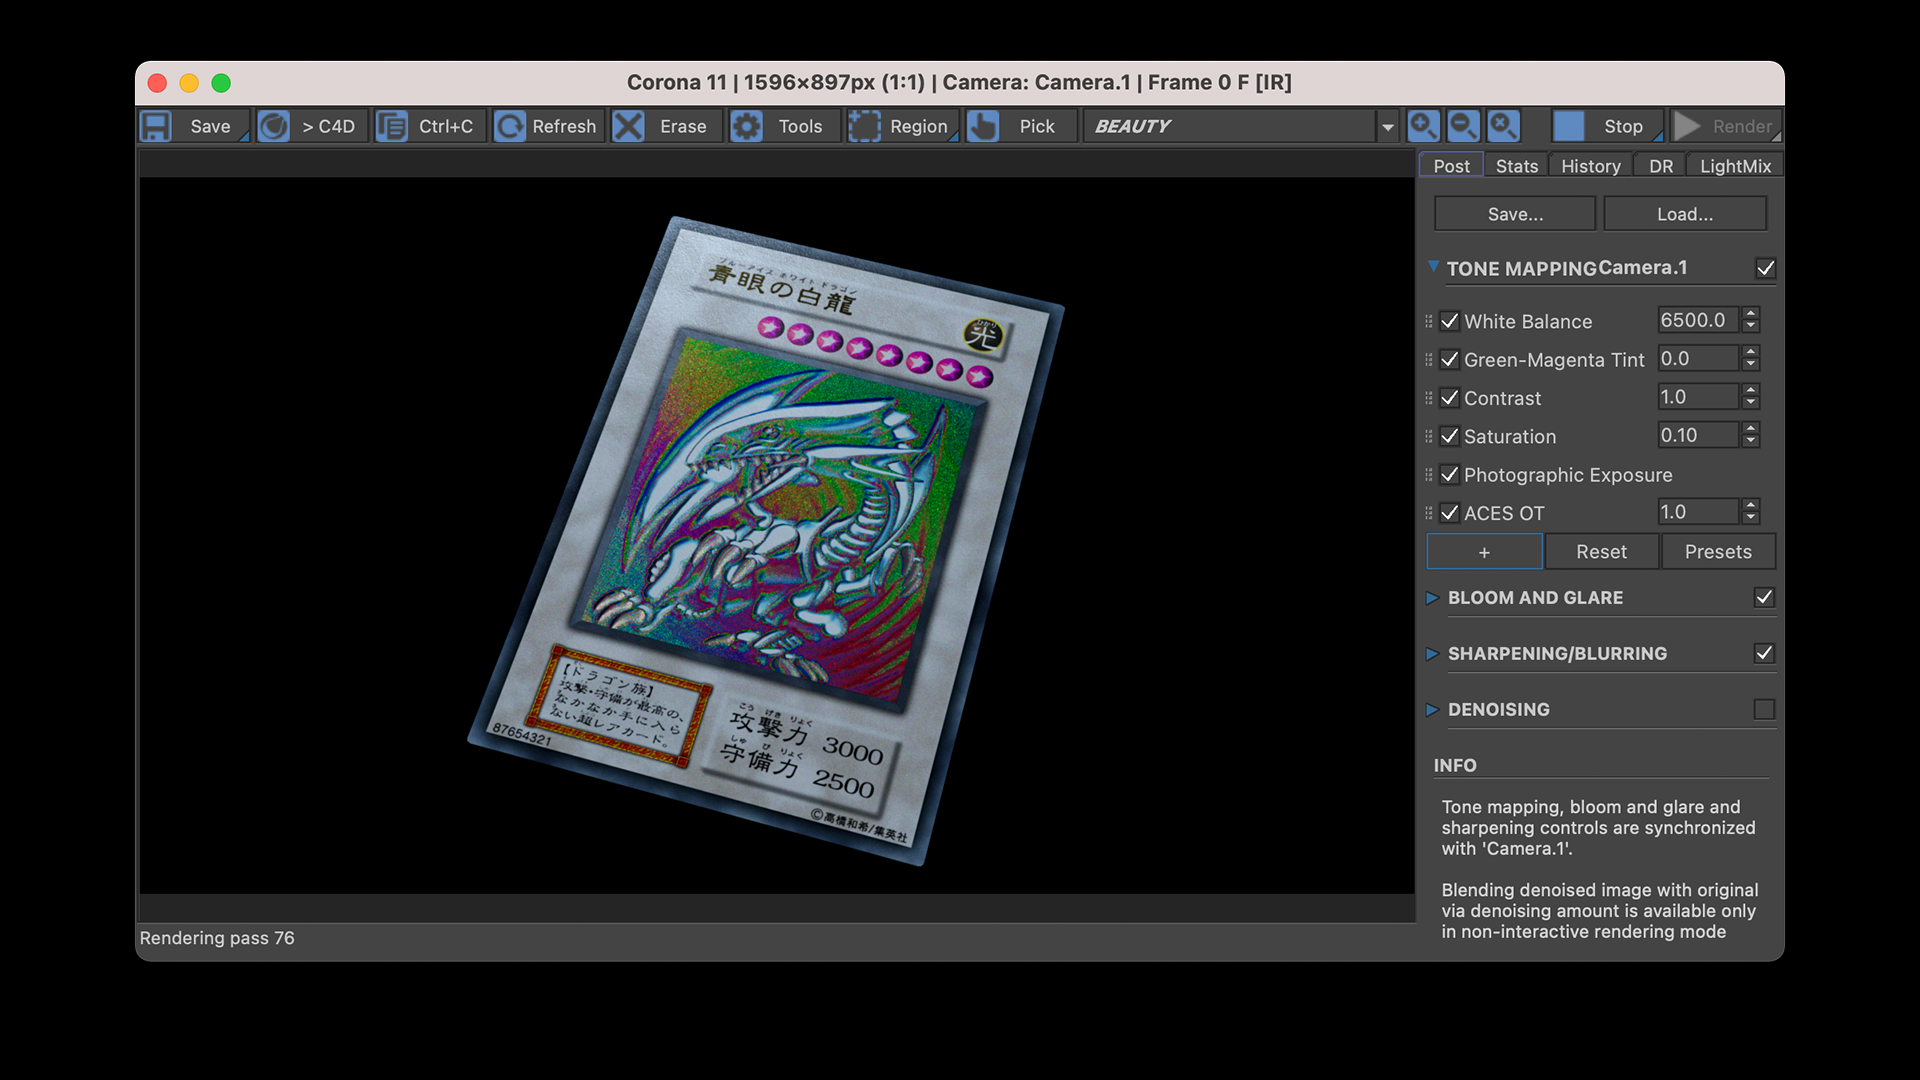

Now we have a functional holographic shader that uses a Fresnel or a Gradient as its Anisotropic Rotation control. This way you get beautiful looking rainbow colors depending on the angle of index relative to the camera.
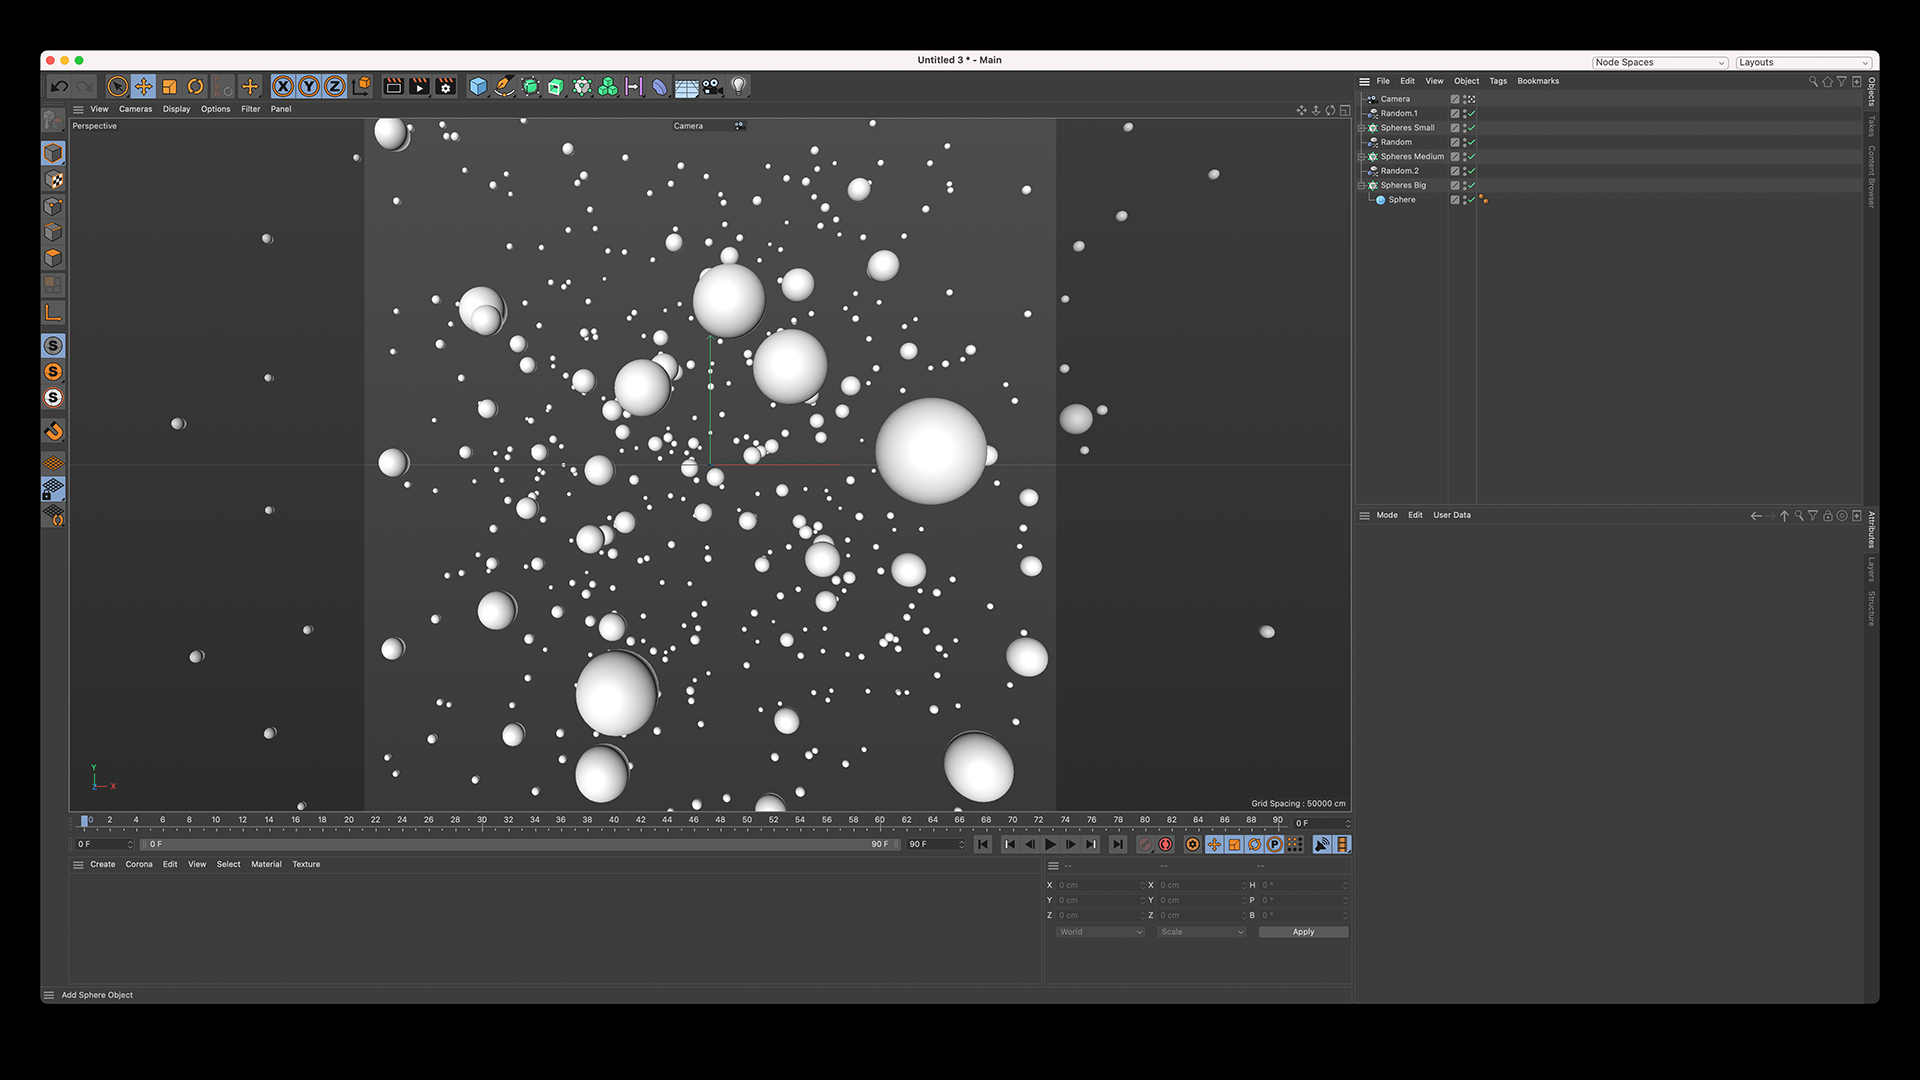
To complete this effect I'd like to create a spherical sparkle effect. For that I'm creating a new scene from which I'm rendering a NormalShading pass from a front on collection of spheres:


Conclusion
And that's it! A simple overview of creating a 3D Holographic shader inside of Chaos Corona and Cinema 4D. In the next few weeks I'll be further iterating on this shader. So I'll be sure to write another post on it :)

Reading List
References
- Silverwing VFX — Behance
- Silverwing VFX — Instagram
- Spectral Rendering — Wikipedia
- Holography — Wikipedia
- Computer Generated Holograms — Wikipedia
- Computer Generated Holography for Computer Displays — Light AM
- Corona Layered Material in 3Ds Max — Chaos Docs
- Corona Layered Material in Cinema 4D — Chaos Docs
- Corona Normal Map in 3Ds Max — Chaos Docs
- Corona Normal Shader in Cinema 4D — Chaos Docs
- Pokémon — Pokémon
- Yu-Gi-Oh! — Yu-Gi-Oh! Trading Card Game


%20by%20Ivan%20Aivazovsky.jpg)


0 Comments