3D Character Pipeline: Creating Uncanny Horror Film Demons
A Technical Breakdown of Designing, Modeling and Animating Sad Tall & Short Angry
Apple Rot


Blauw Films presents Apple Rot, an independently produced 3D animated horror short film. From its initial concept in 2022 to its production in the fall of 2025, the film was developed on a tight schedule with a small team and limited resources. The process of designing, modeling, texturing and animating the characters Sad Tall and Short Angry was for the most part a two person job.
This 3D character workflow guide breaks down how we tackled the technical pipeline behind the demons’s creation. To learn about the narrative inspiration and character philosophy, you can find a breakdown of the Creative Process behind the two Sleep Paralysis Demons here.
To create the characters, we used the following software:
We’ll take a closer look at the tools and workflows that turned Sad Tall and Short Angry from a written idea into fully realized 3D characters for the horror short film.
From Script to Concept Design
The Apple Rot script doesn’t precisely describe what the demons look like. It only hints at a type of atmospheric visual the two create.
Words like “disproportionately” and “distorted” were leading in our visual research. Above all, Leo had a pretty clear idea of how the two characters acted and how they were different from one another. These key insights gave me just enough guidelines to get started.

We created a number of concept art pieces to find out what the two demons could actually look like.
The concept phase focussed on a couple of things:
- Character silhouettes
- Character faces
- Character costumes
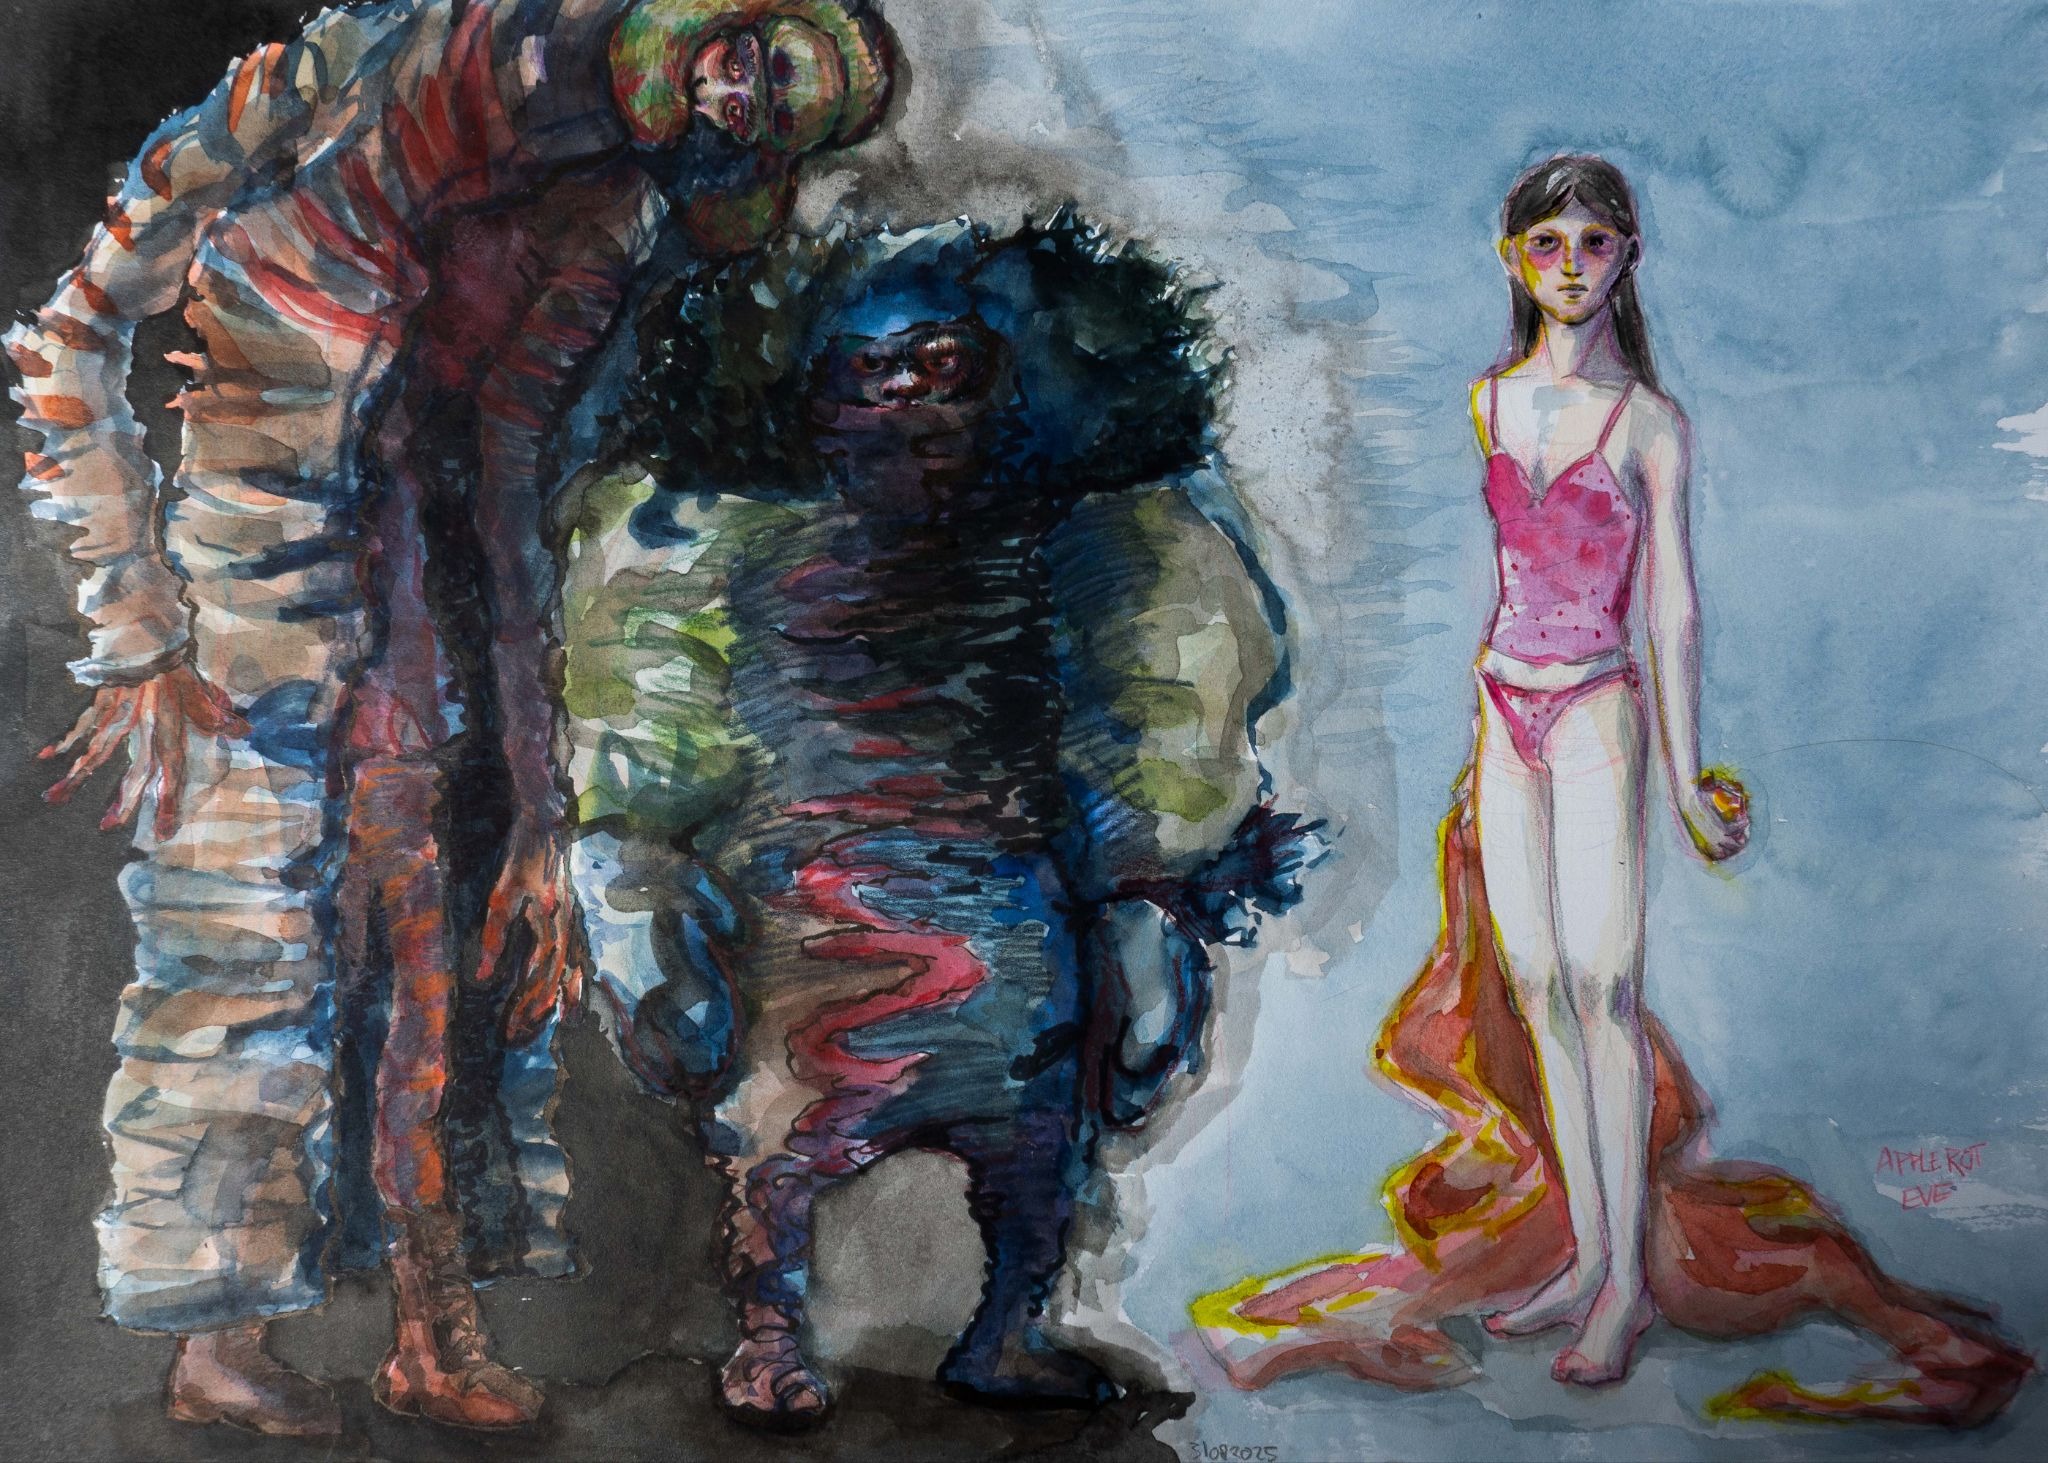
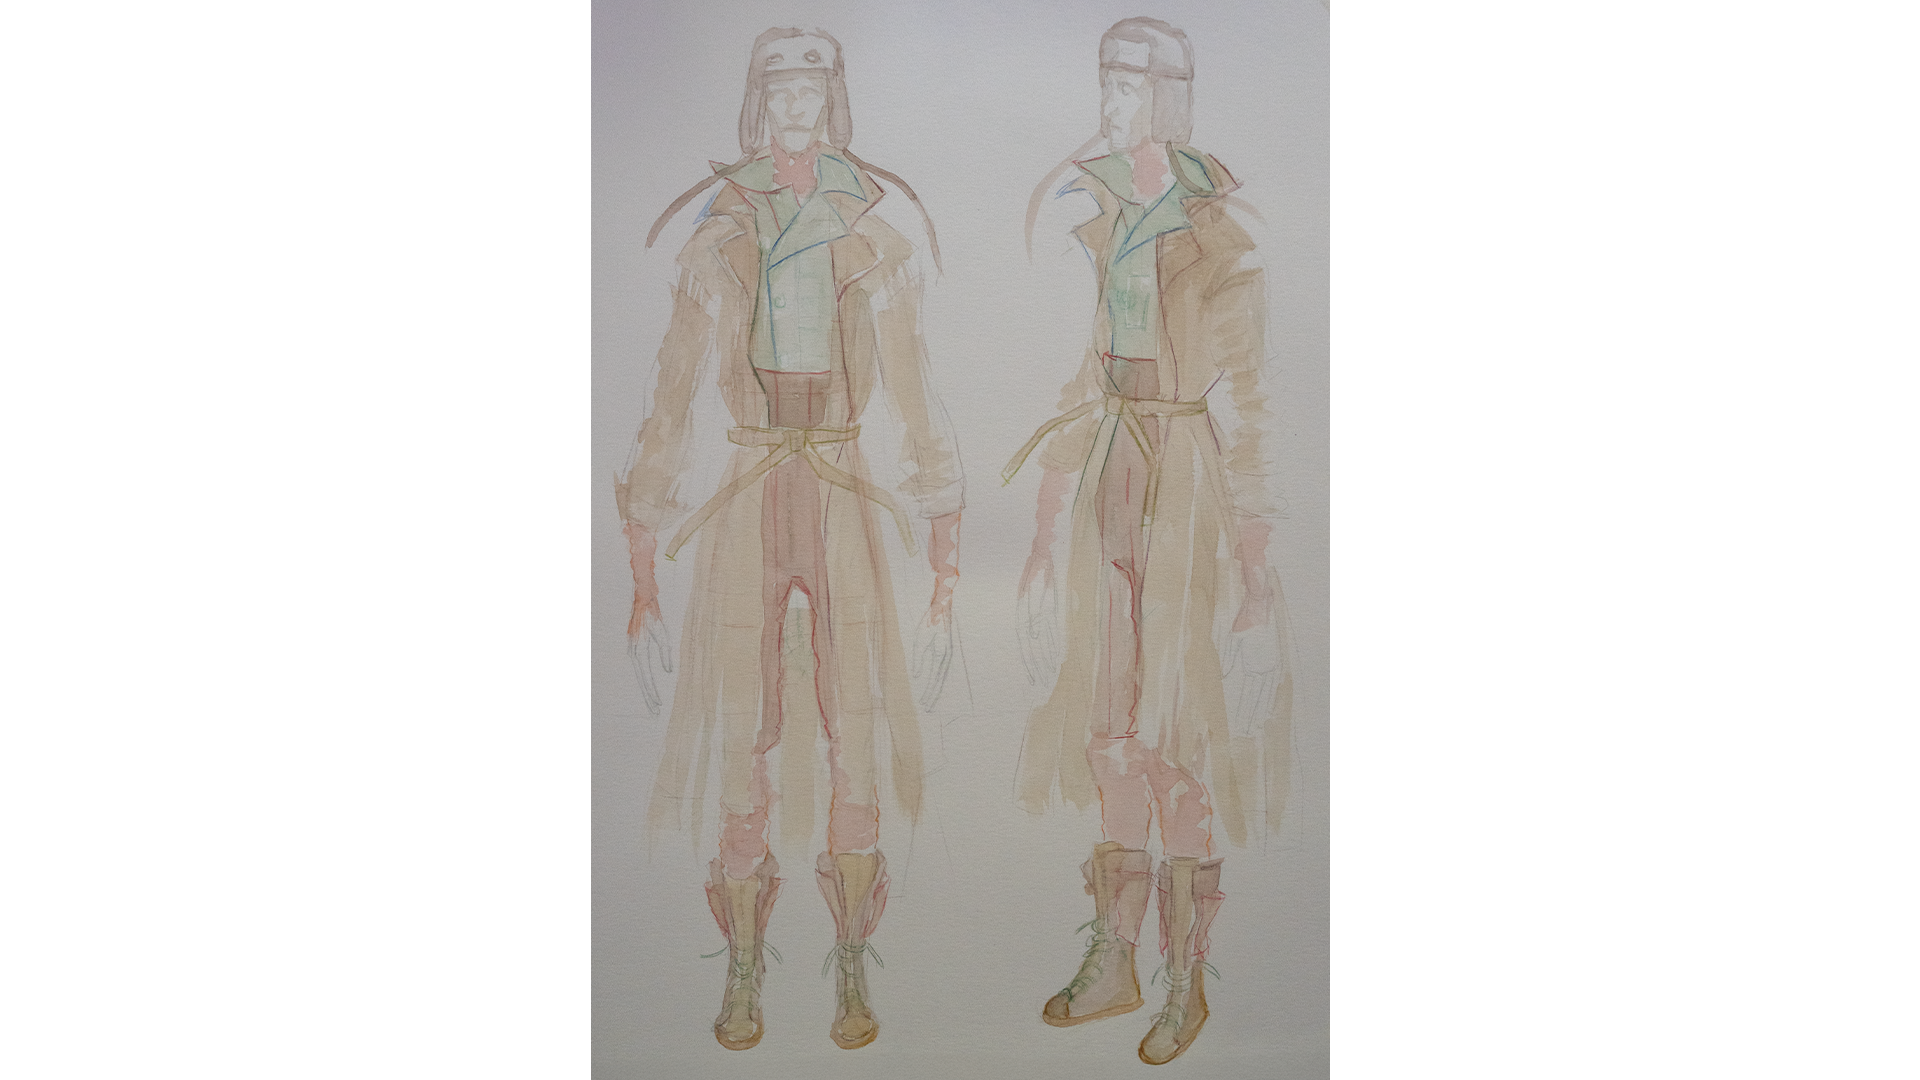
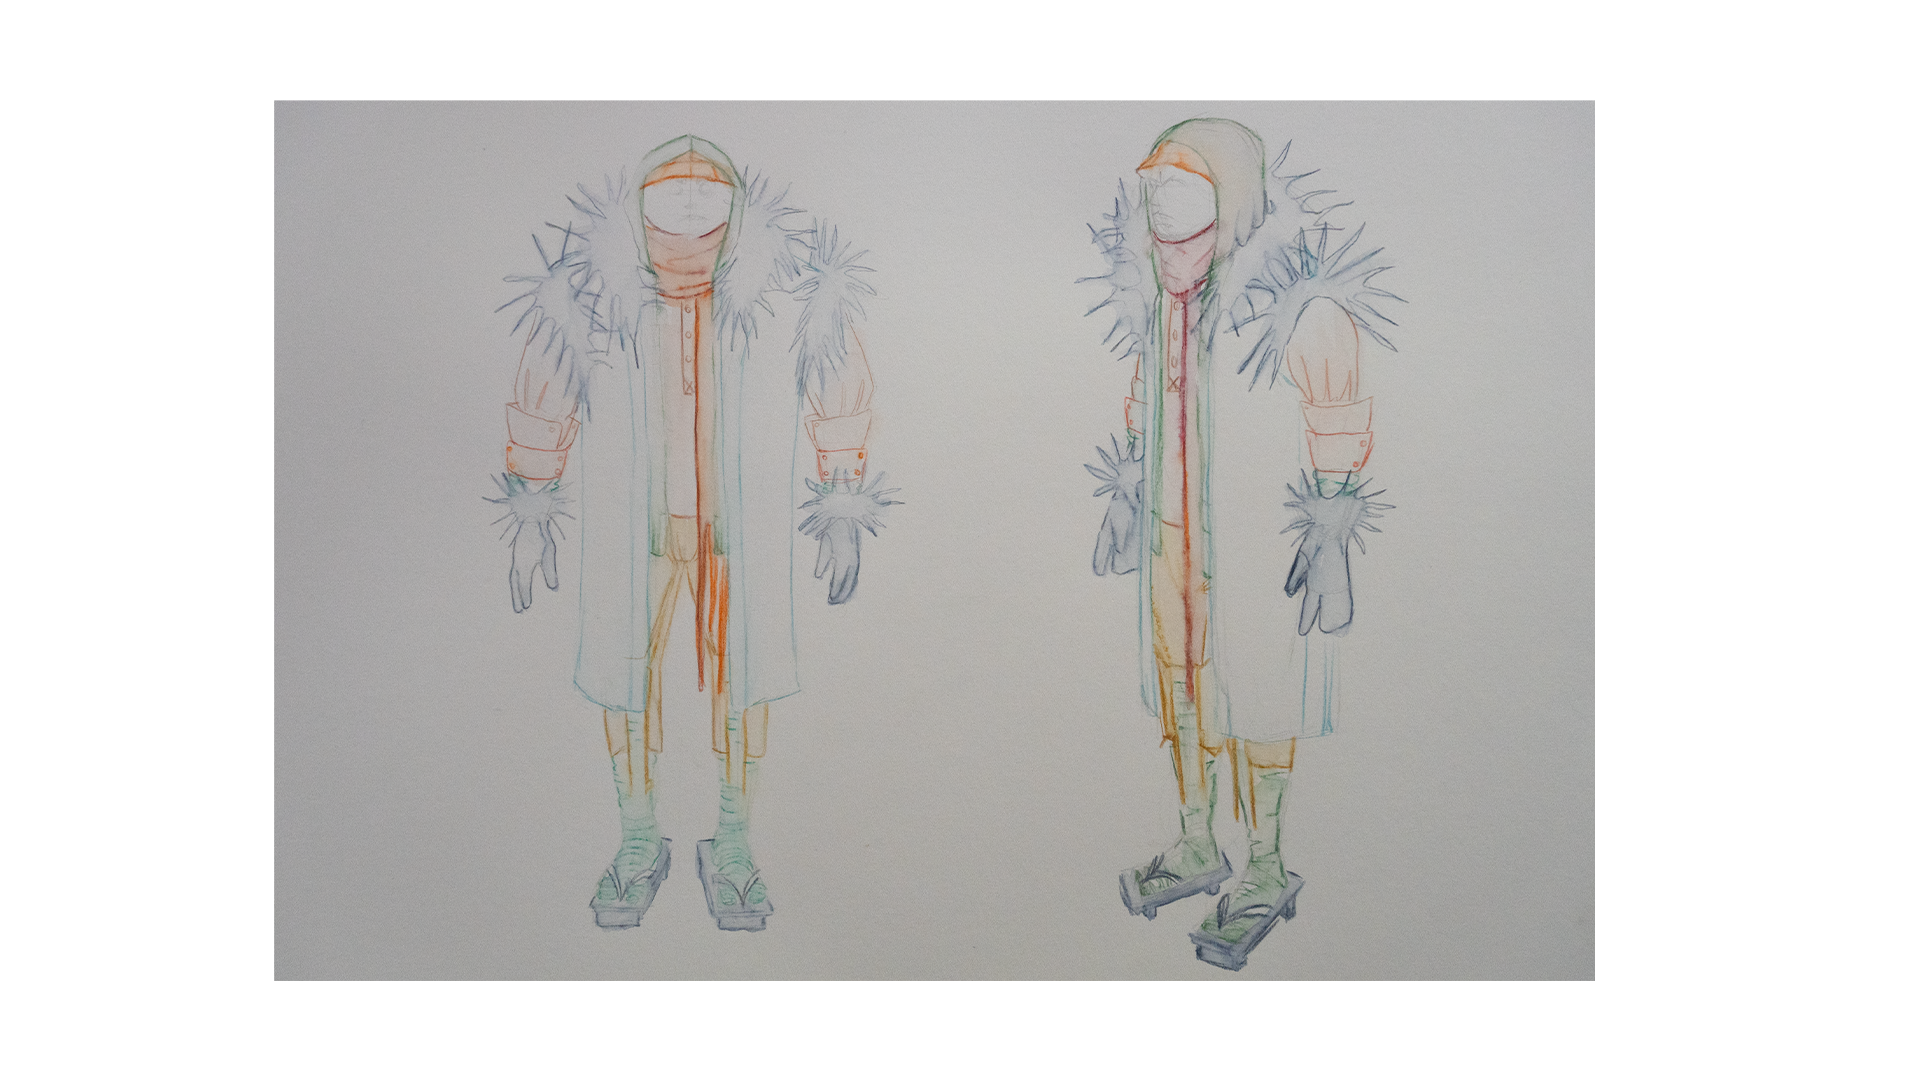
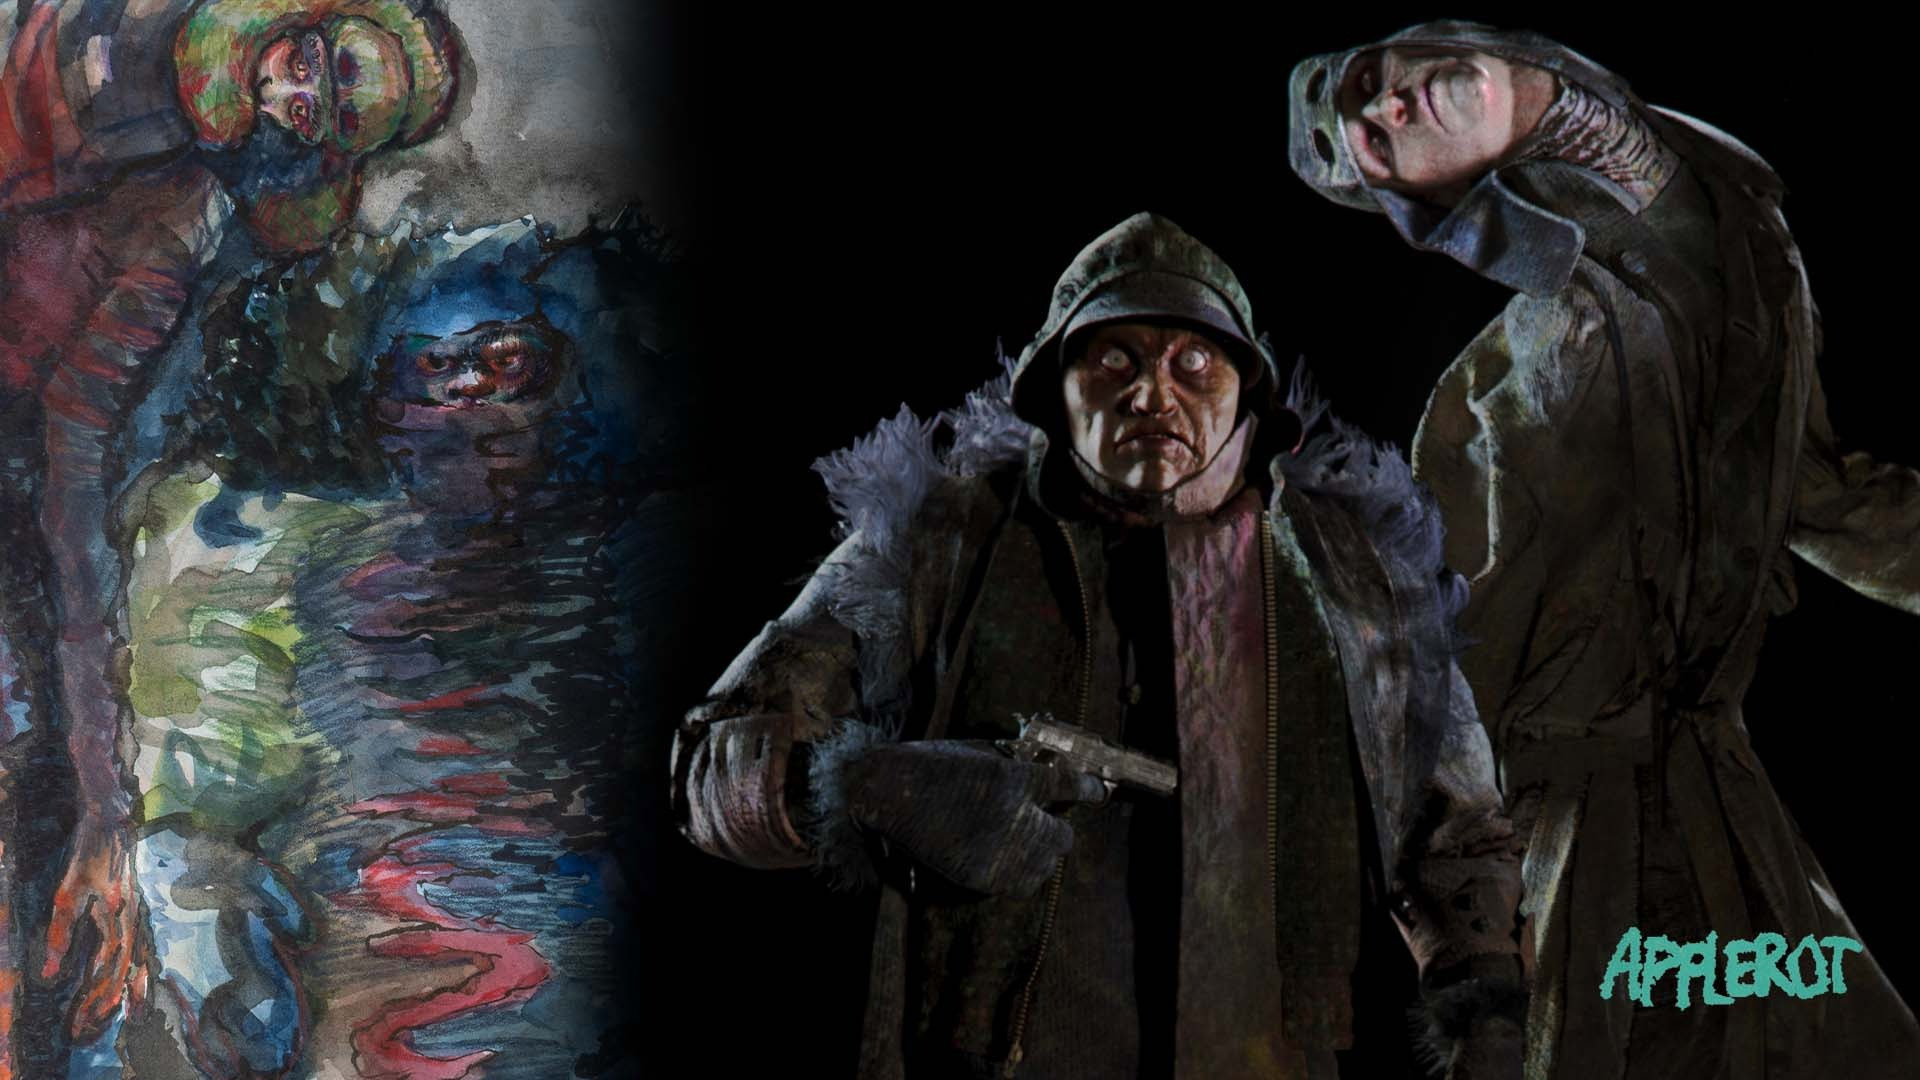
Concept artist Ab Wienk joined the team to paint his vision of the Apple Rot characters.


Ab Wienk took my moodboards and concept sketches into consideration when creating his rendition of the characters. The desired silhouettes, faces and costumes were all discussed beforehand too.
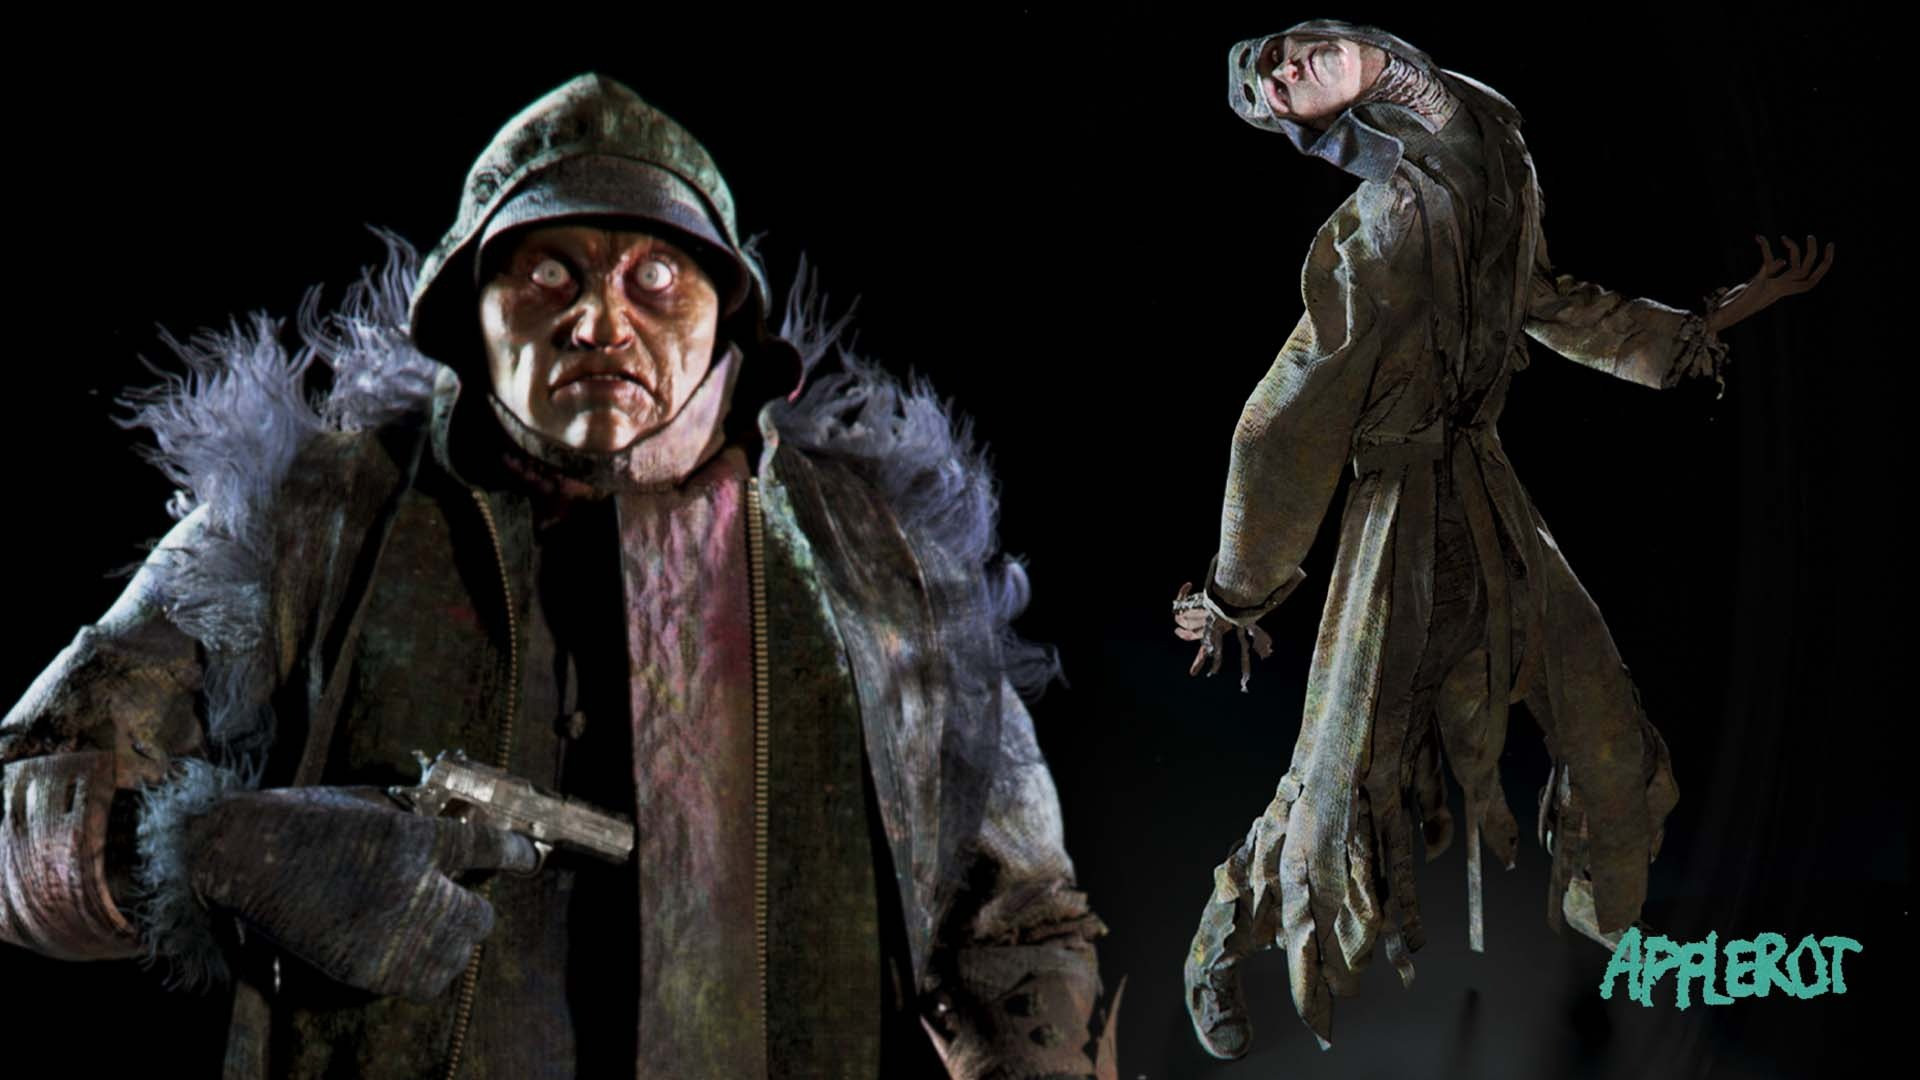
Sad Tall’s and Short Angry’s faces were established pretty early on in the process. Their costumes, however, remained as vague as the script till the very last moment.
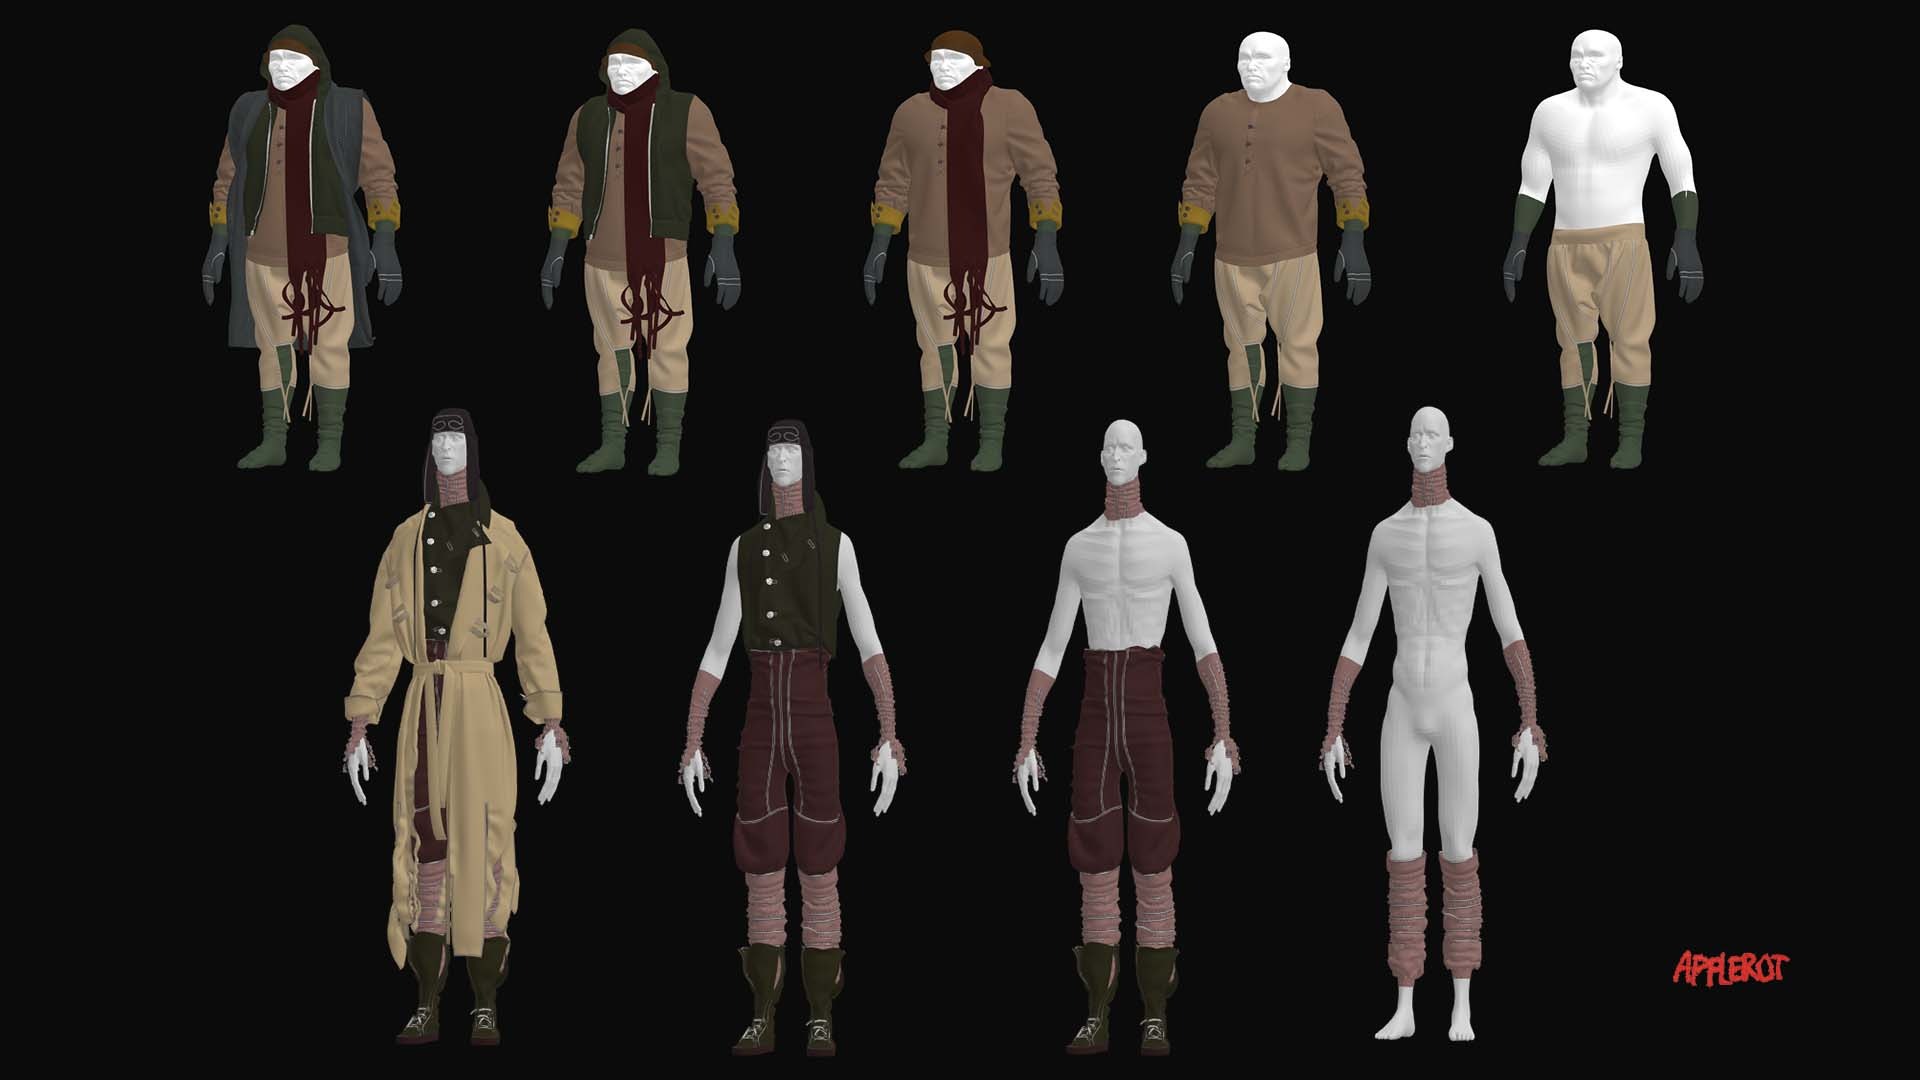
Character Modeling in Blender and Zbrush
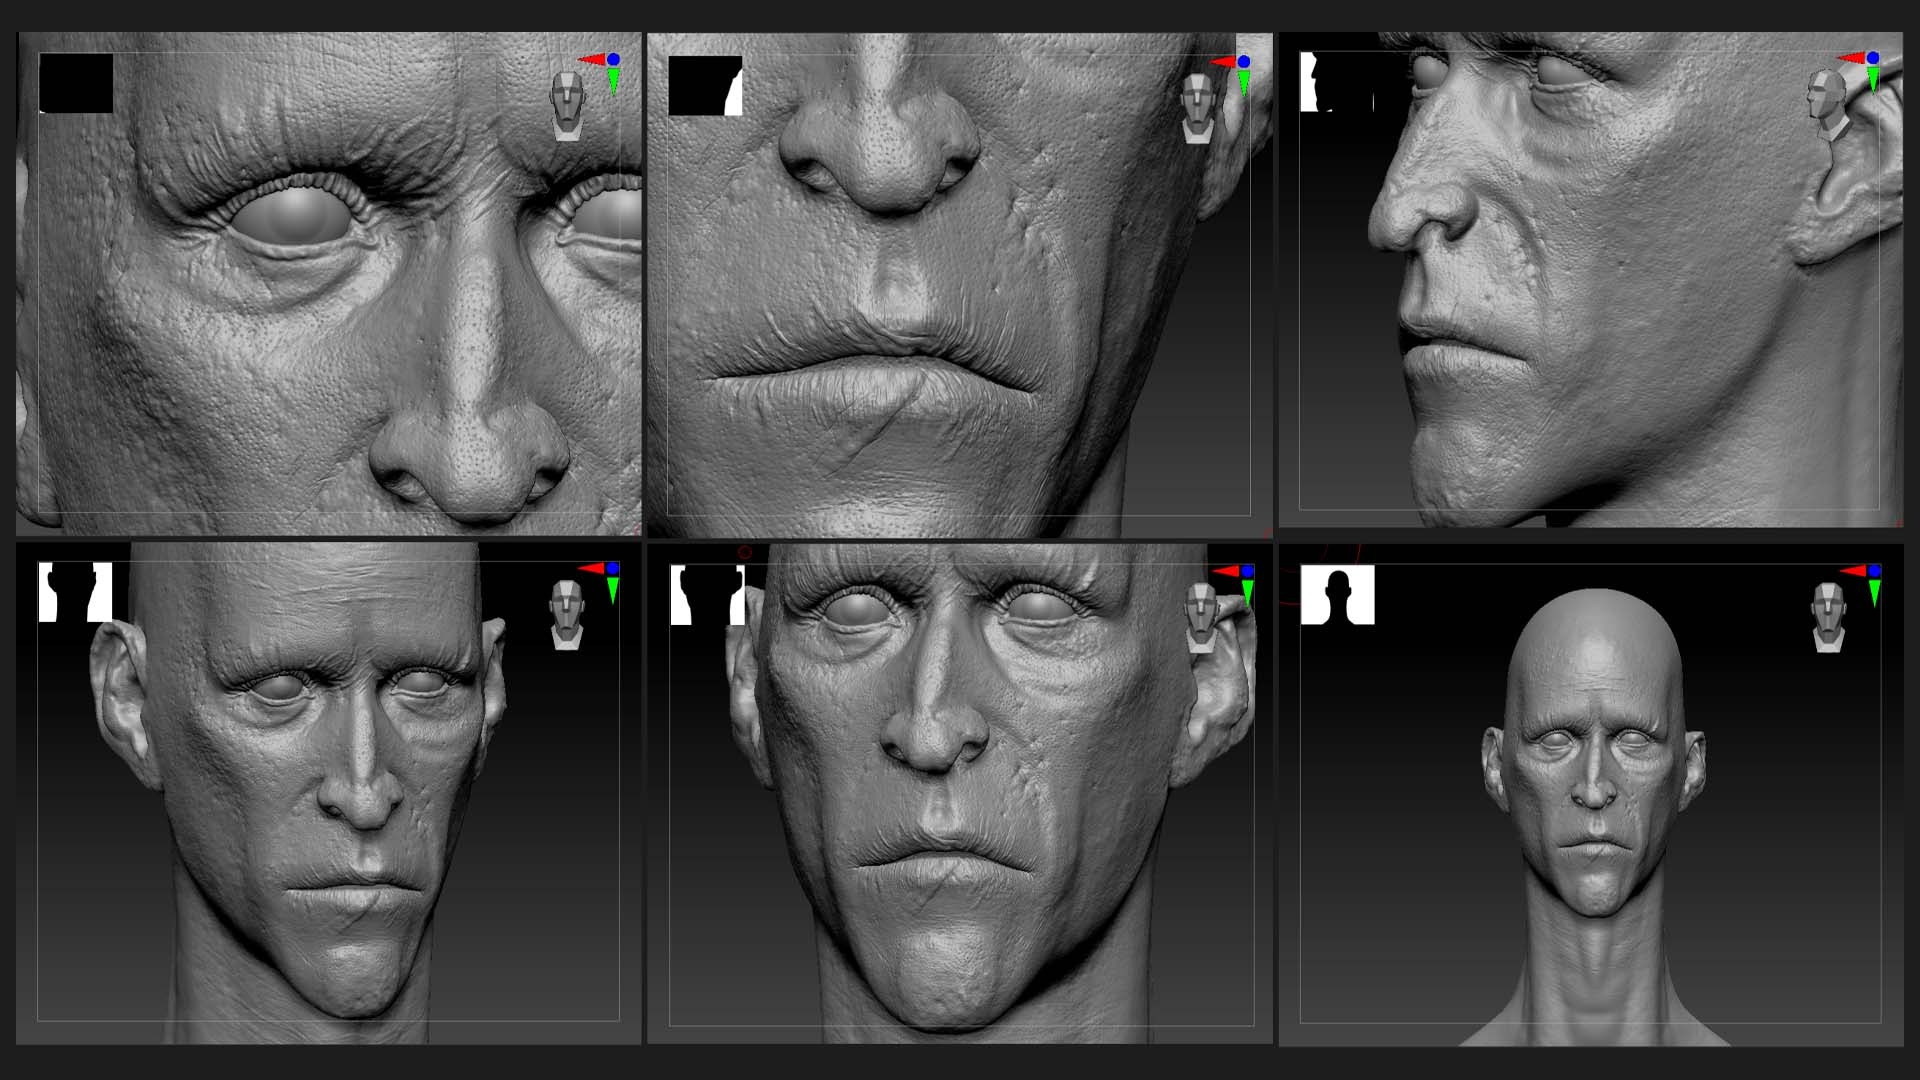
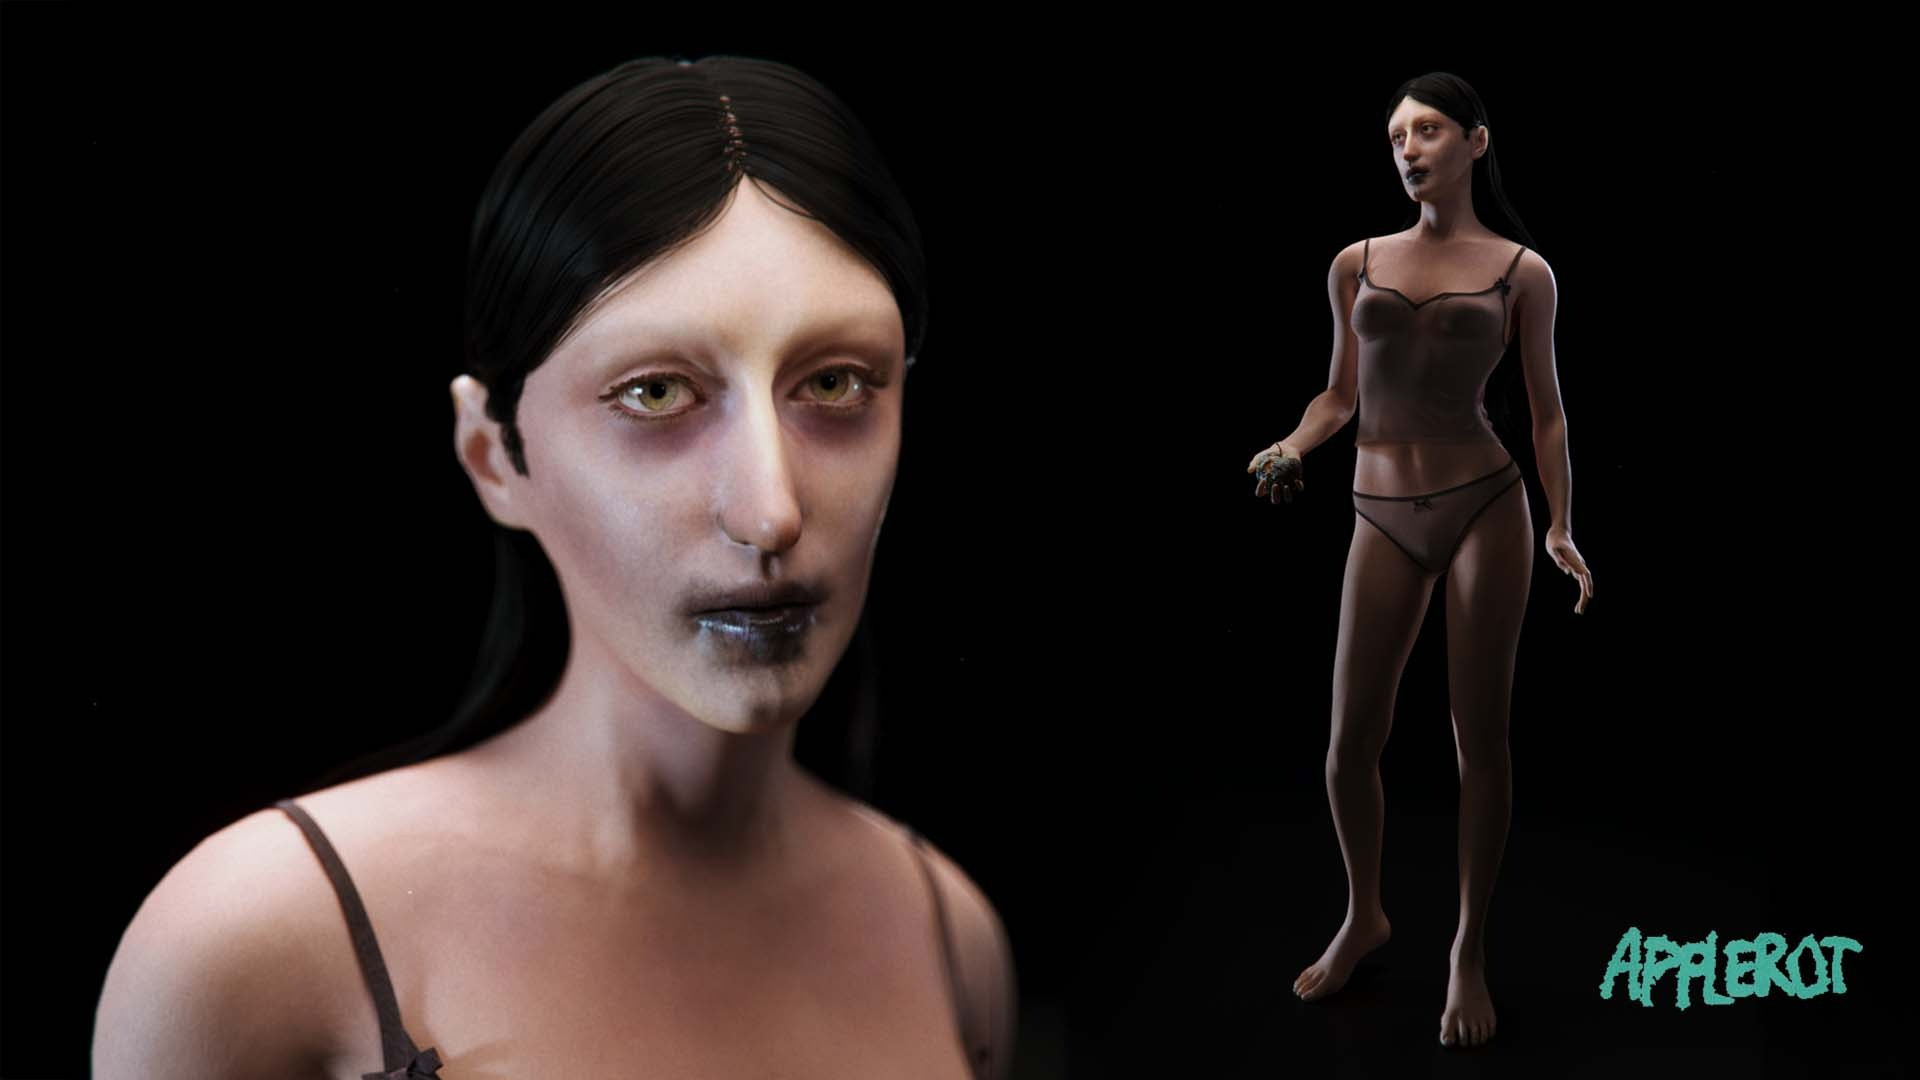
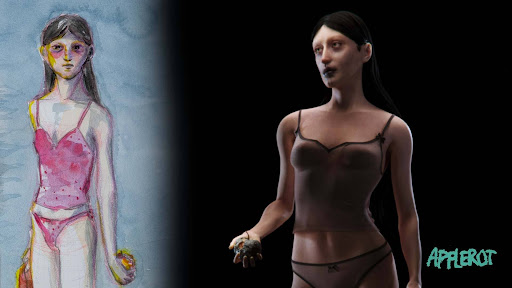
To help with the concept development, I sculpted faces for the two demons. These only served as a reference and proportionally changed quite a bit over the course of the production.
See below the evolution of their faces and silhouette.

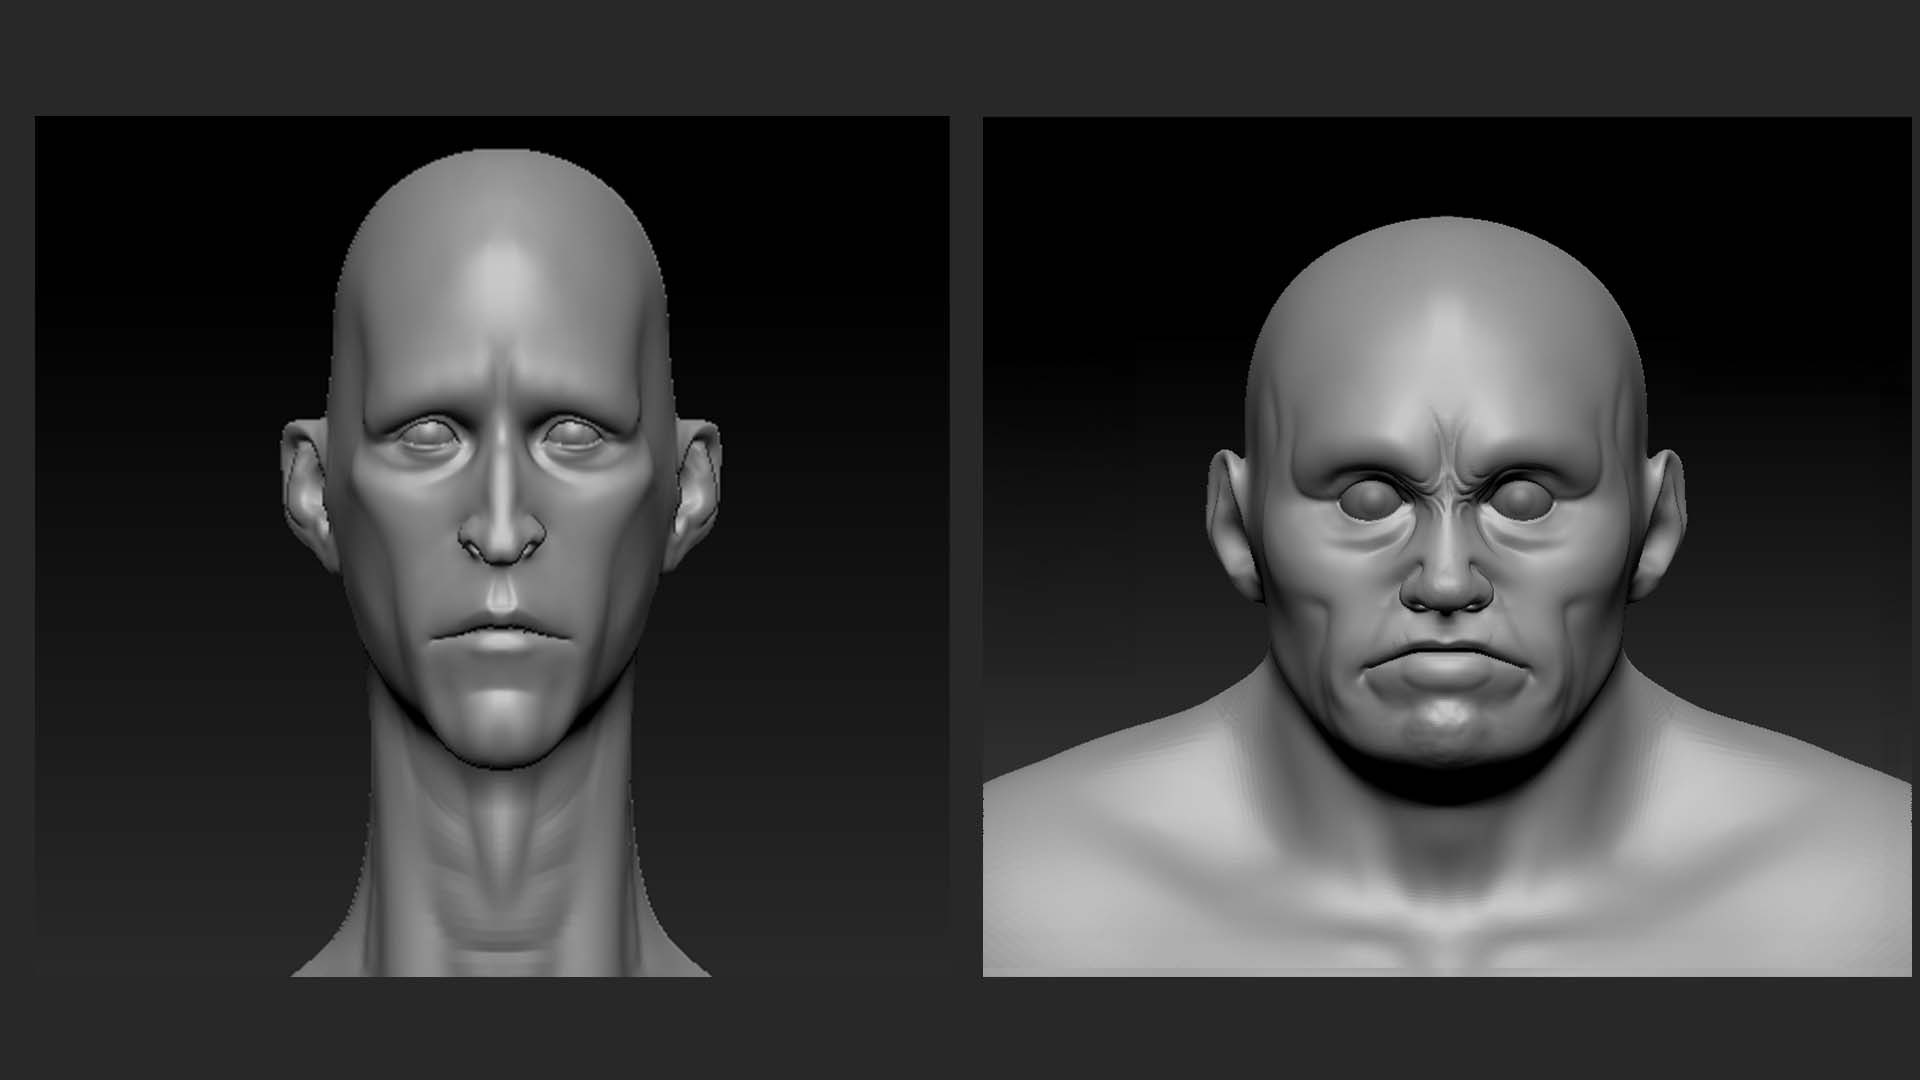
For both characters, the body meshes are heavily deformed Jhill Male Basemeshes. To properly control scale, this deformation was done in Blender. The cube references the height of the ceiling in the film.

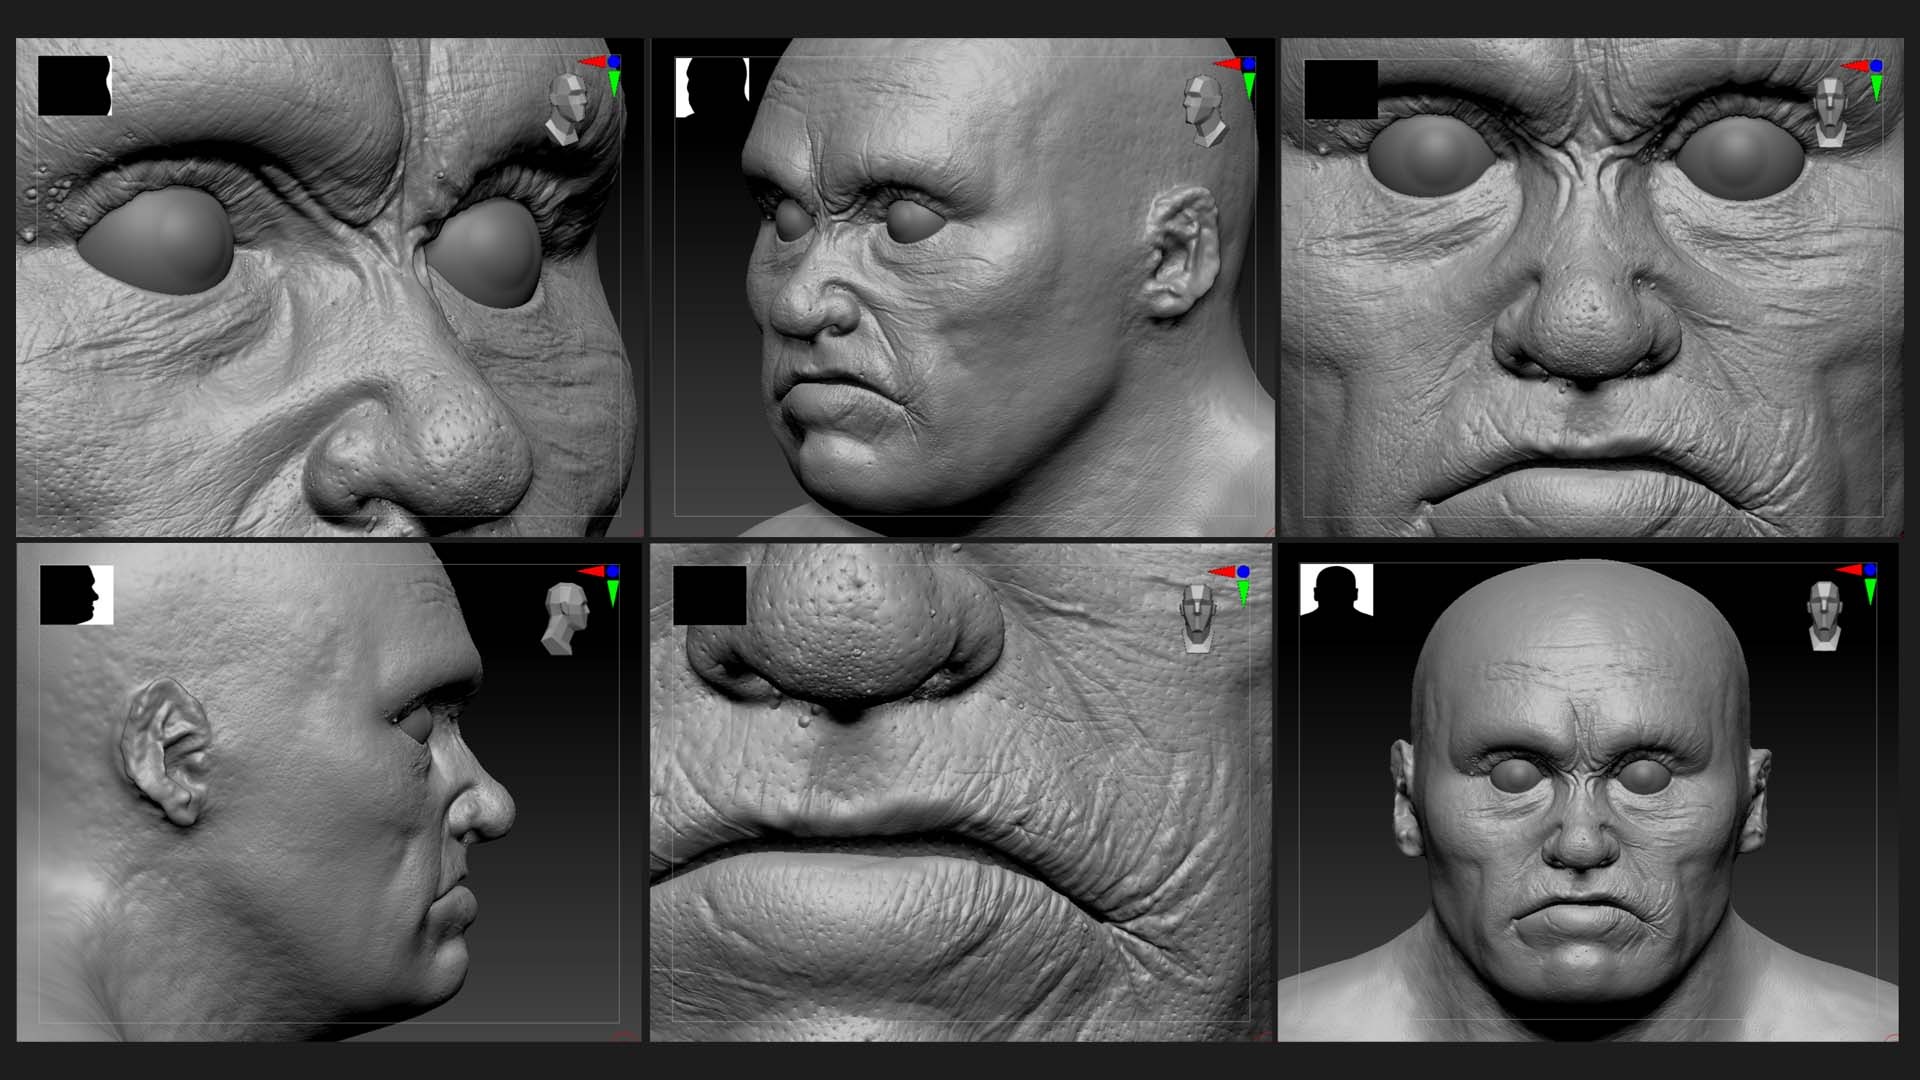
When it came down to carving the details for their features and skin texture, I moved the models over to ZBrush.
I obviously knew that most of their bodies would be covered in cloth, but it was still fun to sculpt a couple of weird details into their torsos. Especially with Sad Tall, I had some fun.

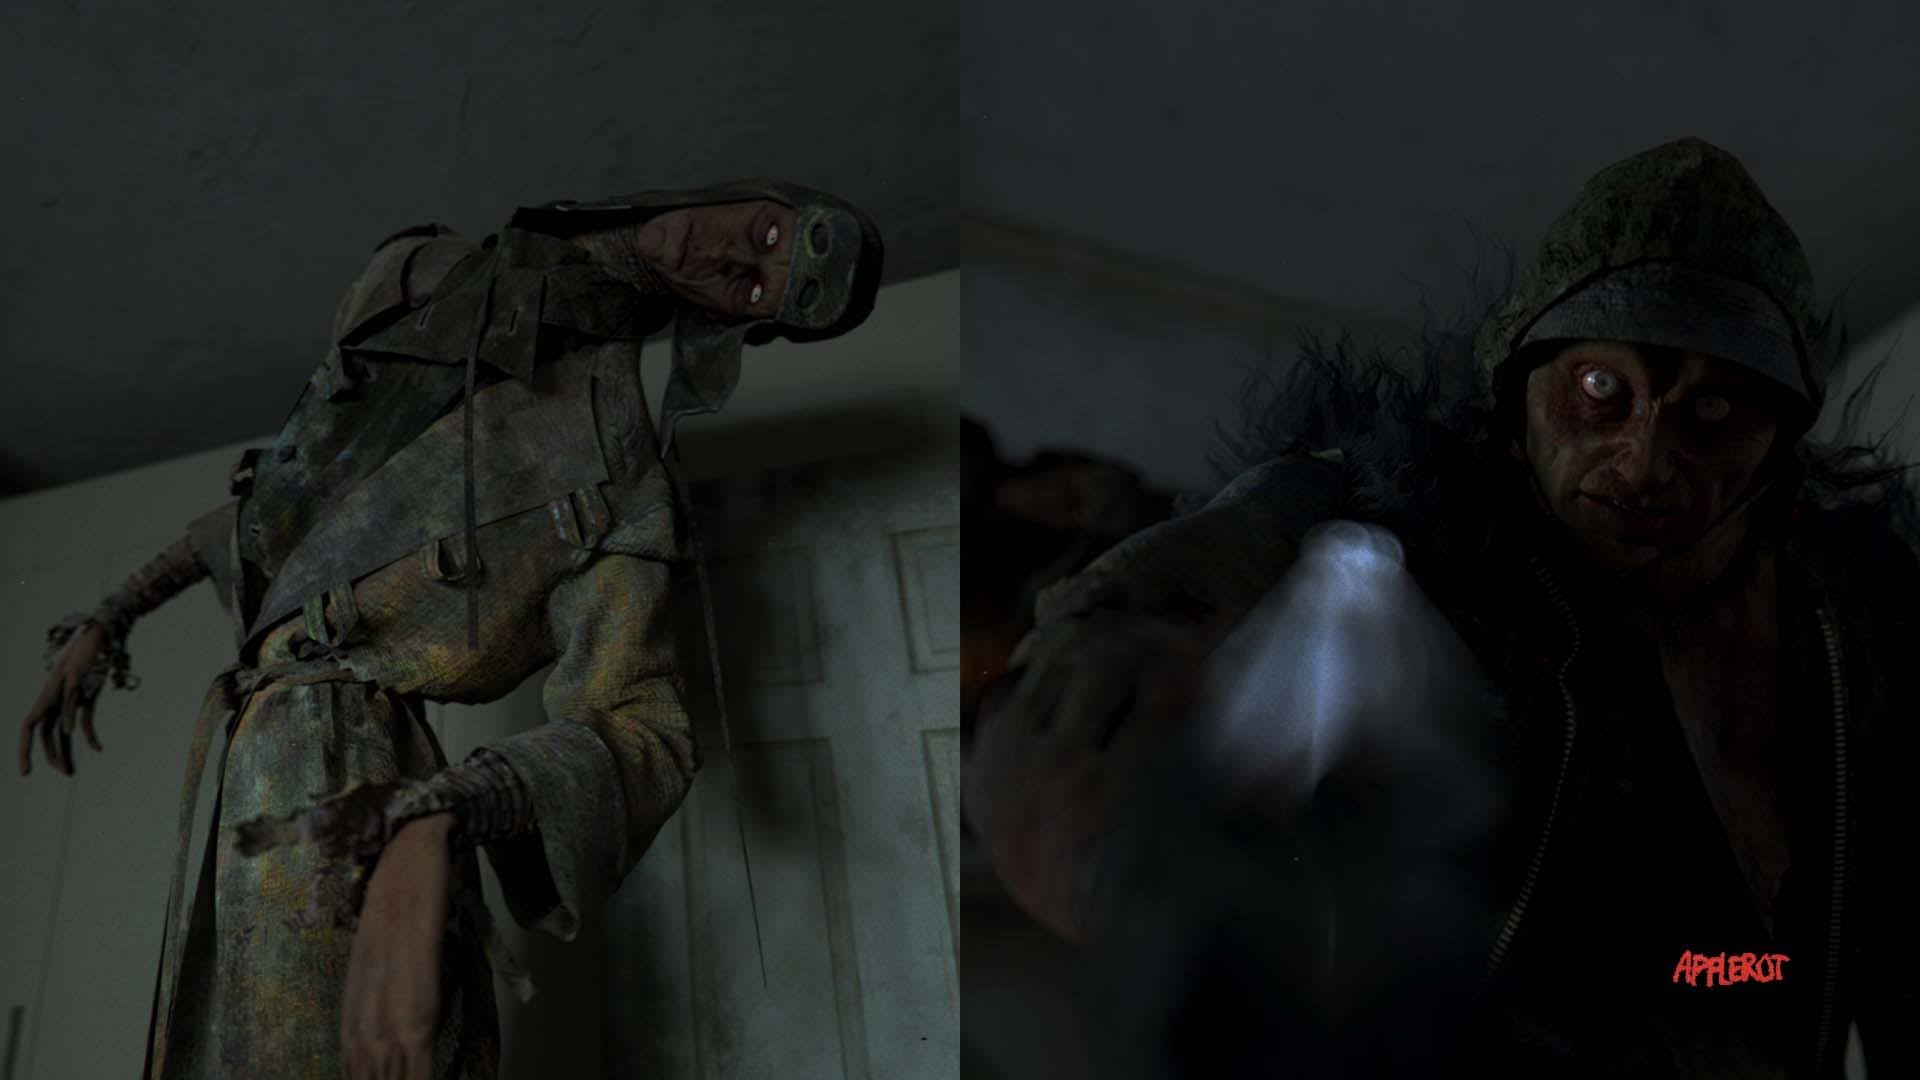
For Sad Tall I sculpted his hands too, as those would be exposed. We had a very clear idea of what we wanted Sad Tall’s entrance scene to look like, and so we knew that his hands would be visibly in frame.
Carving Skin Details in Zbrush
After I had their bodies, I moved on to creating their skin textures.
Using Jhill’s Skin Details Kit, it was easy to get exaggerated and enlarged skin details.
The goal is to be able to extract normal and height details with as many values as possible. These maps are useful in the texturing process.
As we needed to preserve file size for the final render, we couldn’t use the high-density mesh for the final shot. Good textures make a lower resolution model hold up in frame.
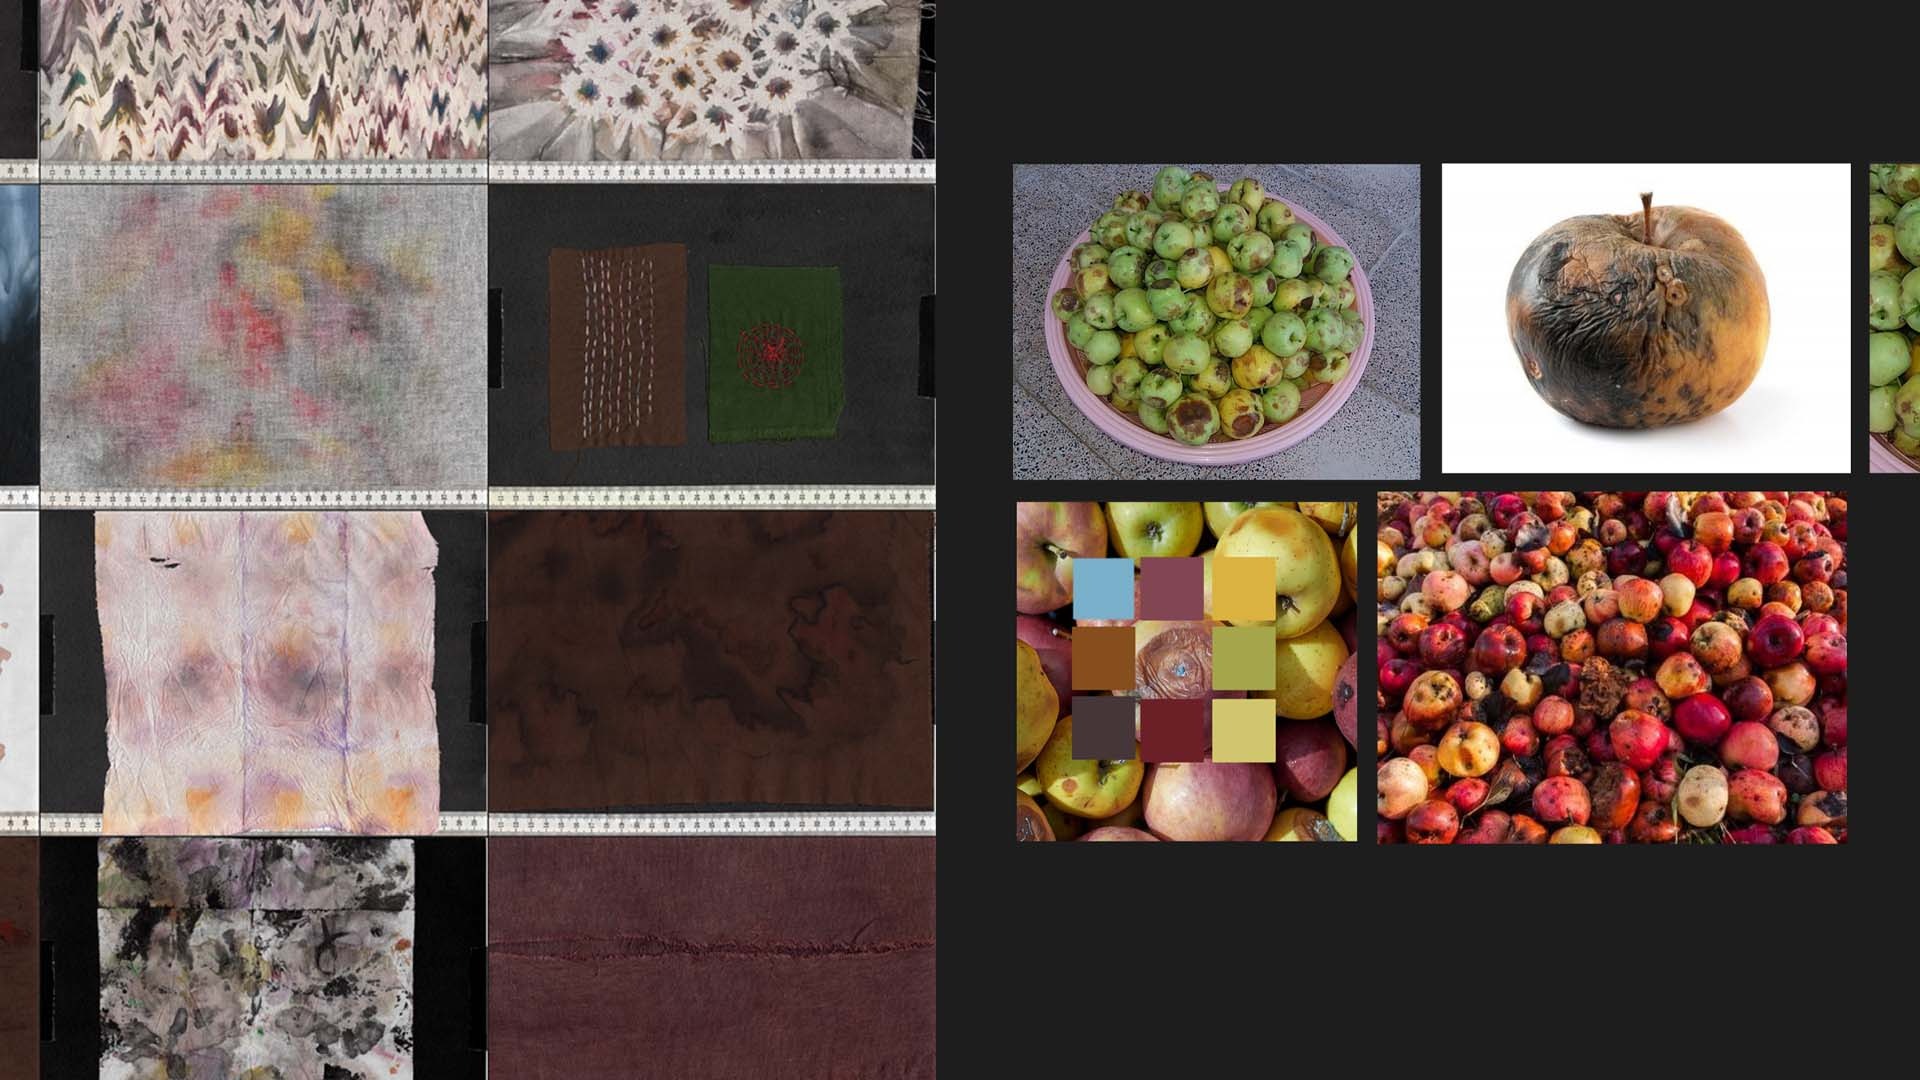
I took reference from real skin details, fabric material textures I made myself and, of course, rotten apples.

3D Costume Design in Style3D
With low-resolution exports of the two characters, I could start the costume design process.
I personally use Style3D Atelier for any cloth simulation, as I enjoy how their simulations run. I feel like the software offers me a lot of control over how the individual layers interact with each other. Things like adjusting the stiffness, render thickness and layer settings help me to get all pieces sitting correctly.
Before jumping into the software, I used our references, moodboards and concept art pieces to decide on a final design. I wanted to have an idea of how many items I needed to create and what shape they’d roughly have. I ended up with two technical drawings of sorts. They ended up pretty closely resembling the final product.


I’d kept the option for experimentation within Style3D open, but ended up enjoying these oddly draped trousers and vests.
Wrinkled and bunched up material could create the illusion of more layers than there actually are. Both Sad Tall and Short Angry wear gloves and socks that emulate the look of excess skin or material.
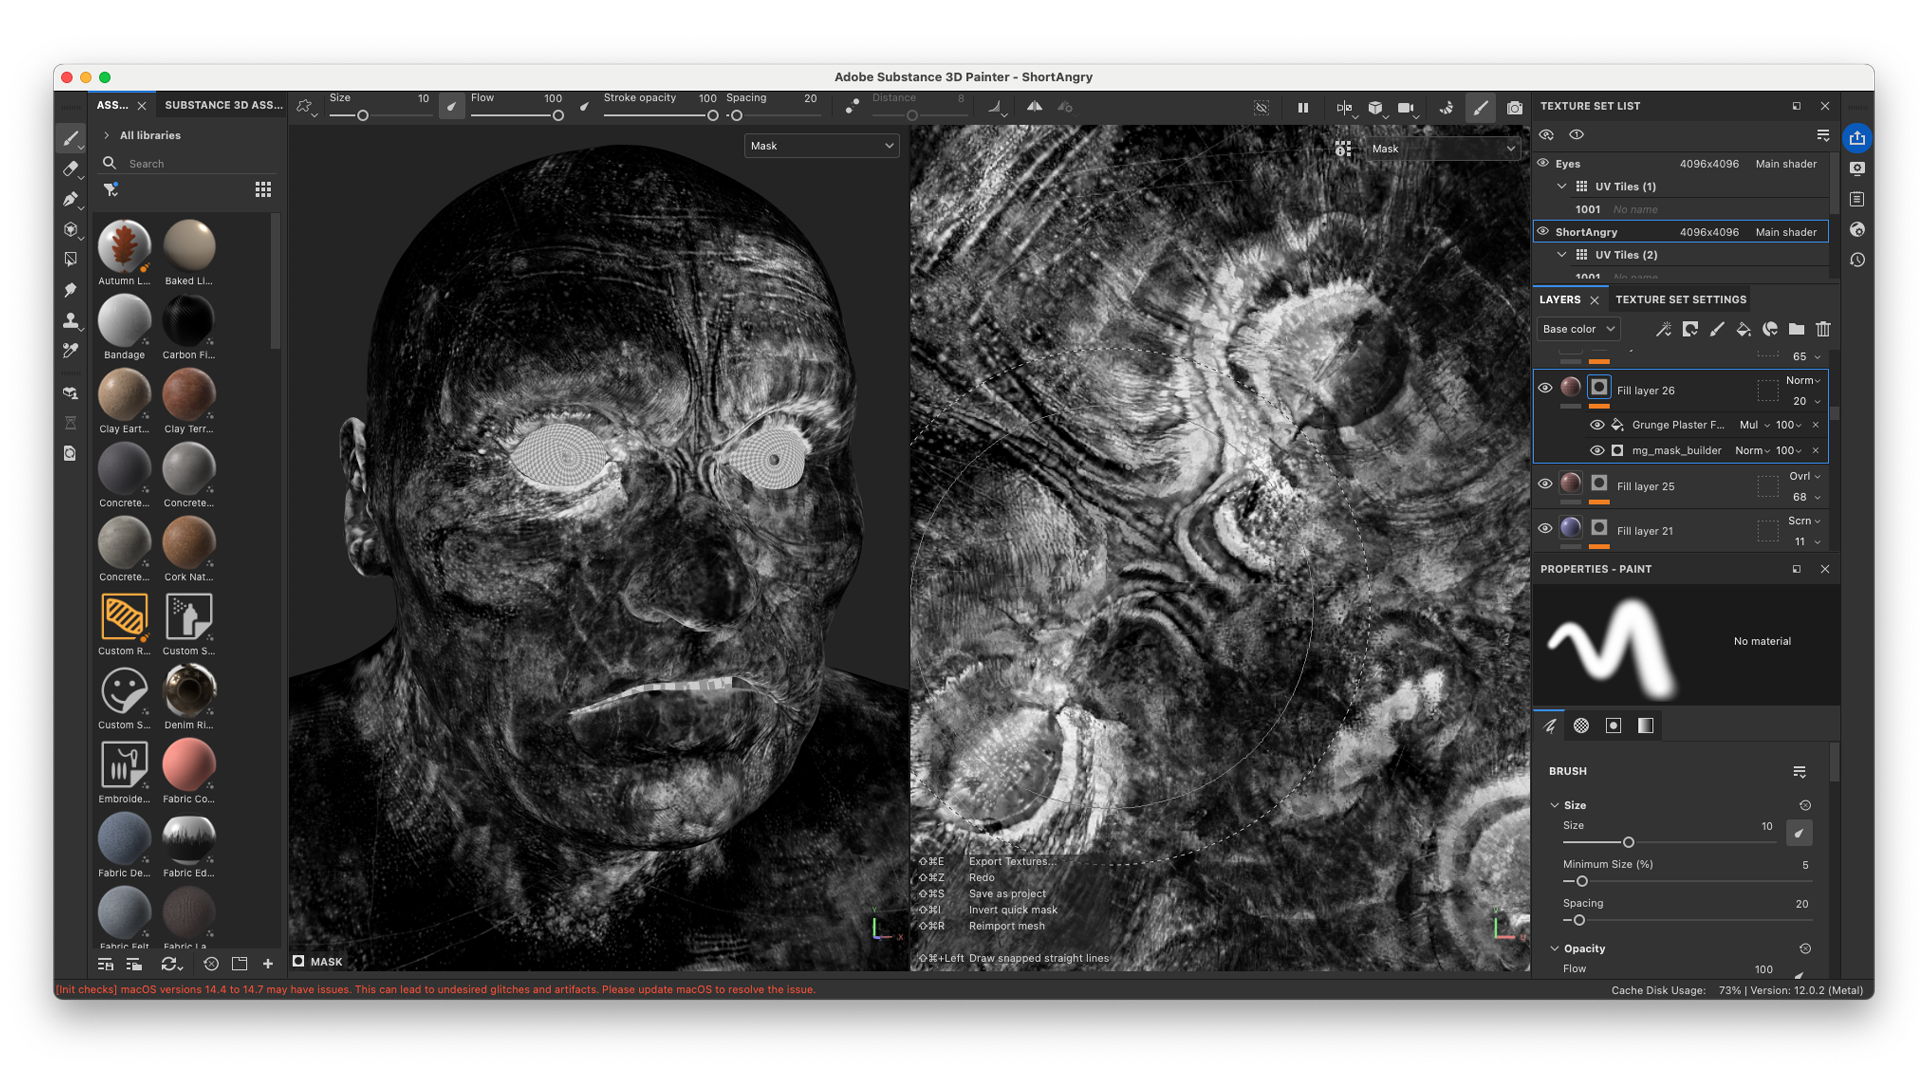
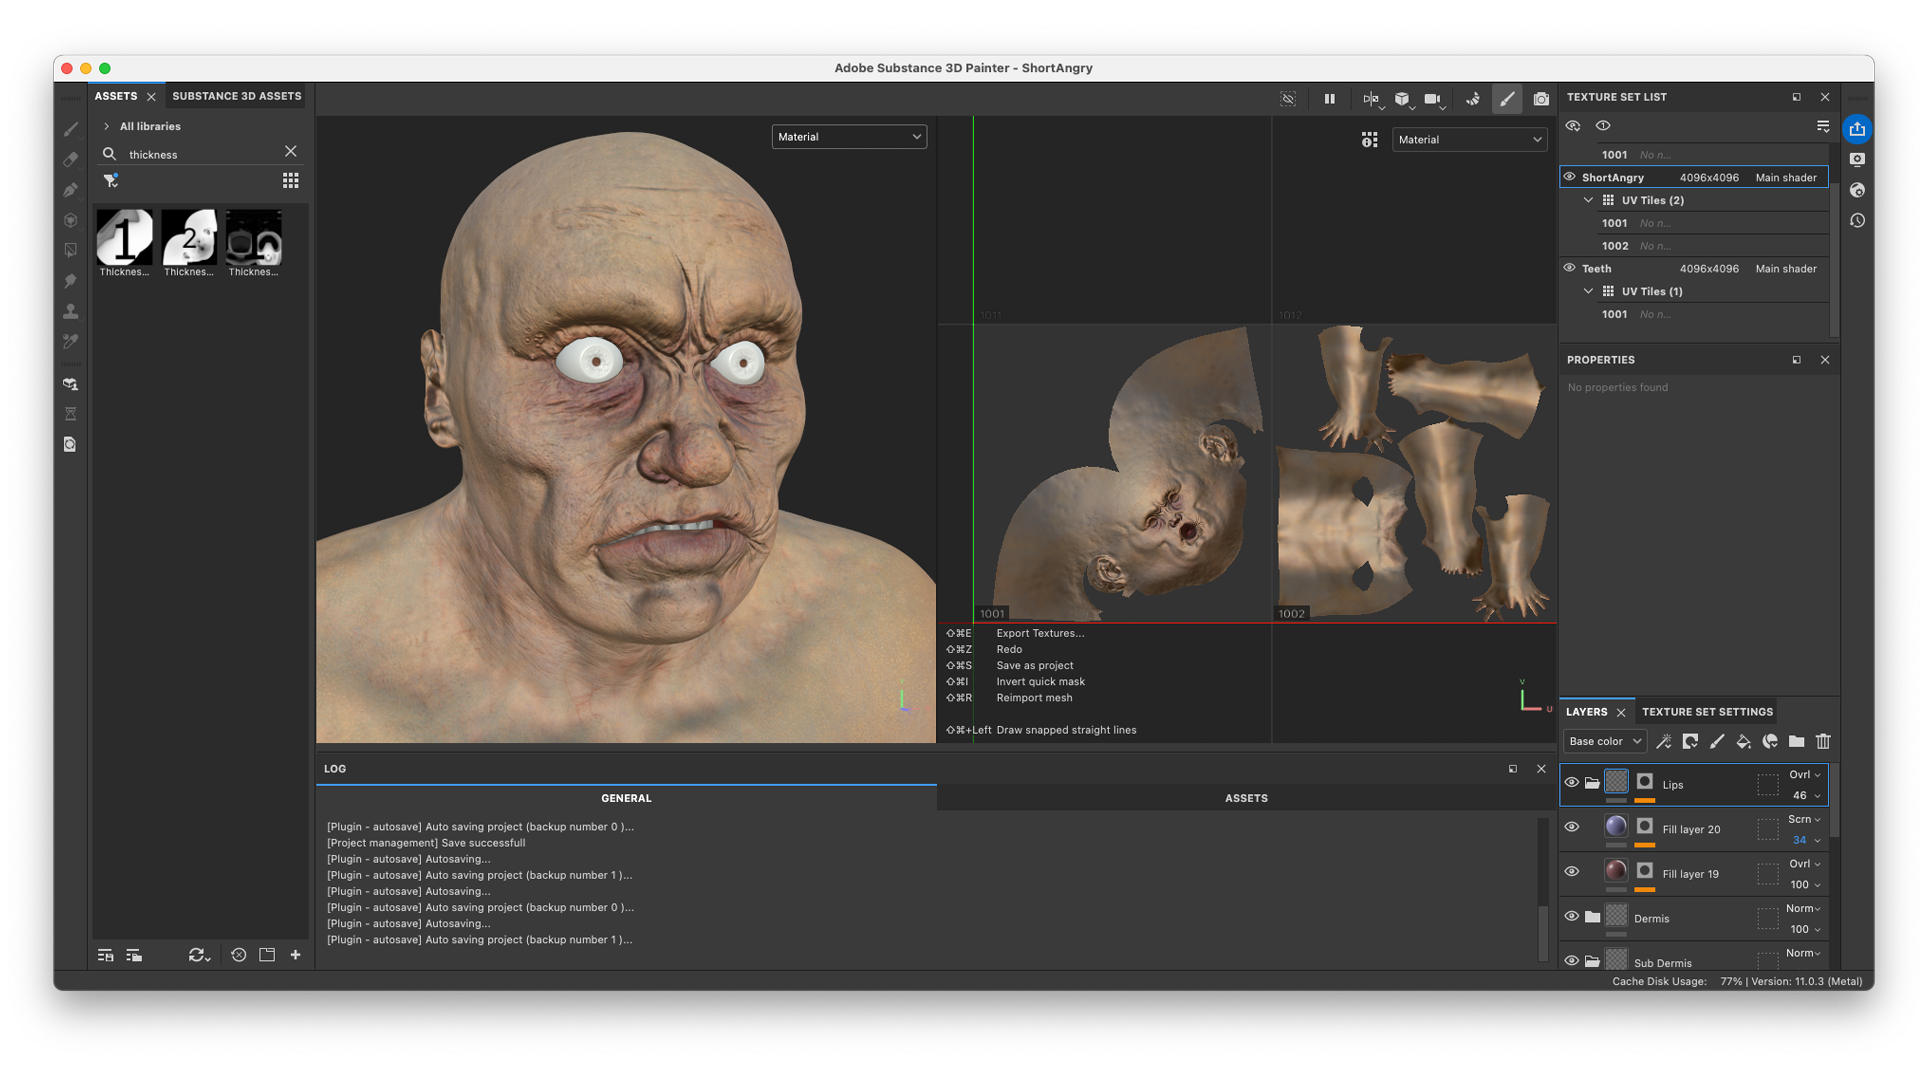
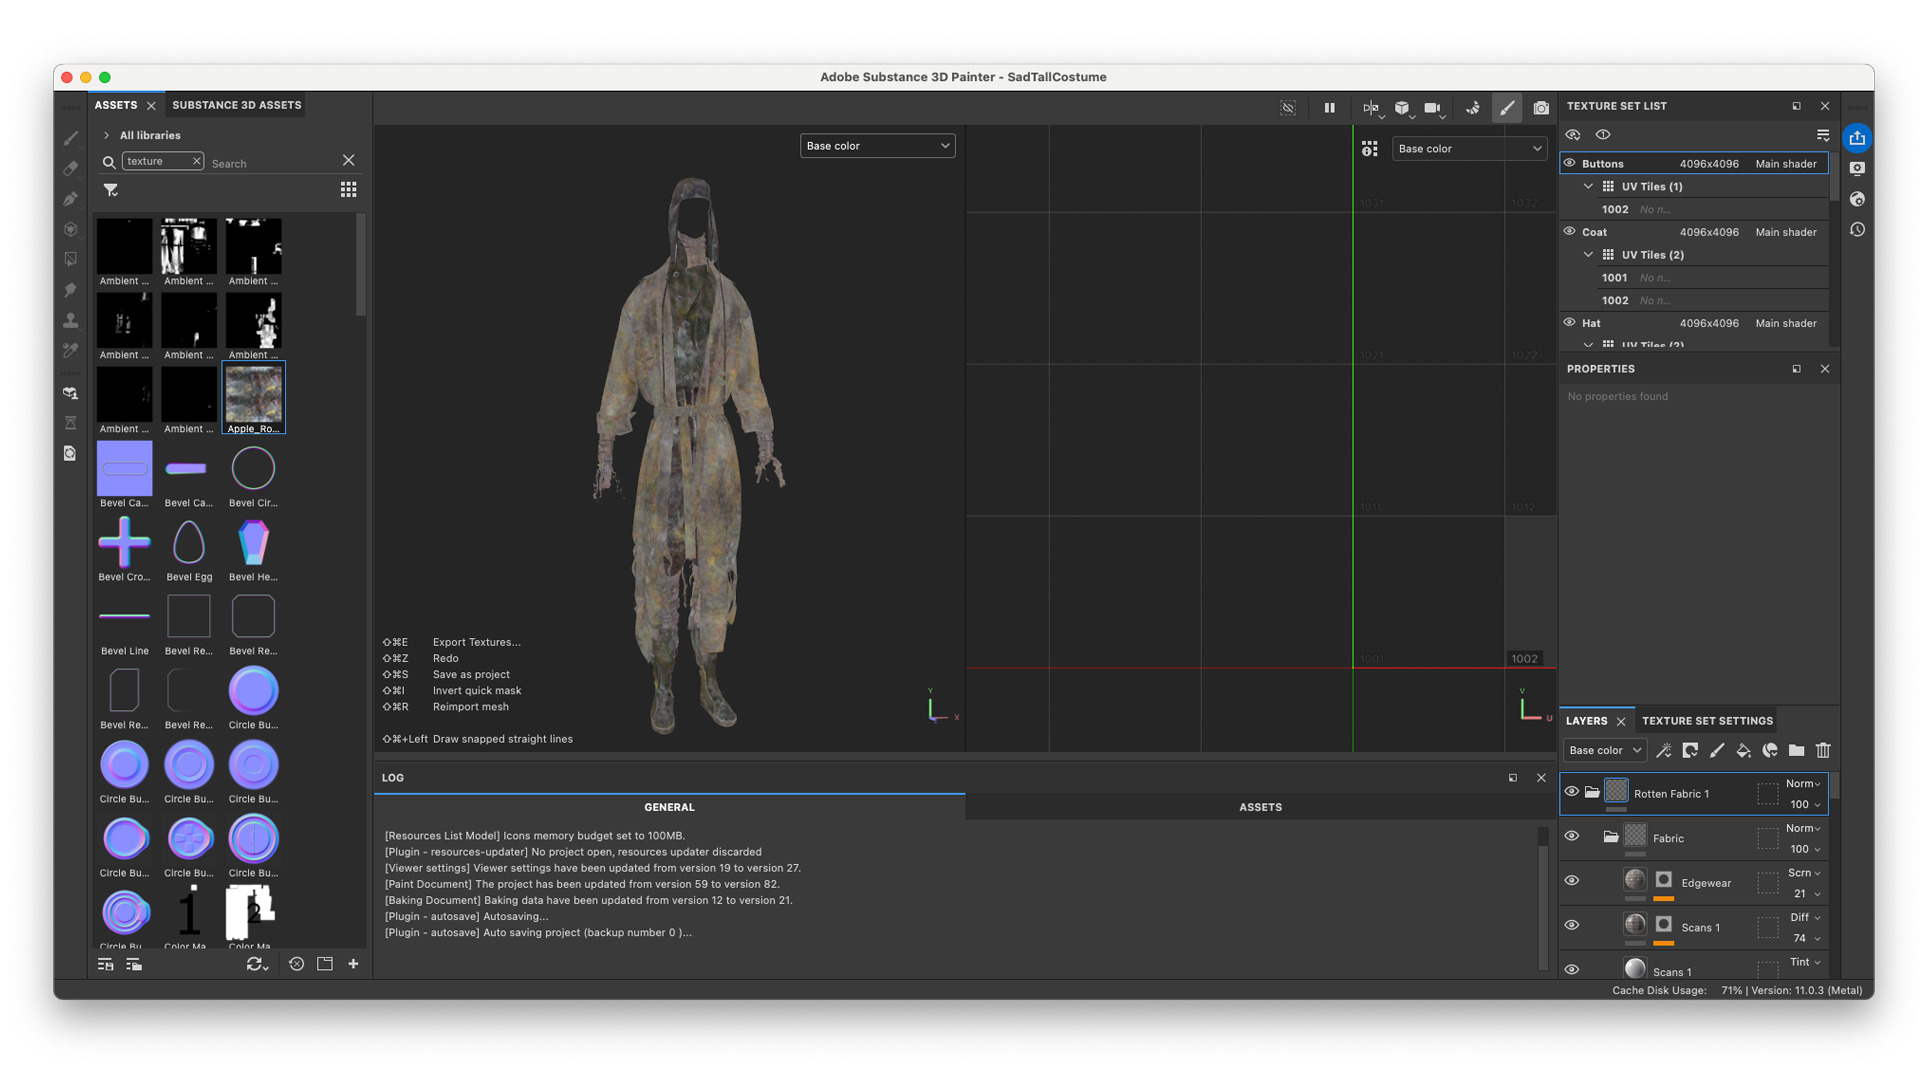
Texturing in Substance Painter
The skin is built up from various layers and colors.
In Substance 3D Painter we started with a blood-red and purple subdermis layer. Shades of yellow, green and blue are stacked to mimic the depth of real flesh.
Handpainted details and custom texture maps were used to create all sorts of irregularities in the skin texture.

A similar layering process was applied to the cloth.
The base materials are a variety of cloth shaders from Bakermat Antwerp. Their materials provide maps that are essential to give the material the right amount of Sheen and Translucency.
Leo describes this in the Apple Rot Case Study:
In Adobe Substance 3D Painter it's important to get a good quality bake of your mesh. I then like to create a base material for each texture set that lays out the general materials. Where possible I create an Anchor Point for each fabric texture. At each future state it will be beneficial to reference the Anchor Point for creating masks or texture variations.

We used textures from our own library to add additional dirt and aging, colour and height. These textures included photographs and scans of leaves with mold, hand dyed fabric, burnt receipts and rotten apples.
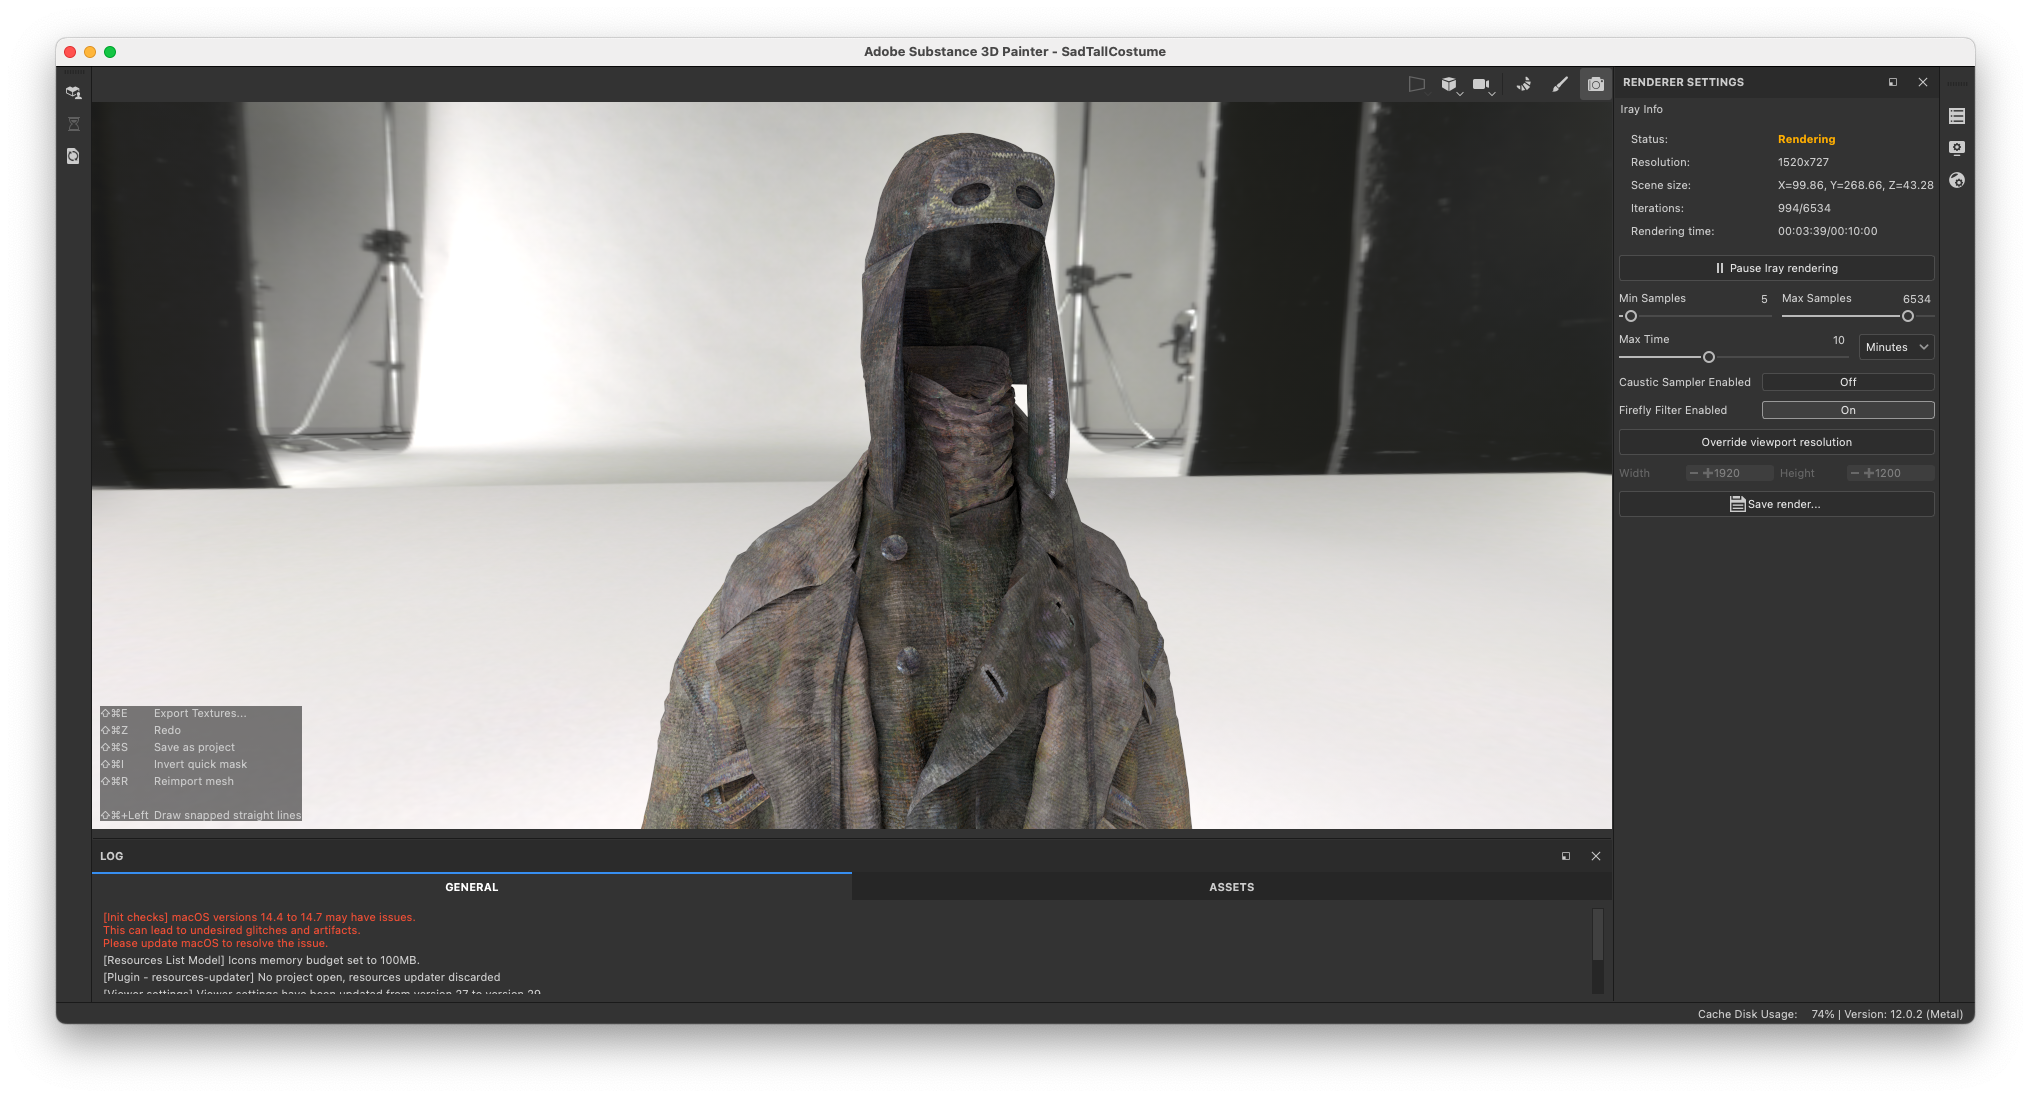
Look development in Cinema 4D and Corona Renderer
We took a look at the materials under various lighting conditions, including tests for the final look of the film.
Lookdev is extremely important, as textures always look different in your texturing software compared to the final, shaded material. Lighting, environment bounce, sheen and metalness greatly affect the look of the material. As we rendered the final film in the physically-accurate render engine Chaos Corona, we always make sure the textures are optimally set up. Since Corona renders images with extreme accuracy, the wrong setup greatly impacts the quality of the final, rendered shot.
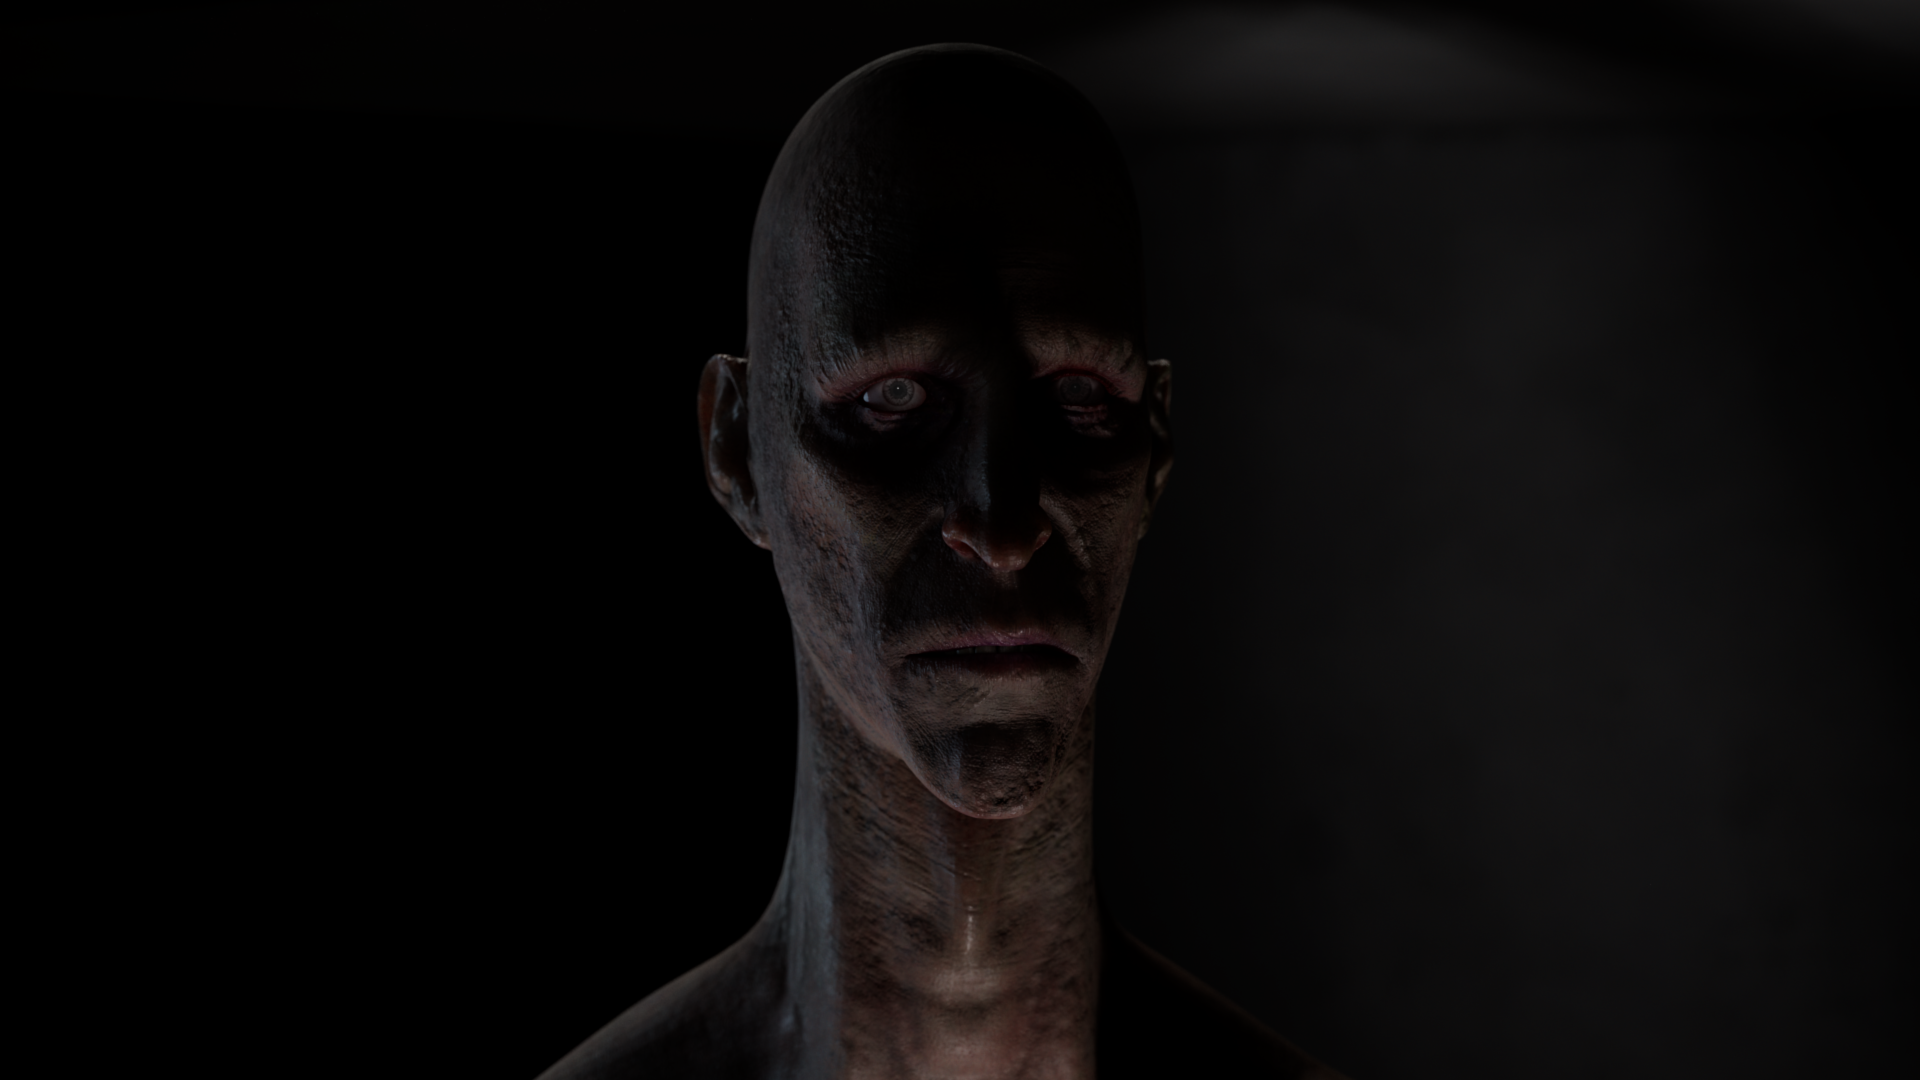


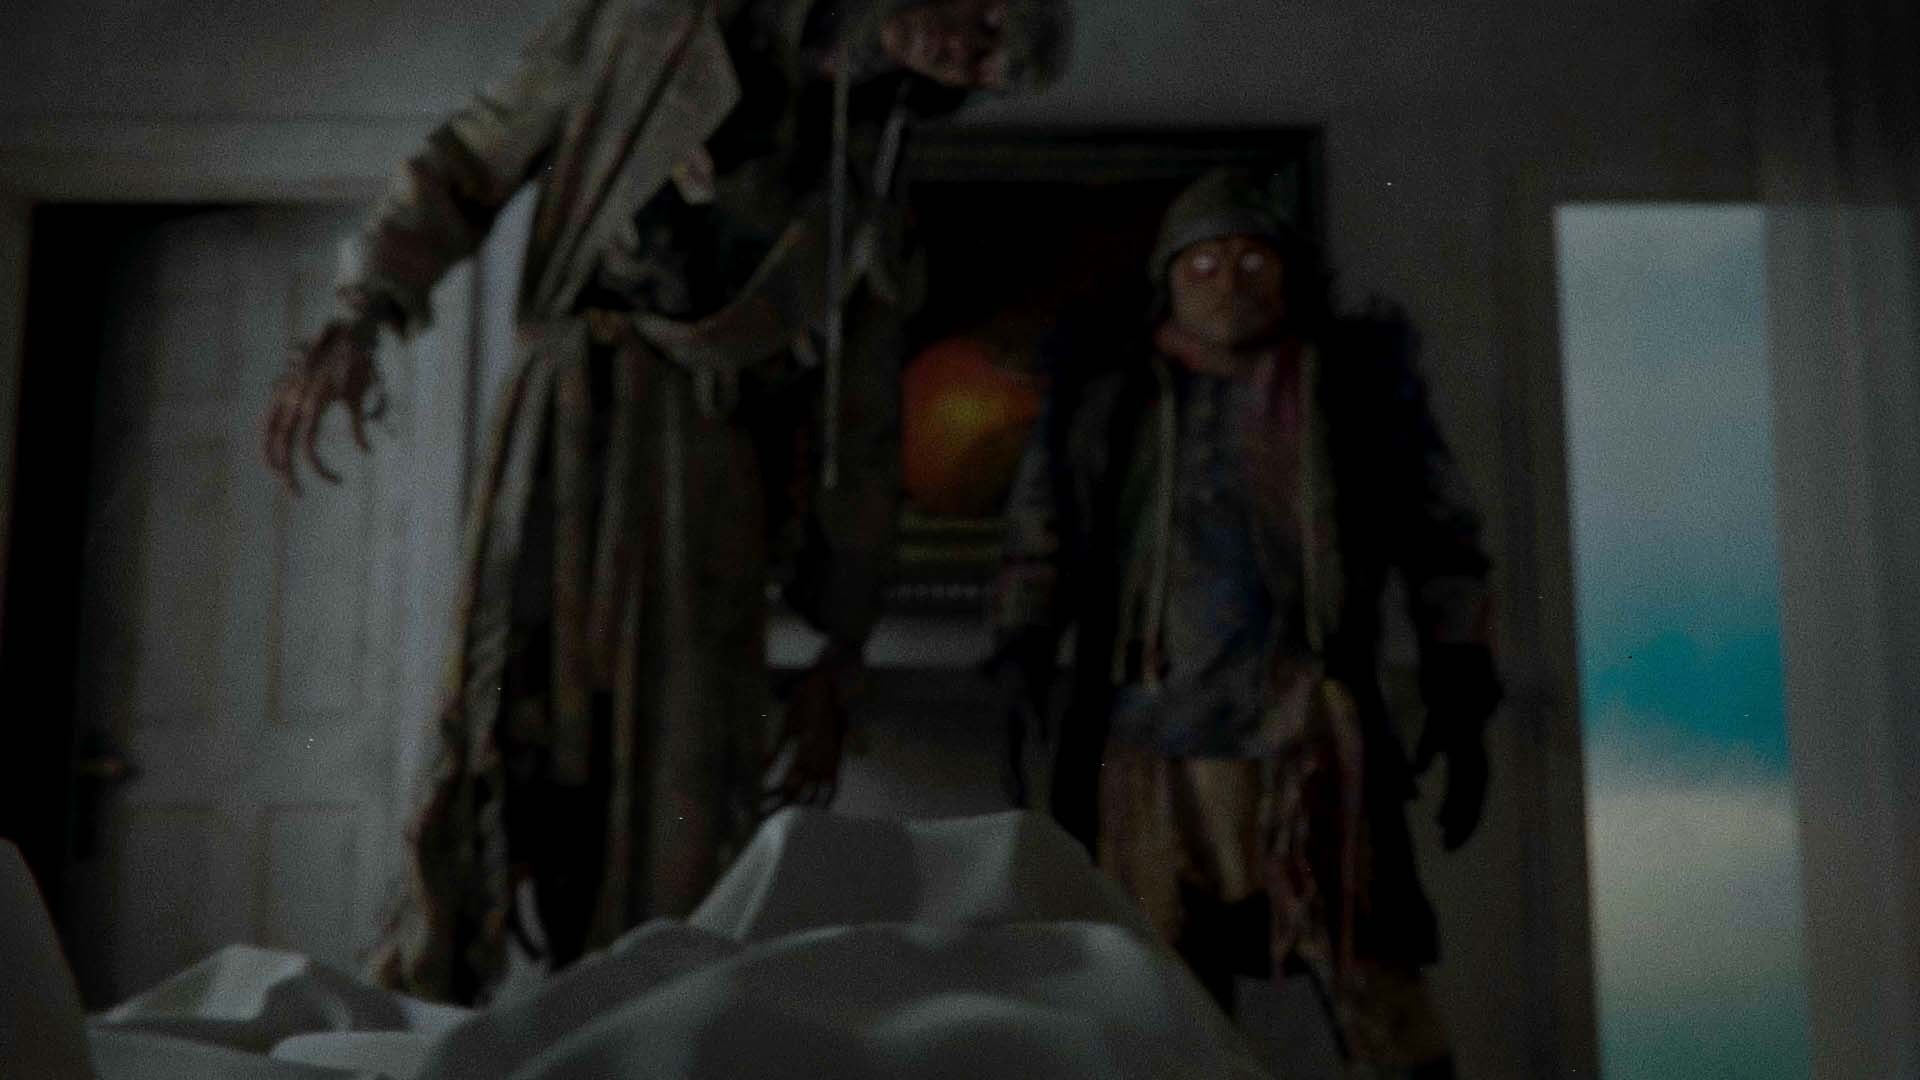
The scene in which the demons appear is a night-scene, and is mostly lit by the moon. Furthermore, the film’s blurry and often out of focus. Bringing the characters truly to life depended on the animation.
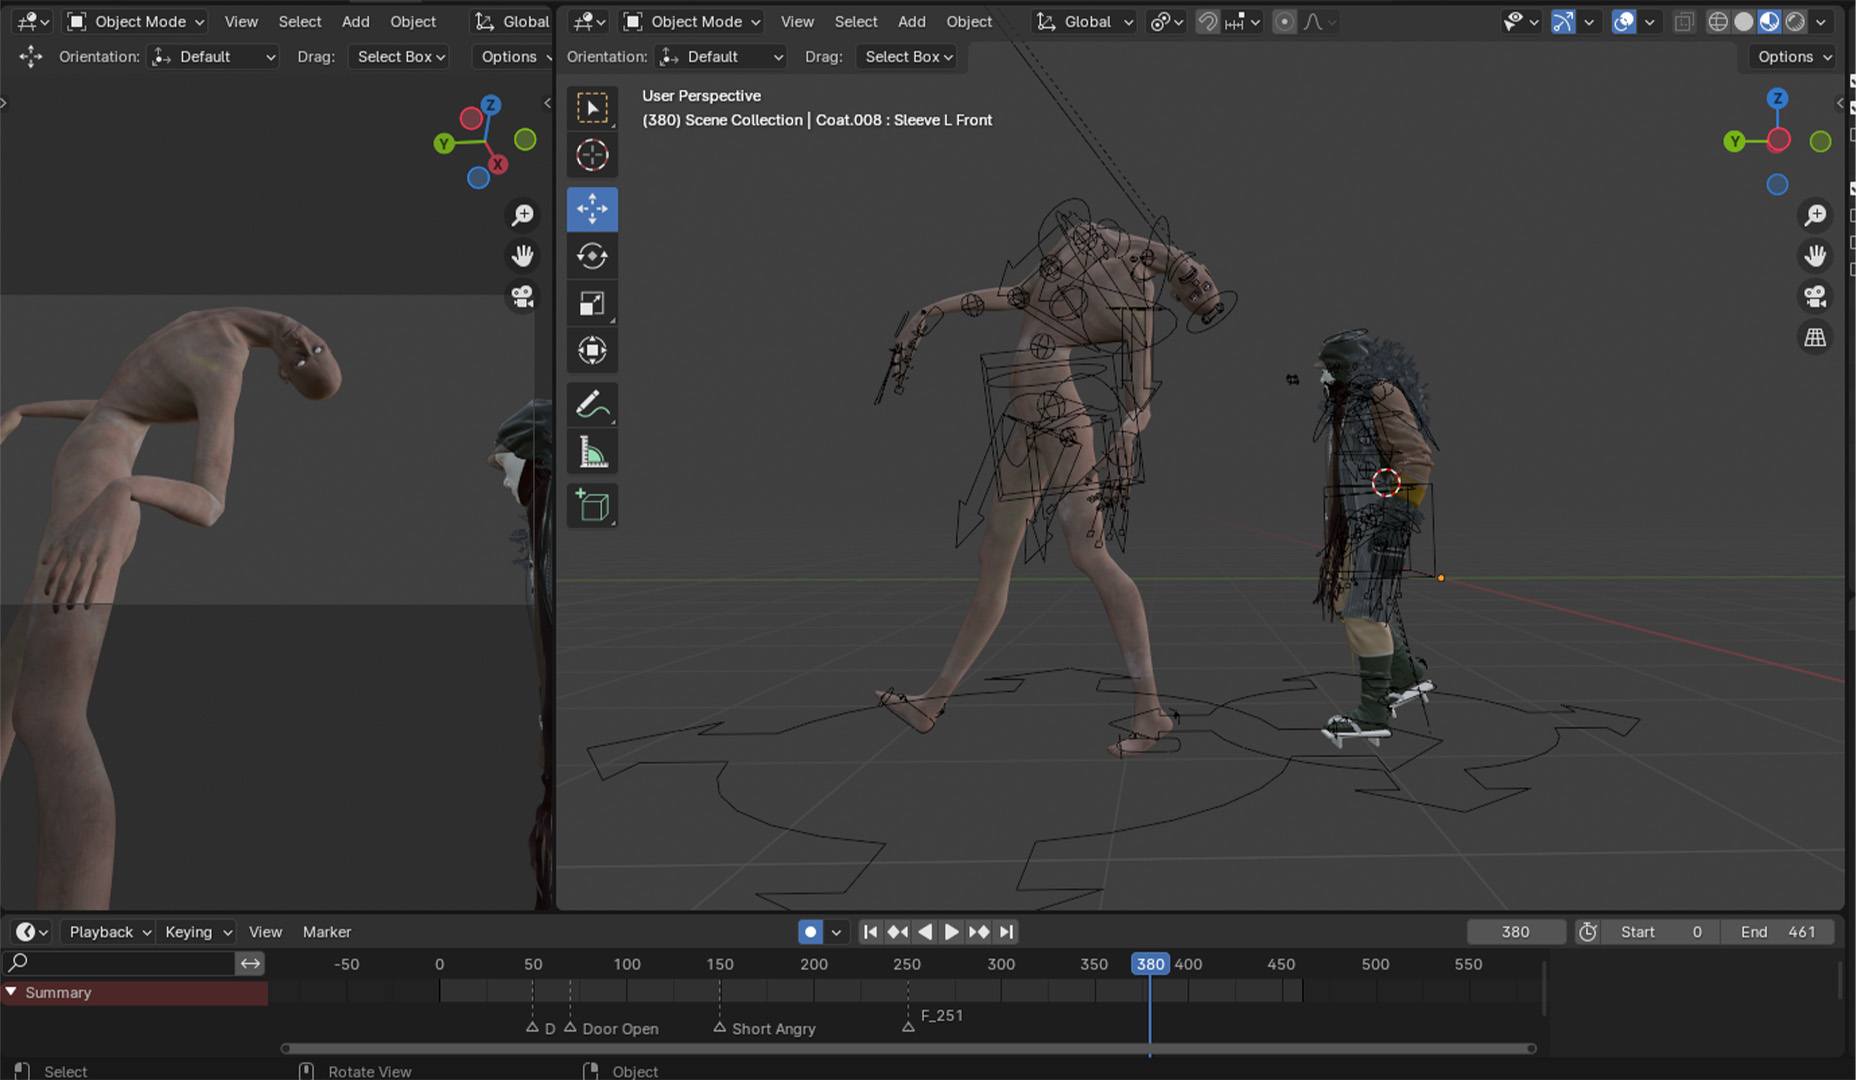
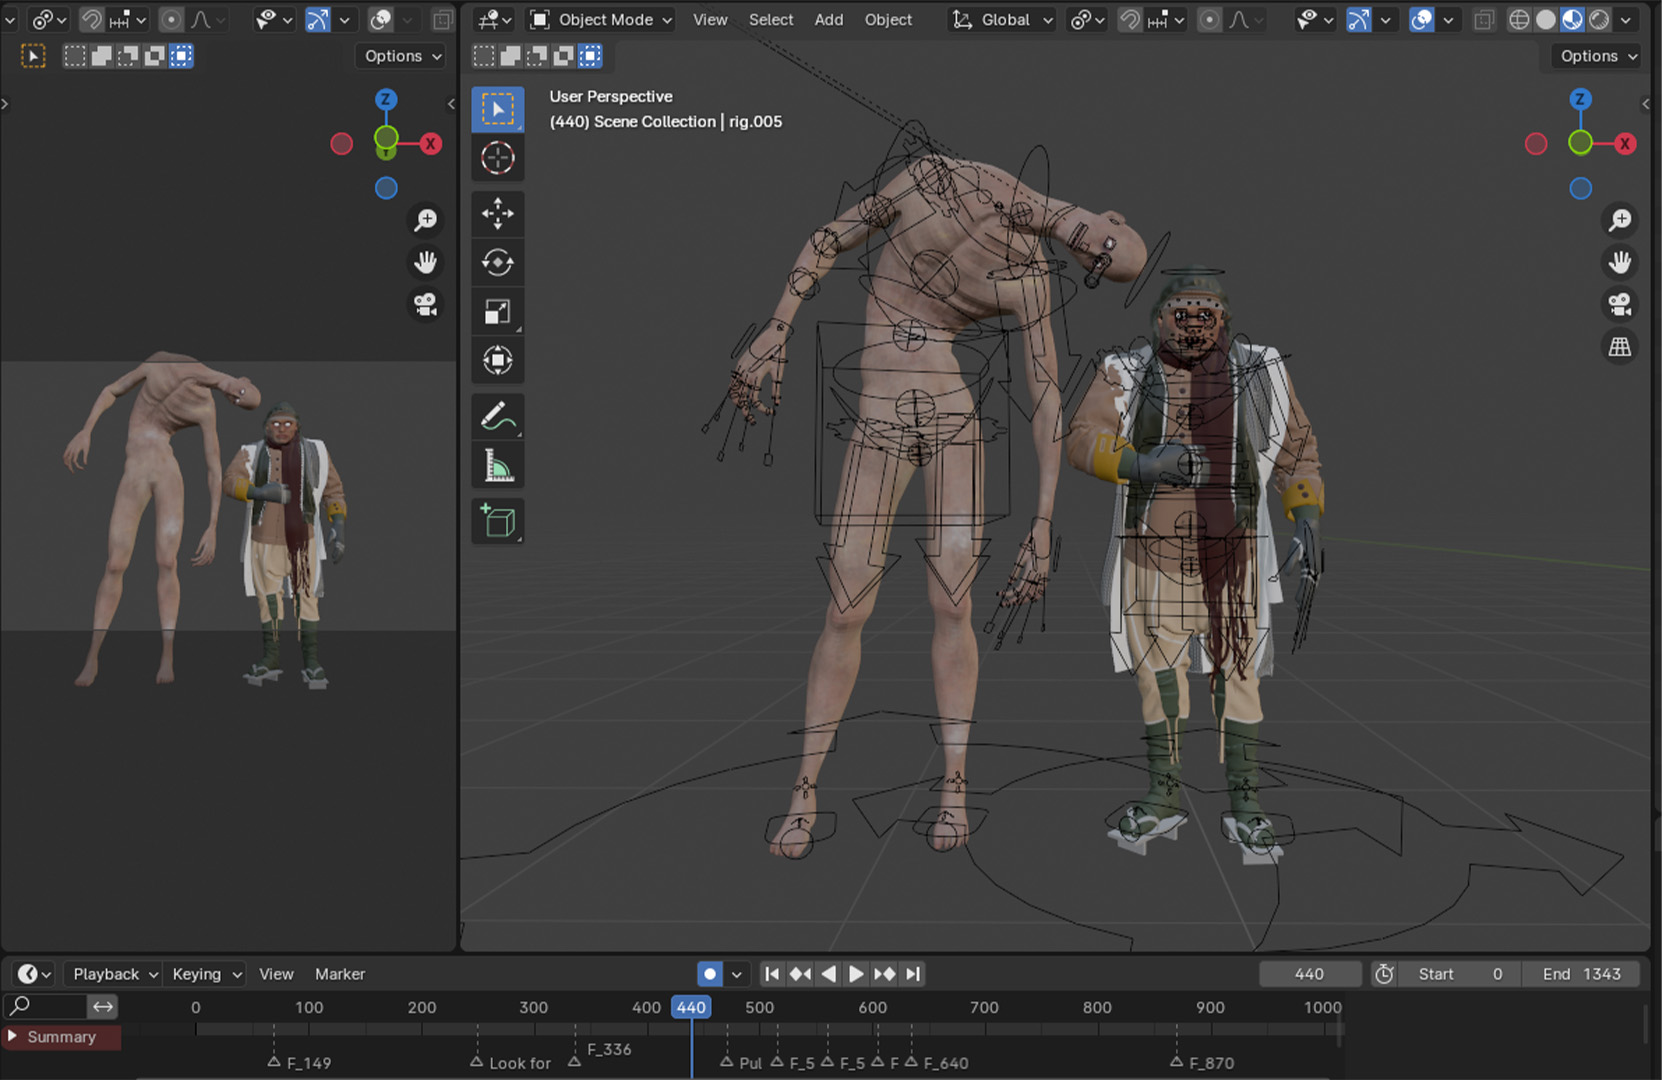
Rigging and Animation in Blender
The rig for Sad Tall and Short Angry is a simple Rigify rig.
I rigged the body without the clothes first, to have a base for the cloth simulation. Later, I also attached the clothes to the rig by transferring the weight data. This allowed me to quickly animate the demons for the opening shots of the film, in which they’d be barely visible and small mistakes wouldn’t matter as much.

The Bedroom Scenes were animated by hand too. Most of Sad Tall’s clothing was simulated, whereas Short Angry’s costume was a combination of simulated cloth and weight-painted mesh.
We used quick viewport renders in Blender to tweak the character’s timing and movement.
Posed, lit and rendered, we could now make Sad Tall and Short Angry look like this:


Simulating the Cloth for the Final Render
Final character animations were exported as .abc files and imported into Style3D Atelier. The cloth was simulated a couple of times, after which we picked the best one.


To keep file sizes and render times manageable, I assigned fabric closest to the camera lens a higher pixel density.

Conclusion
Considering the sprint we took to make this film a reality, we are very happy with the achieved results. But even after finishing the Apple Rot short film, we will not stop developing Sad Tall, Short Angry, and even Eve.
We’ve made leaps of progress as a team, and we’re excited to apply our experiences to the next project; Syntactic Labyrinths. An even more complicated 3D animated short.
Apple Rot was the perfect project for us to test our capabilities and pipelines. We now know what we’re missing to complete Syntactic Labyrinths, which makes Apple Rot a successful undertaking to us.
We released a full Case Study on the short film production of Apple Rot. It is likely the most complete documentation ever, on the production of a 3D animated horror short film.
And if you hadn’t already: experience Apple Rot right here, in full resolution on blauwfilms.com.


Reading List
References


%20by%20Ivan%20Aivazovsky.jpg)


0 Comments